1. CISS NexUs Registration
User manual
Download the complete PDF manual to consult it offline.
From your web browser on your computer, tablet, or mobile (preferably in an incognito window) go to https://nexus.ciss-bienestar.org/ and provide an email address:
- If you belong to a CISS member Institution, in the social security, research, or academic field, register with the email provided by your institution (e.g., firstname.lastname@institution.org) and check if you have any benefits in our academic or research offerings.
- If you do not belong to any institution, register with your personal email.
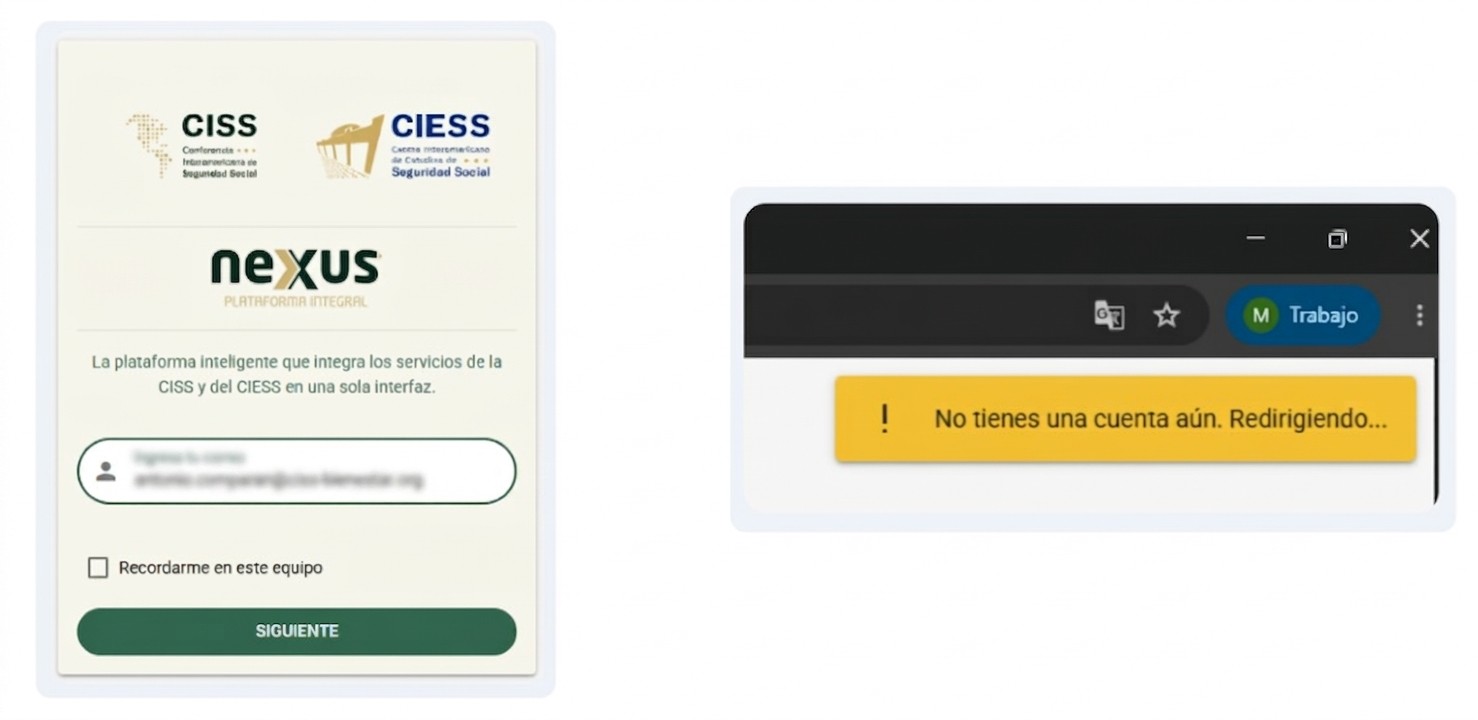
- CISS NexUs will identify if your email is already registered and will automatically redirect you to the next step to complete your registration.
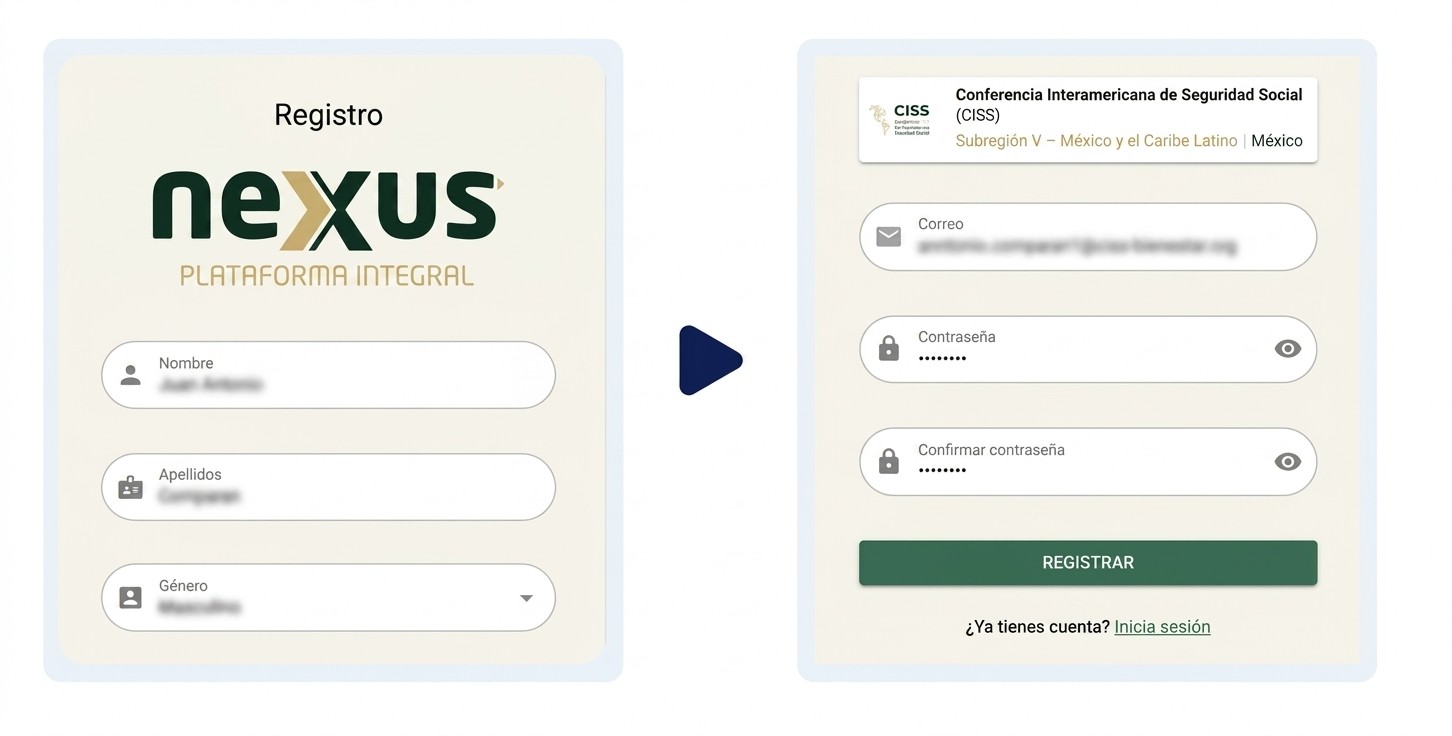
- It is very important that you correctly type your first and last names without abbreviations, select your gender, and the platform will automatically identify if you belong to a CISS member Institution.
- Create your password (minimum 6 characters) and confirm it again. Press [NEXT].
You will receive a confirmation email from no-reply@ciss-bienestar.org to the email address you used for registration in step 1:
- You must access it and press the button: [Verify my email].
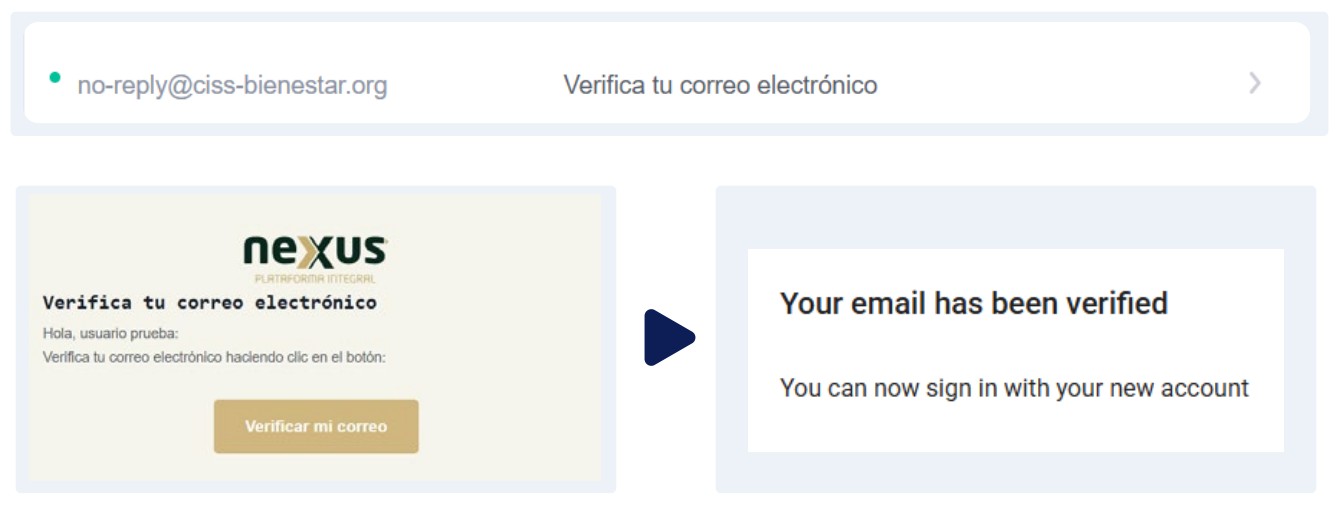
- If you cannot find this email in your inbox, check your spam or junk mail folder.
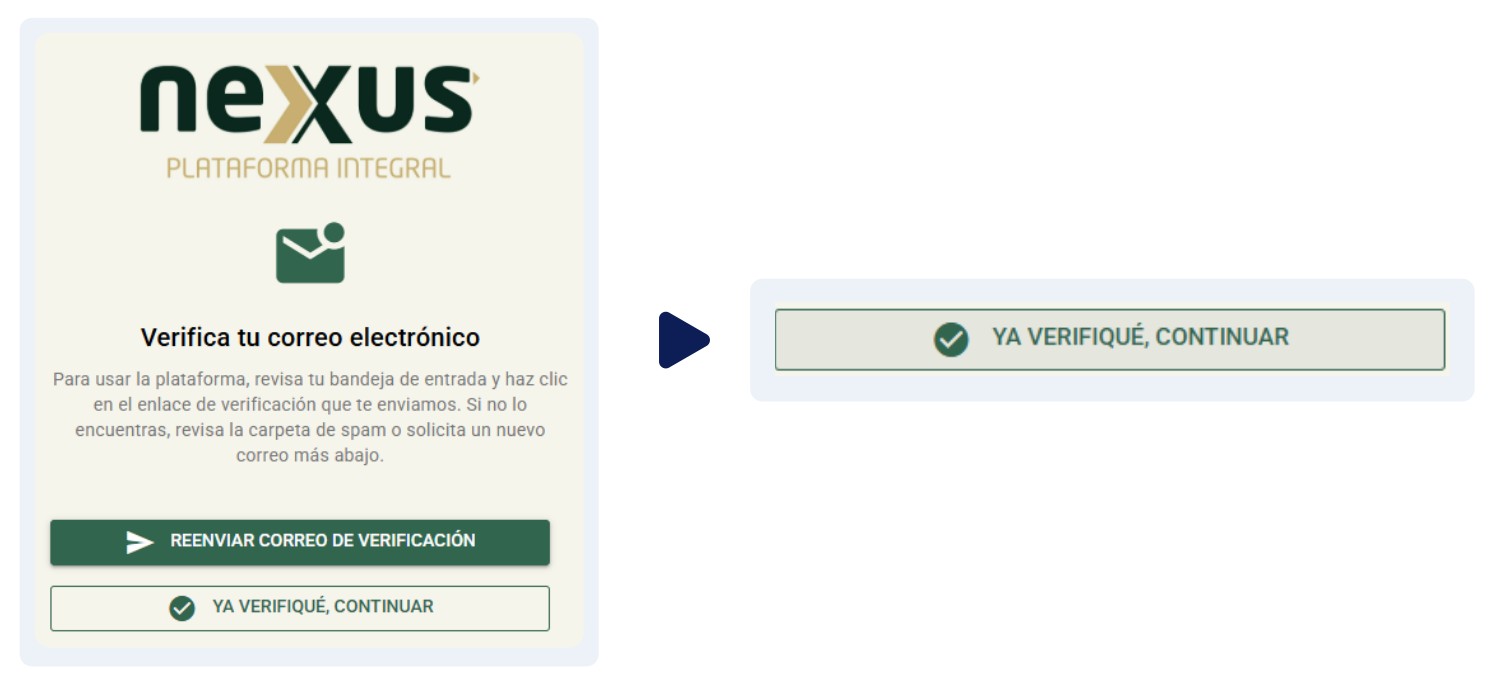
- Once your email is verified, on the registration screen press the button: [I ALREADY VERIFIED, CONTINUE].
Done, you have completed your registration, you will be automatically redirected to CISS NexUs and will be able to access the available benefits:
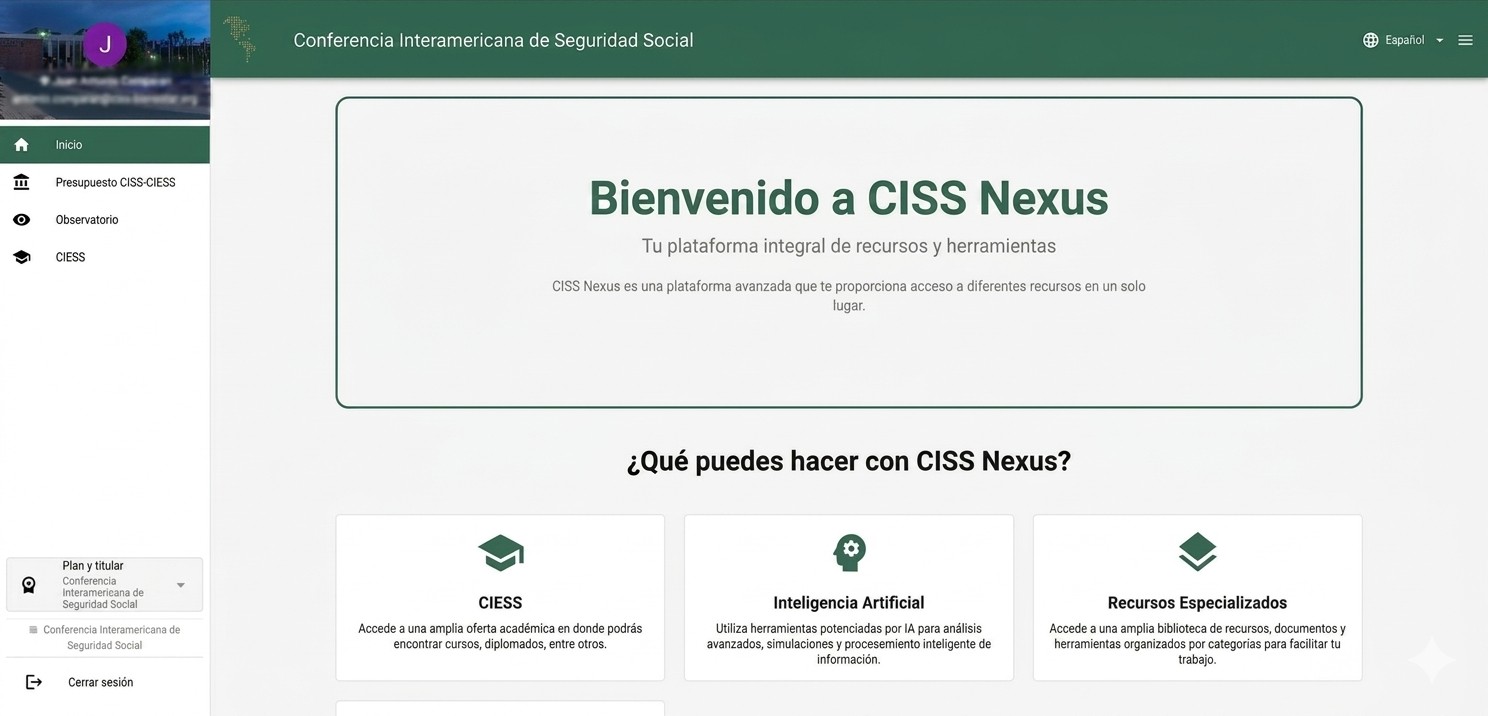
- Click on the left menu where it says: CIESS, to access the available Academic Offer Program.
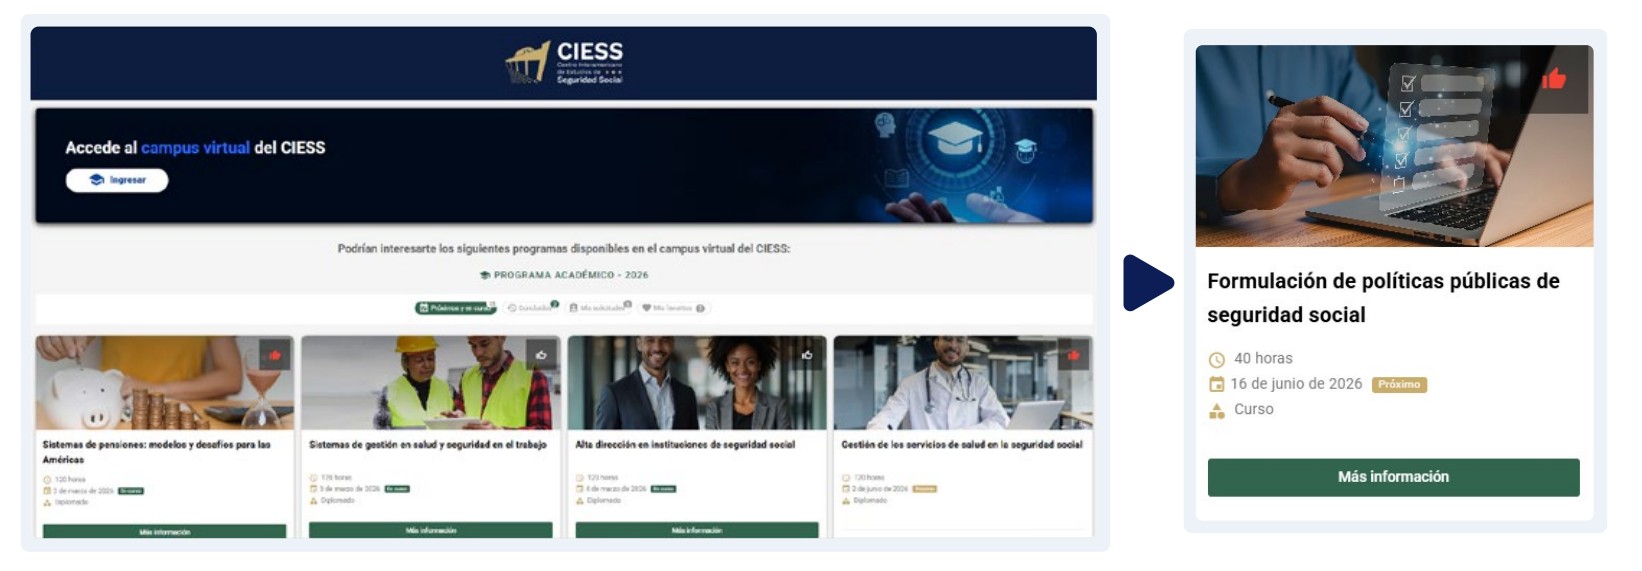
- To register for any of the available academic activities, click on the button: [More information] that appears on the activity of your choice.
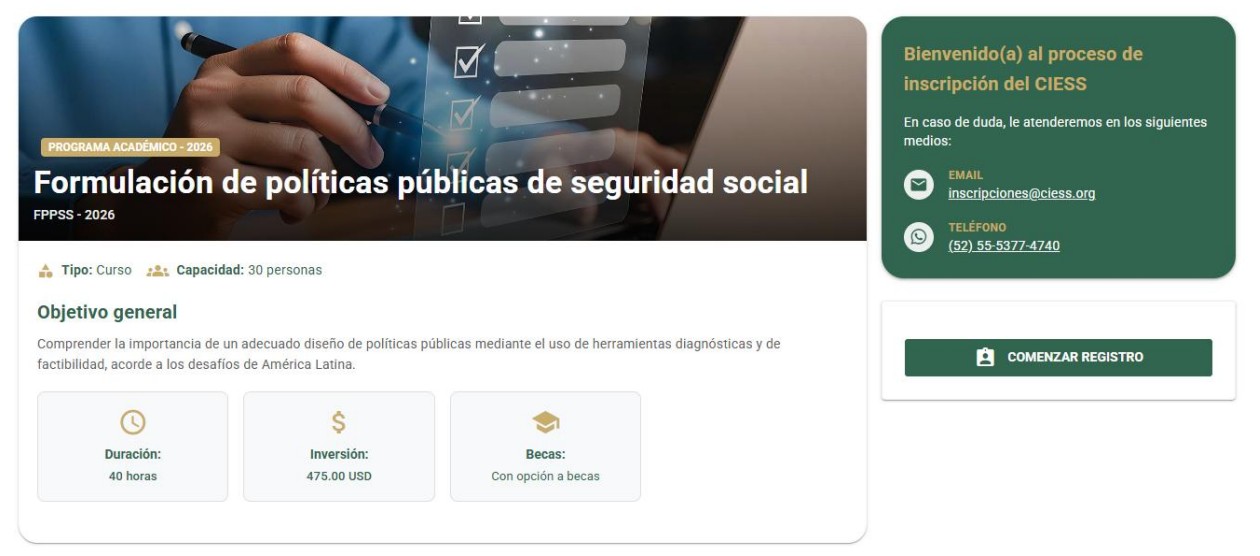
- On the activity page, press the button: [START REGISTRATION].
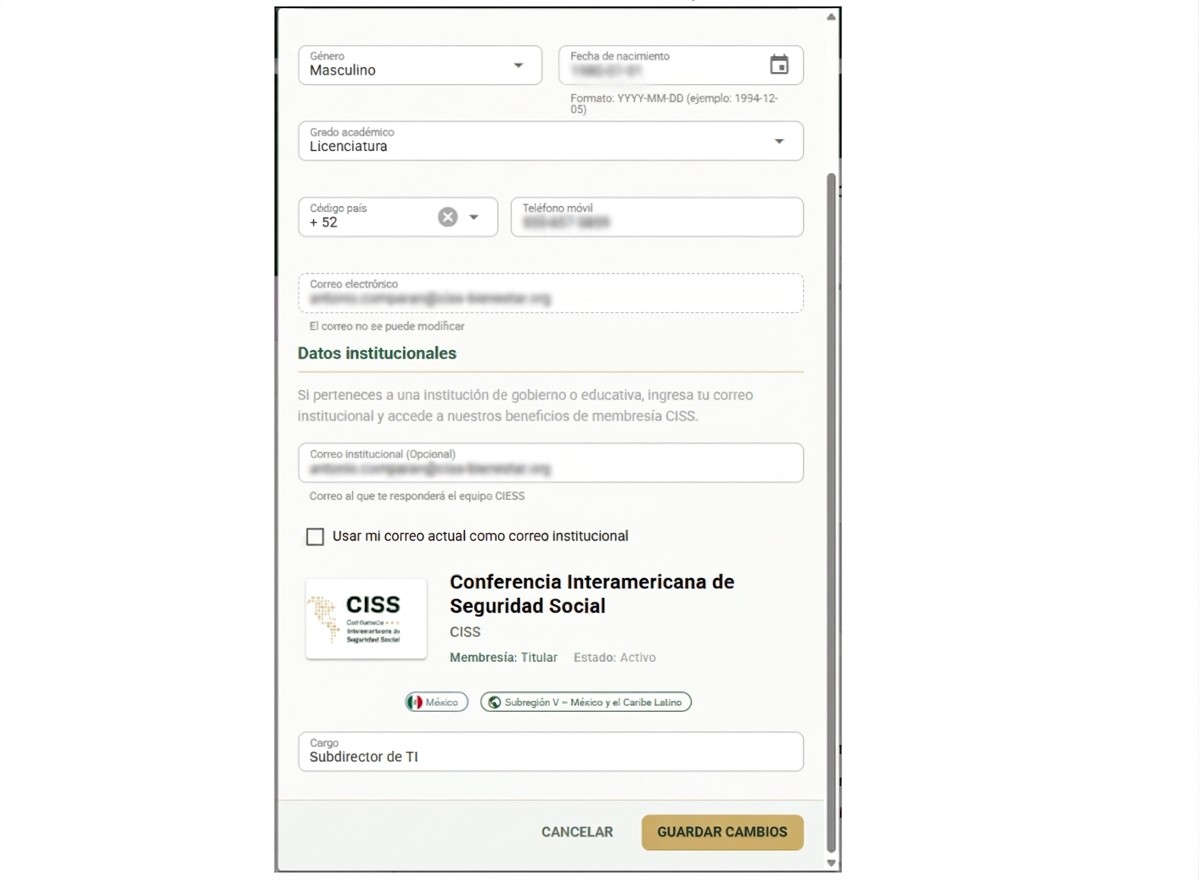
- If this is your first time registering for our Academic Offer, you must complete your profile data; this will help us learn more about your academic preferences and provide better service.
- You will be able to confirm your institutional email and access benefits of our academic offer such as scholarships and discounts.
- Press the button: [CONFIRM AND SUBMIT REQUEST].
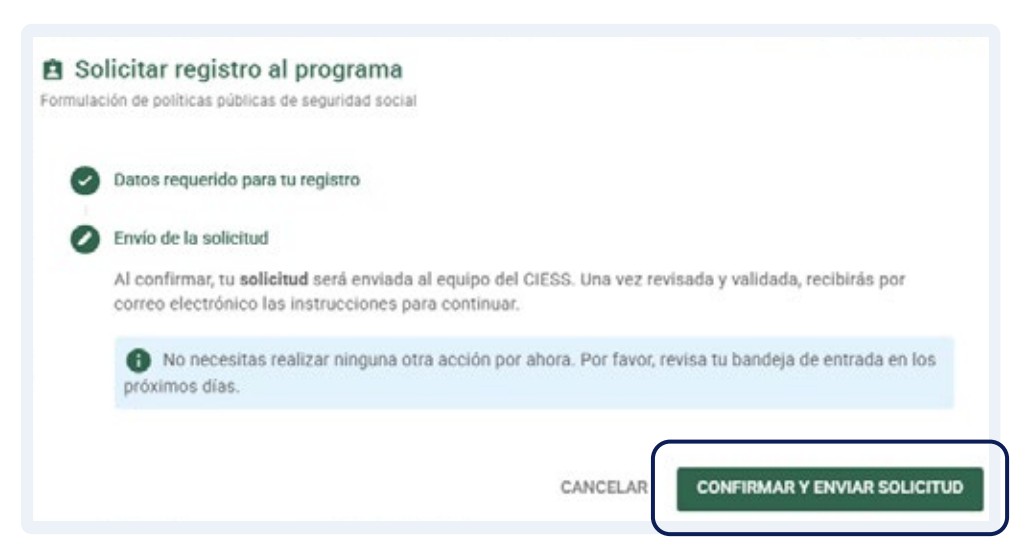
- With your profile complete, you can register for any of the CIESS academic program courses.
- To register for another academic activity, simply follow the same steps and follow the enrollment process instructions.
- You will receive email notifications and must attend to them from CISS NexUs until your registration is complete.
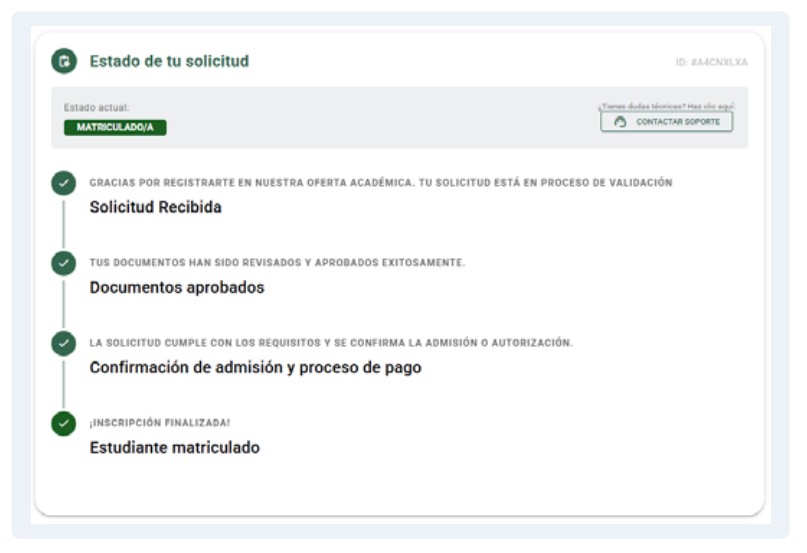
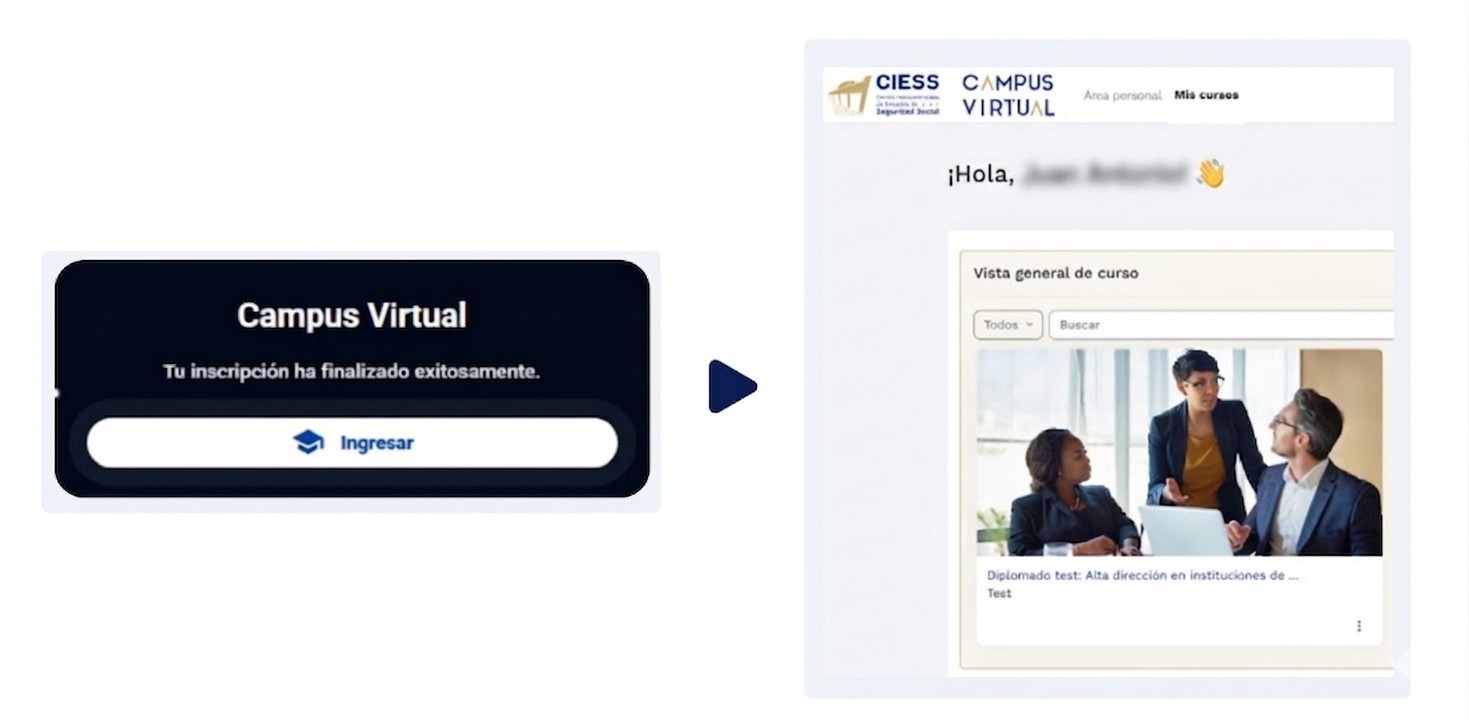
- Once you have completed the enrollment process, you will be automatically enrolled and will have access to the Virtual Campus by clicking the button: [Enter].
If you are already registered in the NexUs application:
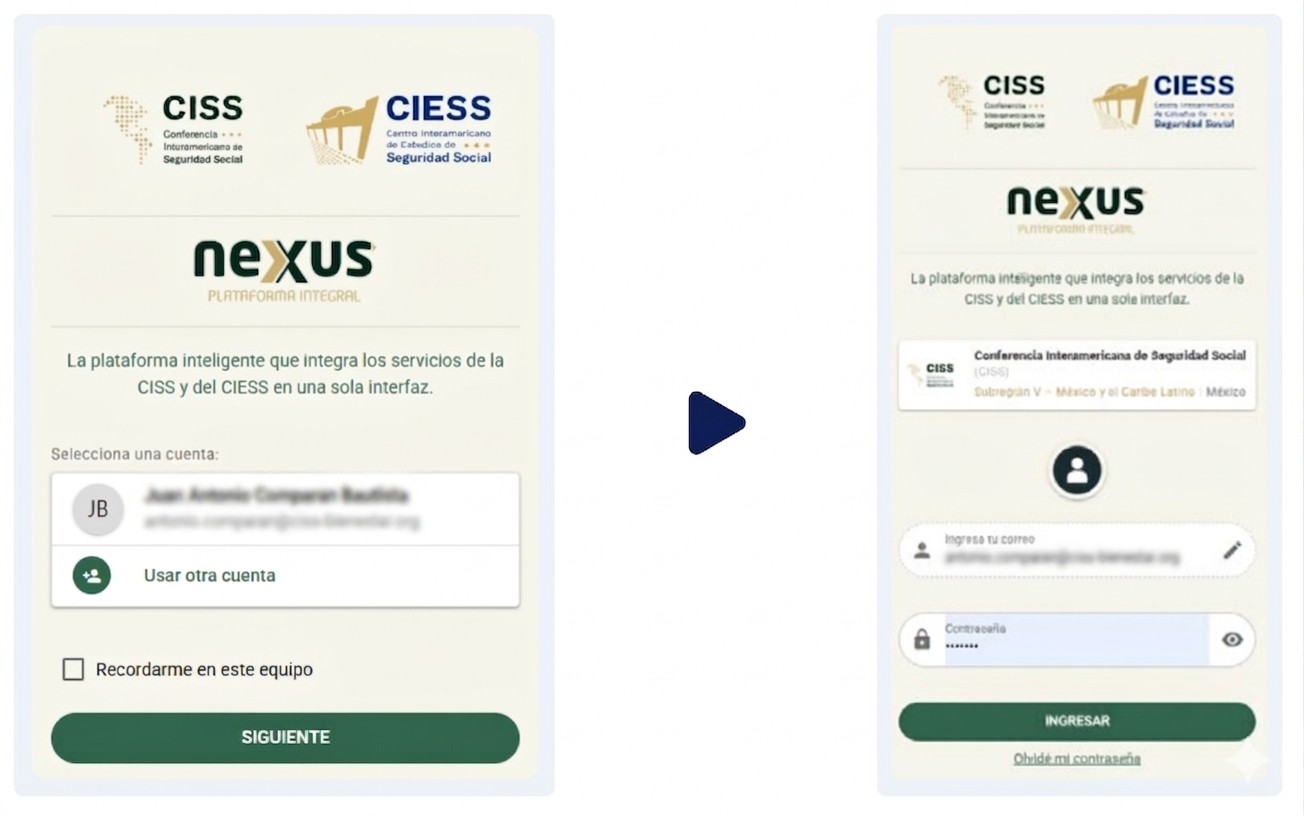
- From your web browser on your computer, tablet, or mobile (preferably in an incognito window) go to https://nexus.ciss-bienestar.org/ and provide the email address and password you used to register.
- If you selected the [x] Remember me on this device option, your data will be saved so your future logins are easier. In that case, you just need to select the account you want to log in with and that's it, you will be automatically redirected to the CISS NexUs application.
If you forgot your password, you can easily recover it:
- Enter the email address you used to register in the NexUs application and click the button: [NEXT].
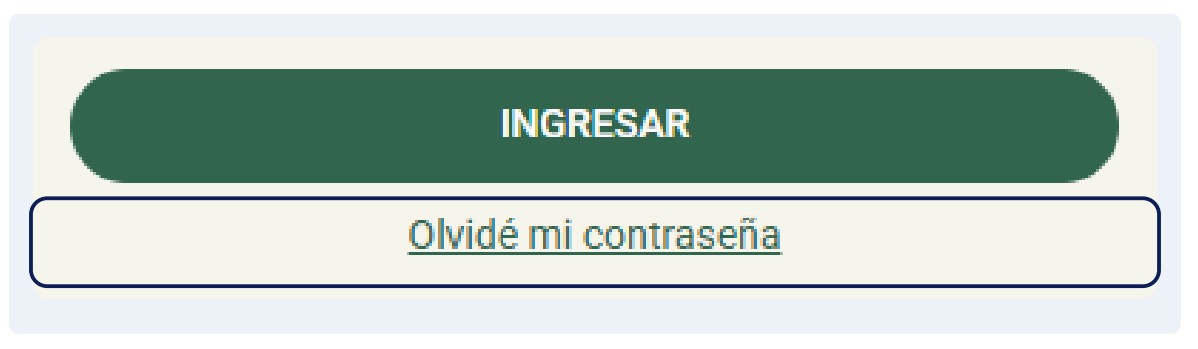
- Select the I forgot my password option and follow the steps from your email.
Navigation Manual
Before starting with the detailed steps, we recommend exploring this interactive resource to get a quick overview of the platform.
2. Main Interface and Navigation
Upon entering, you will see the My courses screen. Here you will find the list of all the academic activities you are enrolled in.
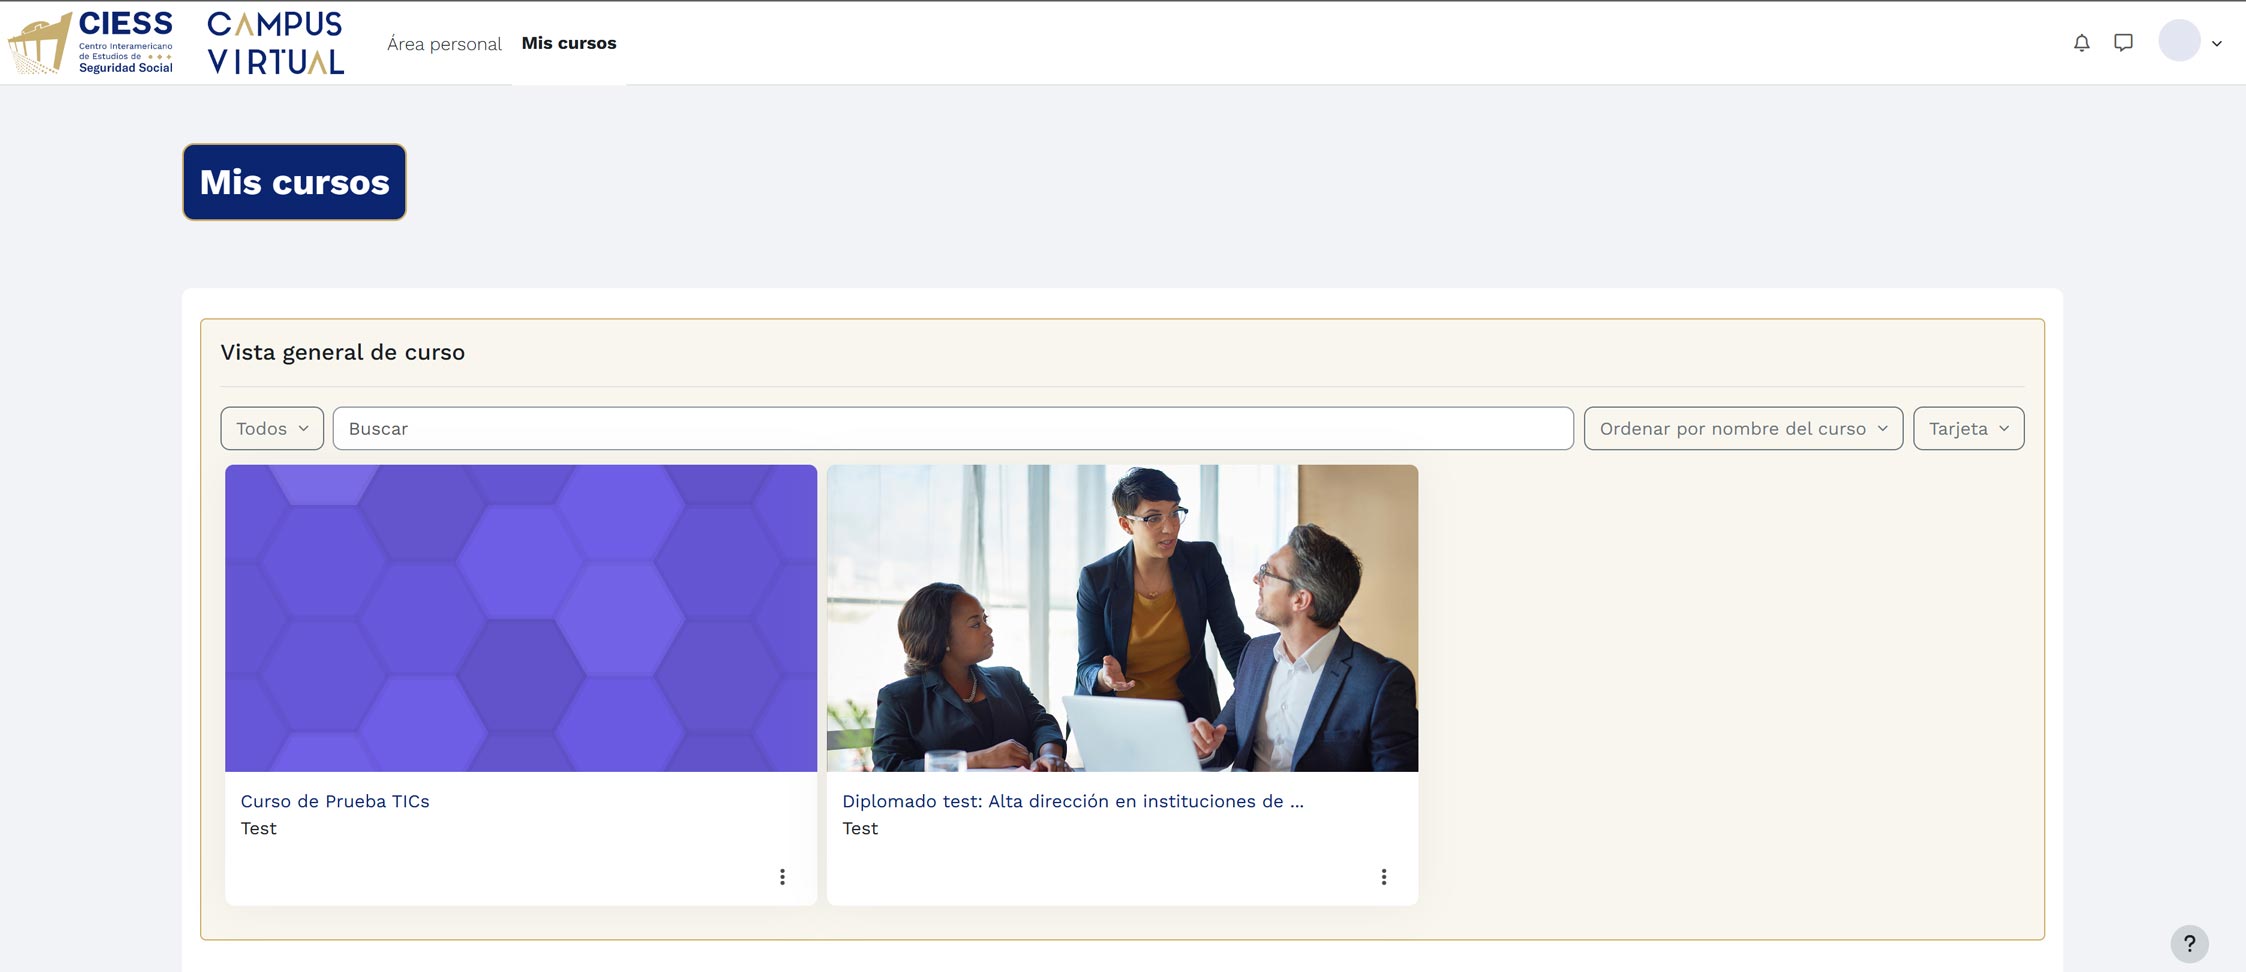
On this screen you will see the list of assigned activities in card format:
- Filtering: Use the tabs to see "In progress", "Future", or "Past" activities.
- Access: Click on the activity name or image to enter the virtual classroom.
- Order: You can sort your activities by name or by last access date.
At the top you will find the Navigation Bar:
- Personal area: To access your personal control panel.
- My courses: Direct access to the list of activities you participate in.
To access your personal control panel, click on the "Personal area" option located in the top navigation bar.
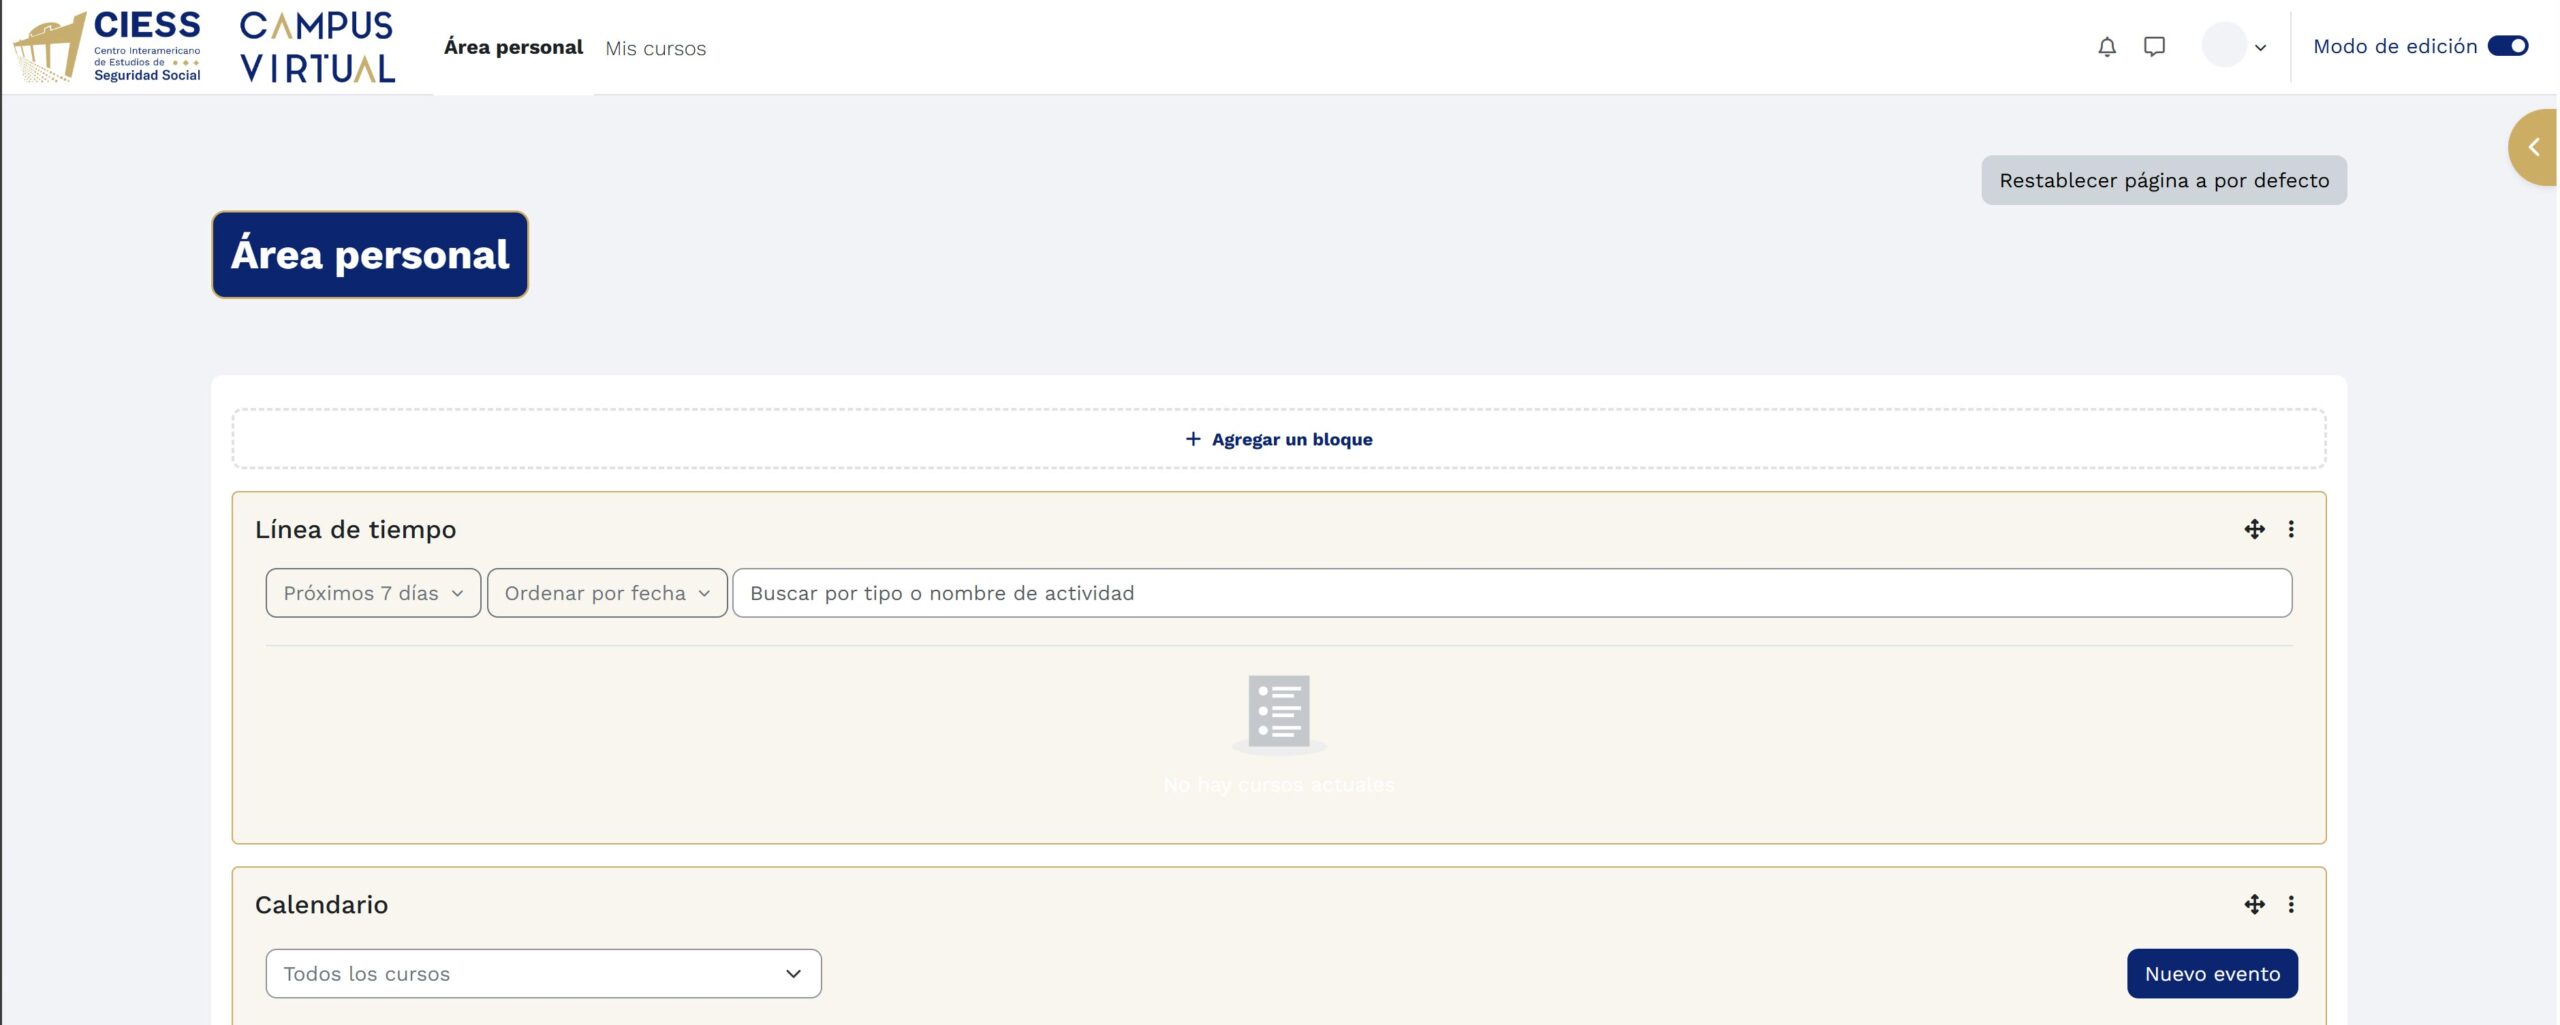
In the Personal Area you will find two key tools for your organization:
- Timeline: Shows upcoming due activities (next 7 days). You can sort them by date or search by name.
- Calendar: View important events and a button to create a "New event" for yourself.
3. User Profile Configuration
Access your user menu by clicking on the dropdown arrow next to your name (top right corner). Here you will find shortcuts to:
Profile, Grades, Calendar, Preferences, and Log out.
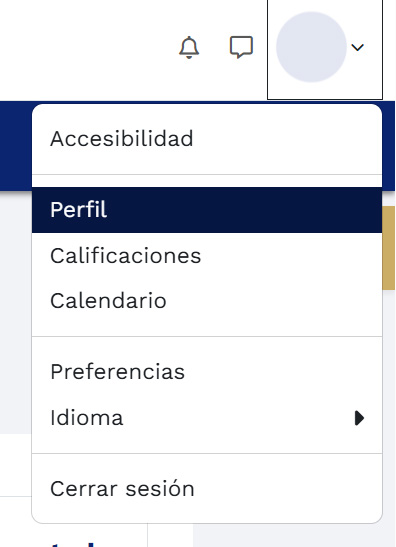
Select "Profile" and then click on the "Edit profile" link or button. The Academic Tracking form will open where you will see the main fields of your account ready to be modified.
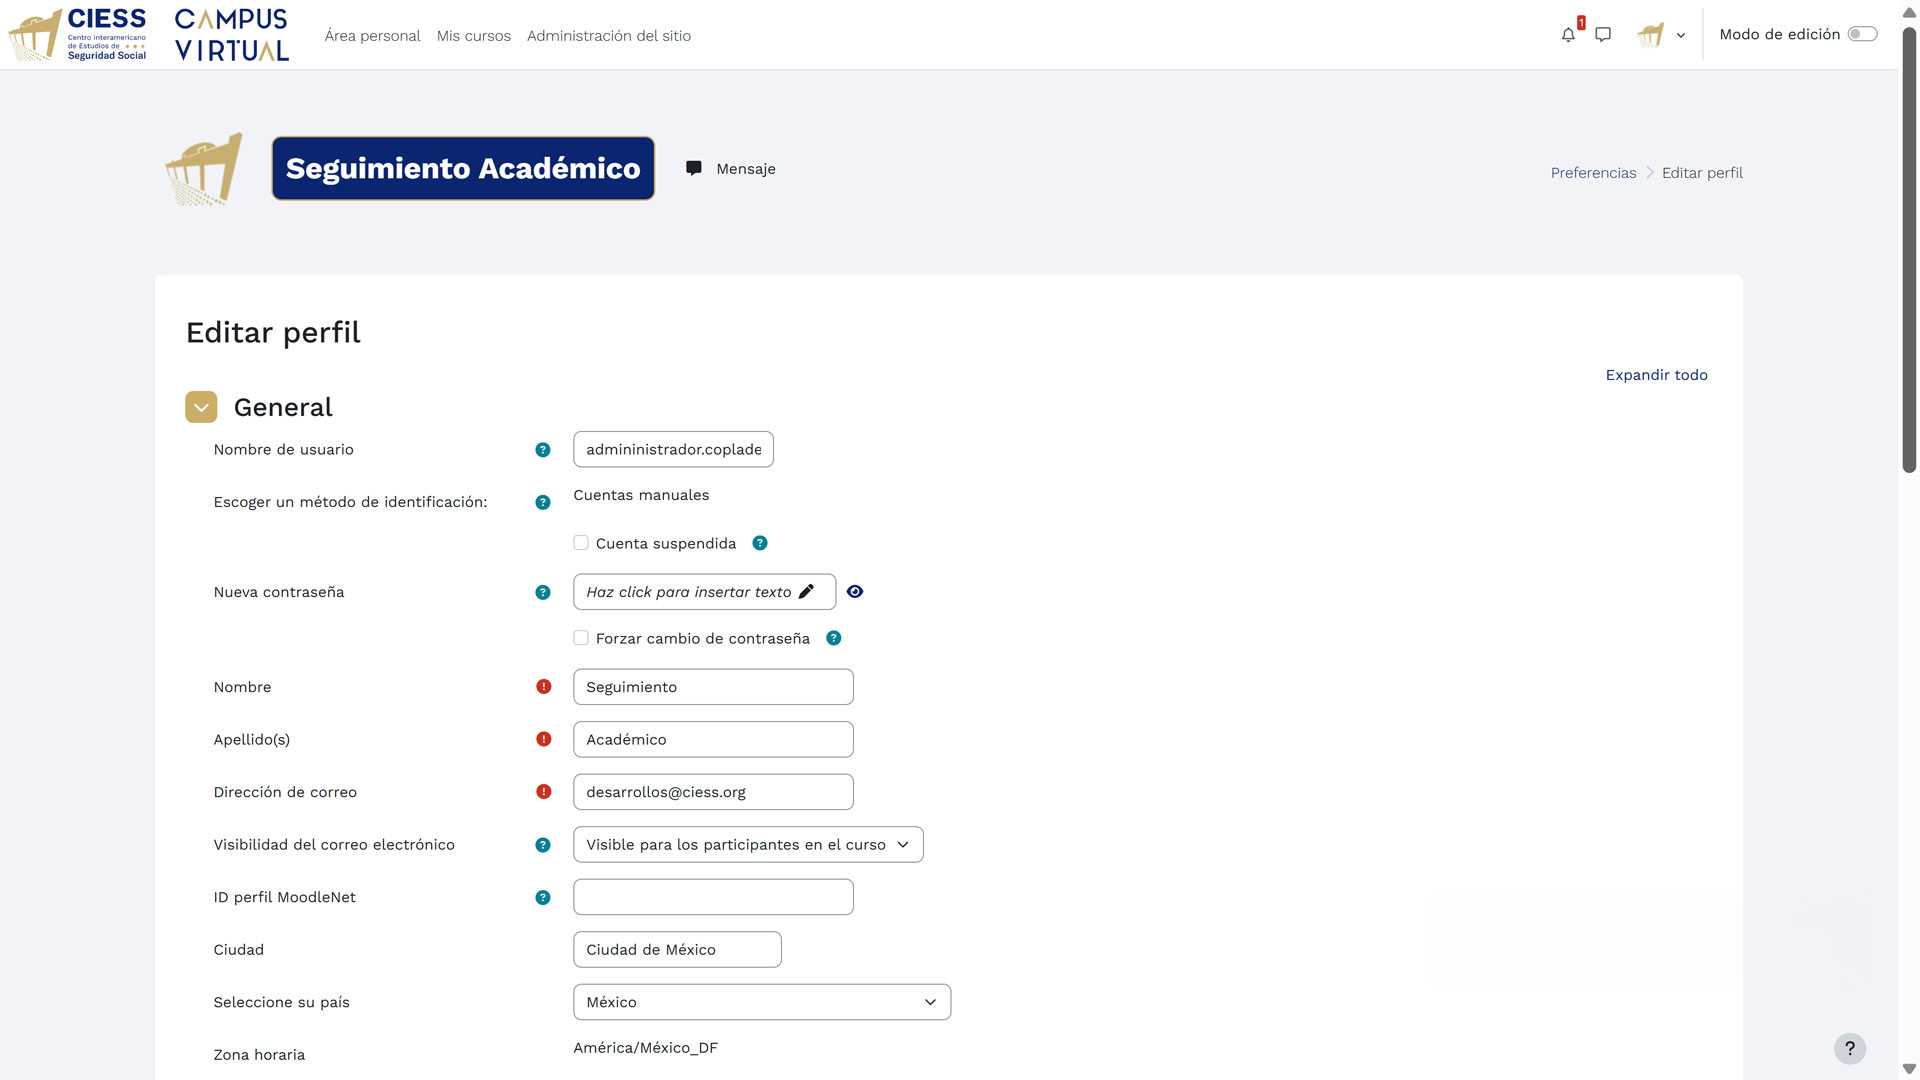
Important: Keeping your profile updated ensures better communication with your tutors and facilitates collaborative work.
Within the edit form (top part), configure the following options:
- Username / New password: You can change your access credentials if necessary.
- First name(s) / Last name(s): Verify that they are spelled correctly.
- Email address: Make sure it is an active account where you receive notifications.
- City / Country: Select your current location.
- Time zone: Very important. Select the time zone of your actual location so that due dates are correctly displayed in your local time.
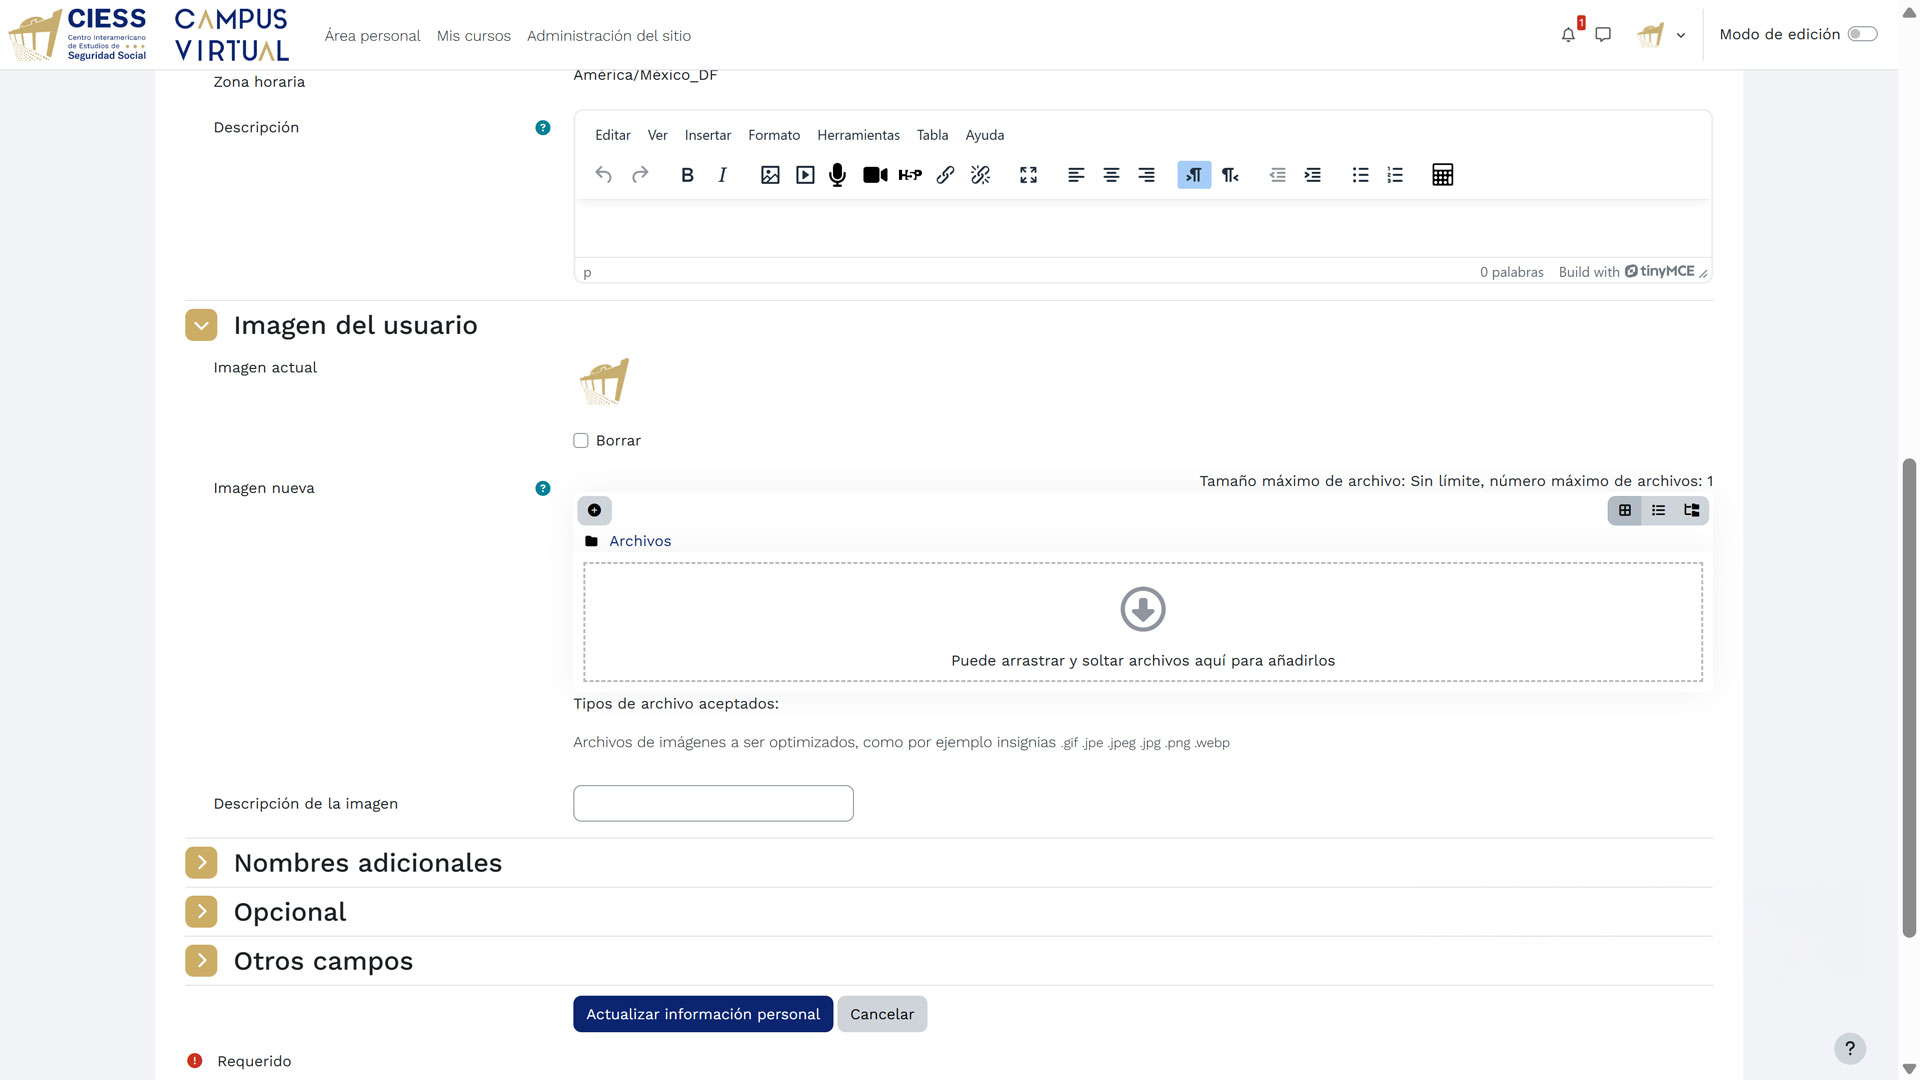
Scroll down the form to access the User picture section and additional fields. Here you can:
- Manage your photo: View your Current image. To change it, use the New image area by dragging a file or selecting it from your device.
- Additional names: Complete this optional field if you have a middle name or prefer to be called differently.
- Other fields: Fill in any relevant optional information requested in the form.
Privacy: Remember that you can configure who sees your email or your profile in the "Preferences" options within the user menu, if the platform allows it.
Finally, scroll to the bottom of the page and click the "Update personal information" button to save all the changes made.
4. Academic Activity Structure
This section describes step by step the structure you will find when entering any CIESS academic activity. Although the screenshots are based on the Diploma "Pension system: models and challenges for the Americas", the organization and operation are the same for the entire CIESS academic offer.
Virtual classroom main screen
Upon entering an academic activity from "My courses", the first thing you will see is the virtual classroom main screen. This screen is divided into three fundamental areas that will allow you to navigate and access all the content of your activity:
- Top bar: Shows the Virtual Campus logo, links to "Personal area" and "My courses", notification icons (bell with red badge indicating pending items), messaging, and your user menu.
- Course navigation bar: Below the header, a dark blue strip with access to "Course", "Settings", "Participants", "Grades", "Activities", and "More".
- Left side panel: Contains the navigation tree with all the sections and resources of the activity organized hierarchically.
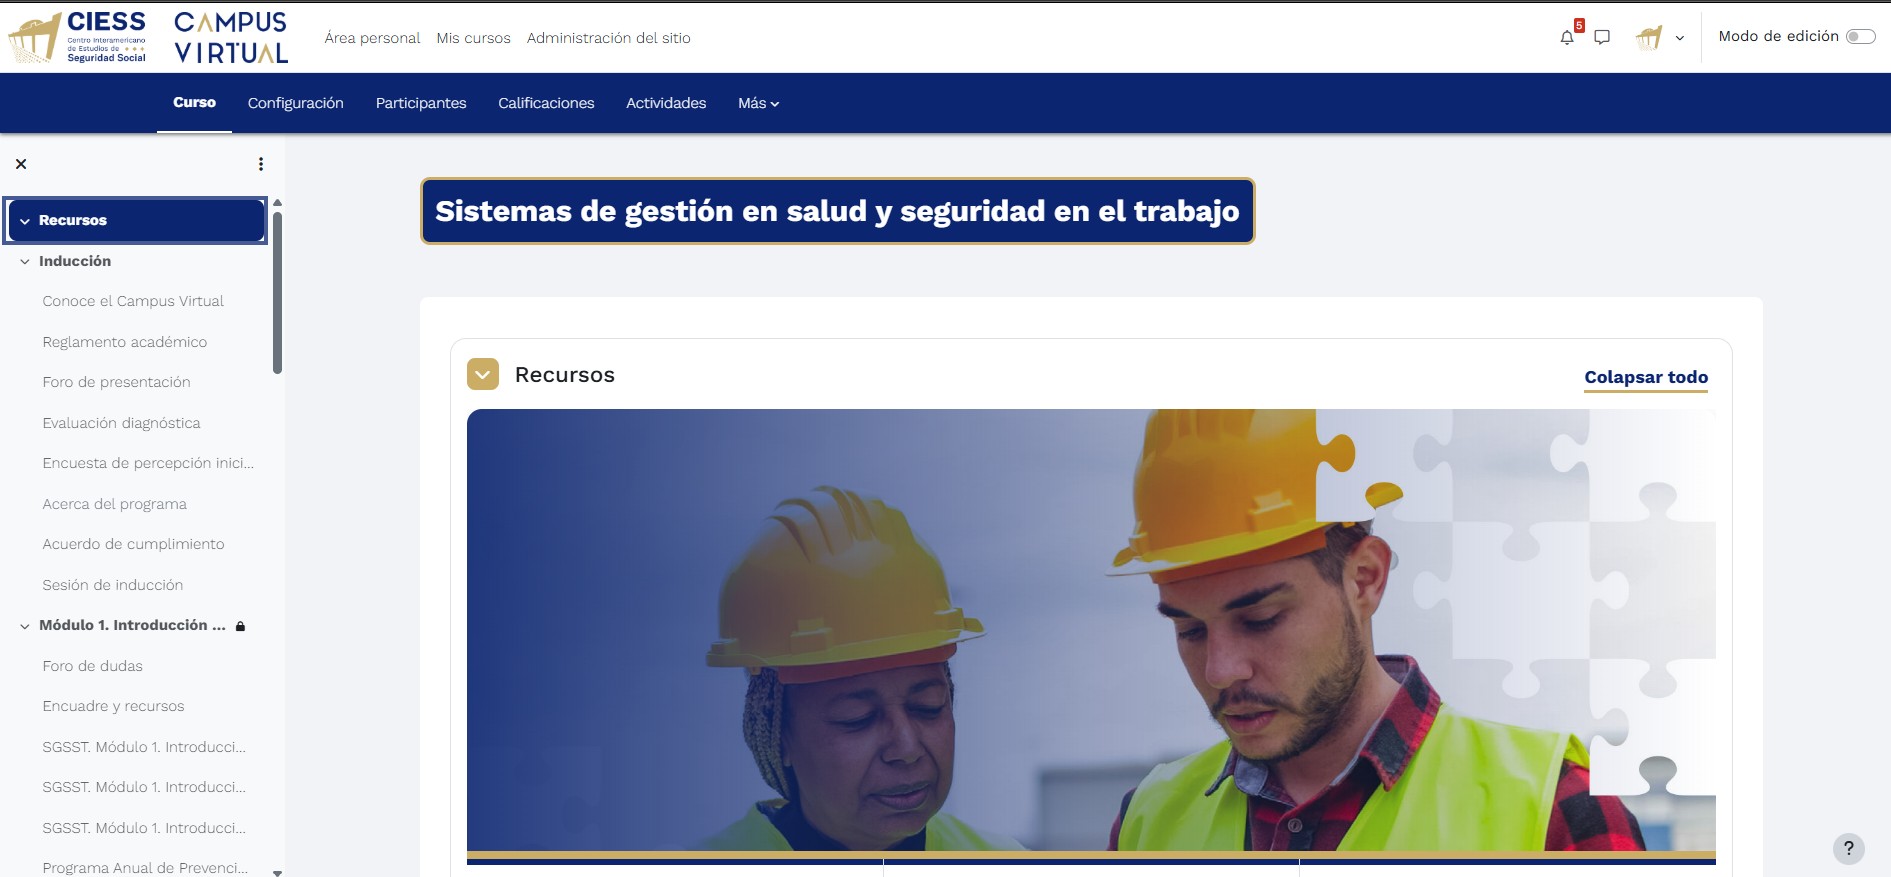
In the central area of the main screen, the diploma banner is presented with the activity name and a representative image, followed by the "Resources" section where the materials organized by topic are displayed. This is your welcome screen and starting point to access all contents.
- Diploma title: Displayed in a dark blue box with a gold border, clearly identifying the activity you are in.
- "Resources" section: Includes a yellow check icon indicating completion status and a "Collapse all" button to manage the display of subsections.
Navigation and support resources
As you scroll down the main screen, you will find the quick access modules and the "Induction" section. The quick access modules are cards with icons, descriptions, and action buttons that provide support throughout your academic activity:
- Tracking: Allows you to directly contact the academic tracking team. Shows personalized attention hours (Monday to Thursday from 08:00 to 16:00 hrs; Friday from 08:00 to 14:00 hrs) and a button with the email of your tracking coordinator.
- Library: Access to the digital repository with information sources specialized in Social Security. Press the "VIEW RESOURCES" button to explore the available catalog.
- Tutorials: Step-by-step guides to navigate the educational platform. Press the "VIEW GUIDES" button to access visual aids and user manuals.
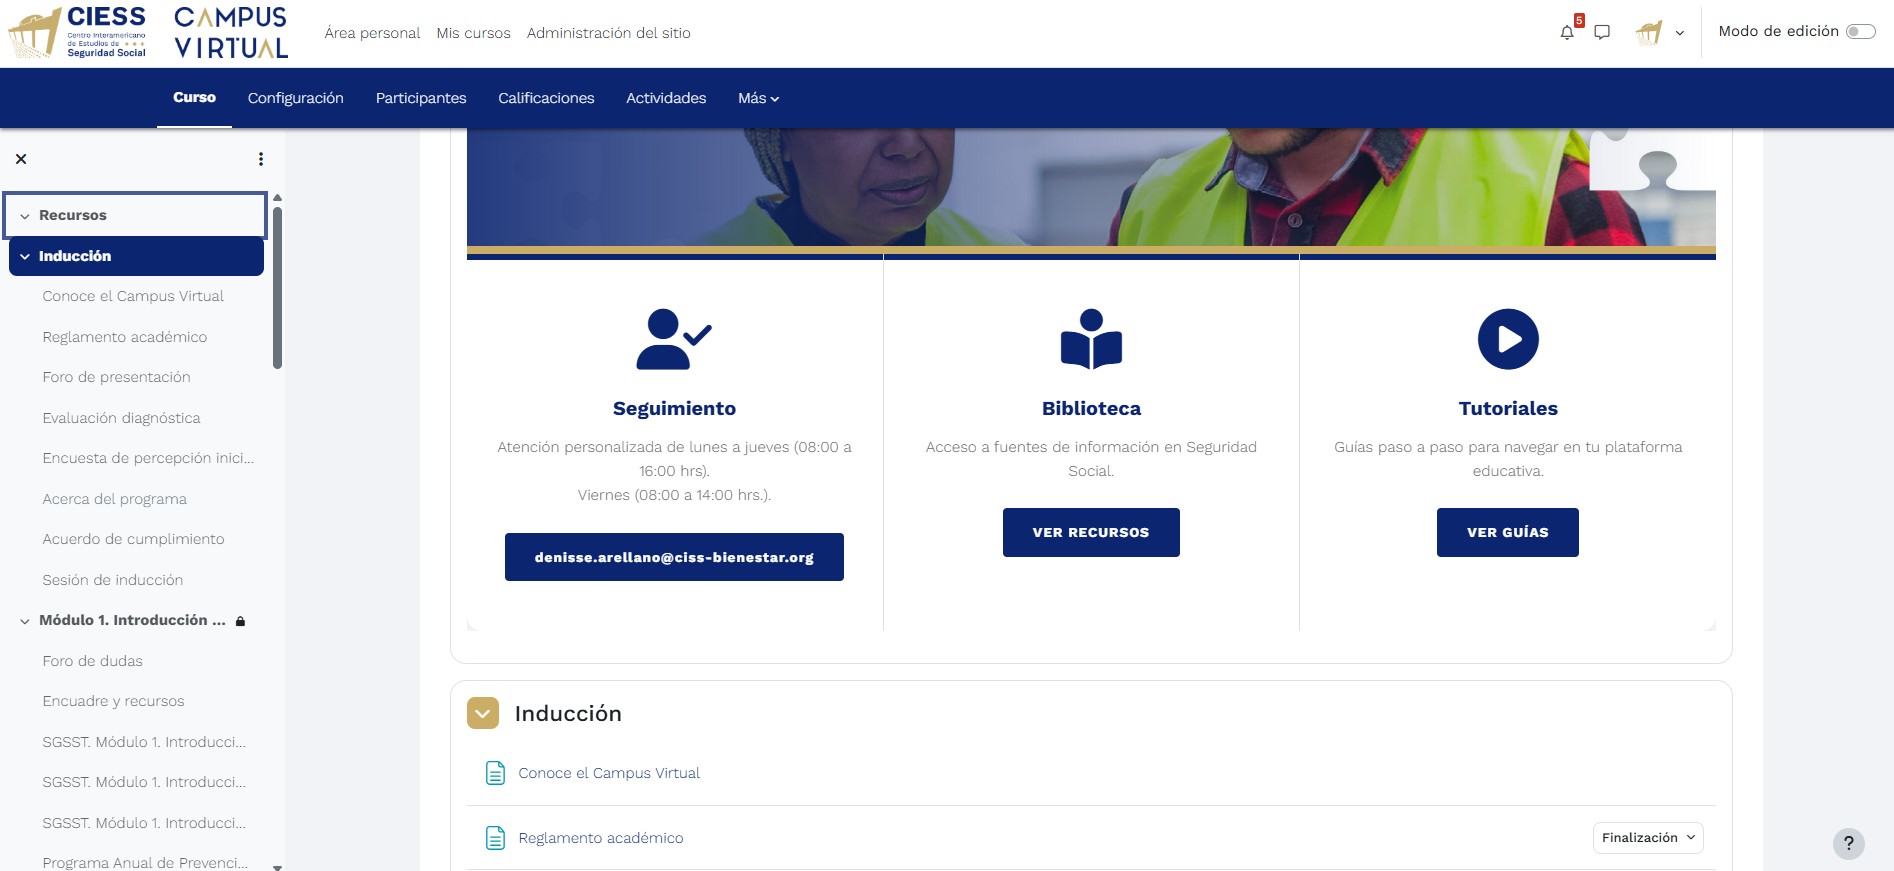
In the "Induction" section, all the initial activities you must complete before advancing to the academic modules are concentrated. Each sub-item shows its completion status and can be expanded by clicking on it. The elements you will find within Induction are:
- Explore the Virtual Campus: Interactive guide to familiarize yourself with the environment tools.
- Academic regulations: Normative document with rights, responsibilities, and institutional processes.
- Introduction forum: Space to introduce yourself to your classmates and teachers.
- Diagnostic assessment: Instrument to identify your prior knowledge level.
- Initial perception survey: Questionnaire about your expectations and experience.
- About the program: Detailed information about the academic activity.
- Compliance agreement: Formal commitment to the activity rules.
- Induction session: Informational welcome session to the program.
Navigation methods: To move through the activity contents, you have two main methods that you can combine according to your preference:
- Vertical scrolling: Scroll down the main page to see all resources and sections sequentially and continuously. It is ideal for getting a complete overview of the activity.
- Side navigation menu: Located on the left side of the screen, allows you to directly access any specific section without scrolling. Click on the dropdown arrows to expand or collapse each section. You can close this panel with the "X" icon to maximize the content area.
Locked modules: You will notice that the academic modules (Module 1, 2, etc.) may show a padlock icon. This means that access to that content is restricted until you complete the induction activities or until the scheduled date for that module opens.
Explore the Virtual Campus
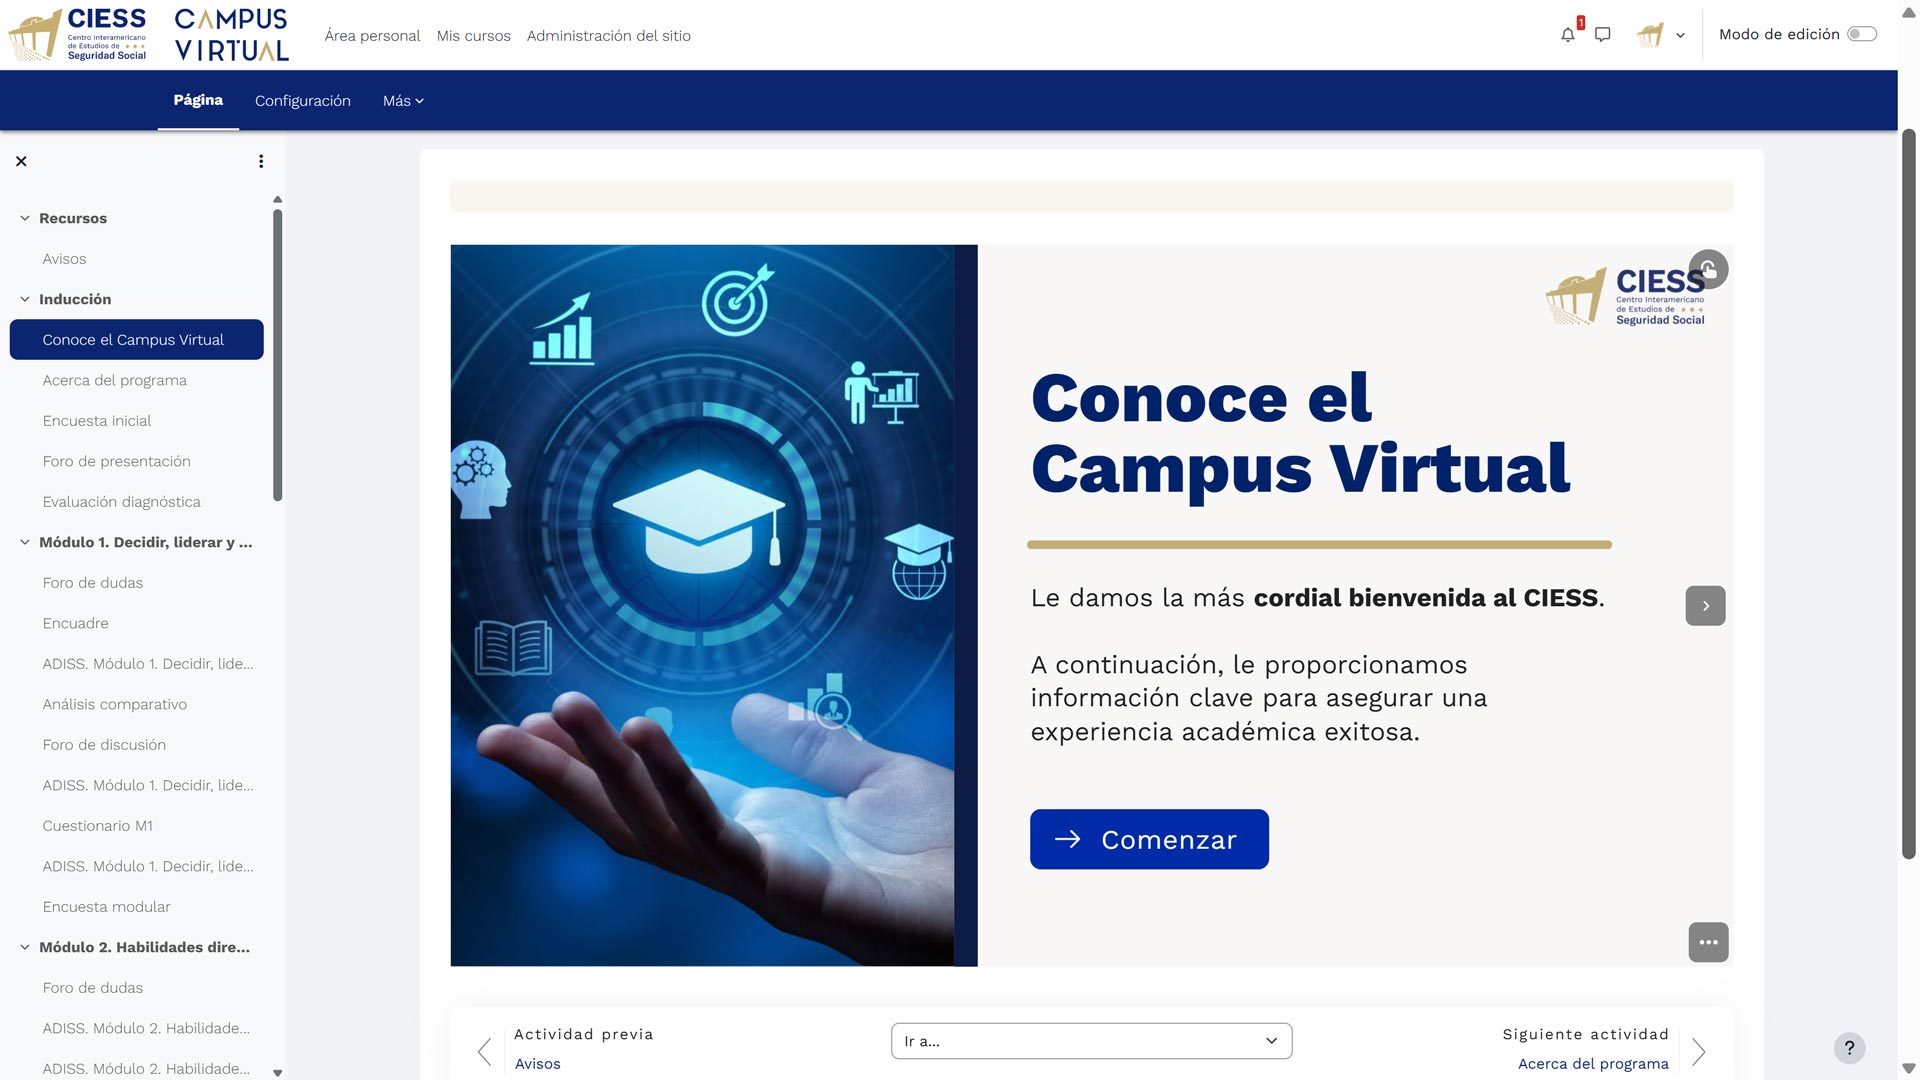
Access the "Explore the Virtual Campus" section from the side menu or by scrolling on the main page. This section offers an interactive guide designed to familiarize you with all the virtual environment tools before starting your academic activities. It is the recommended first step for new platform users.
- Click the "Start" button to begin the interactive exploration.
- You will tour the main functions: how to navigate, where to find resources, how to participate in forums, and how to submit assignments.
- Upon completion, the system will automatically mark this activity as completed.
You can view it directly at this link: View interactive presentation.
About the program
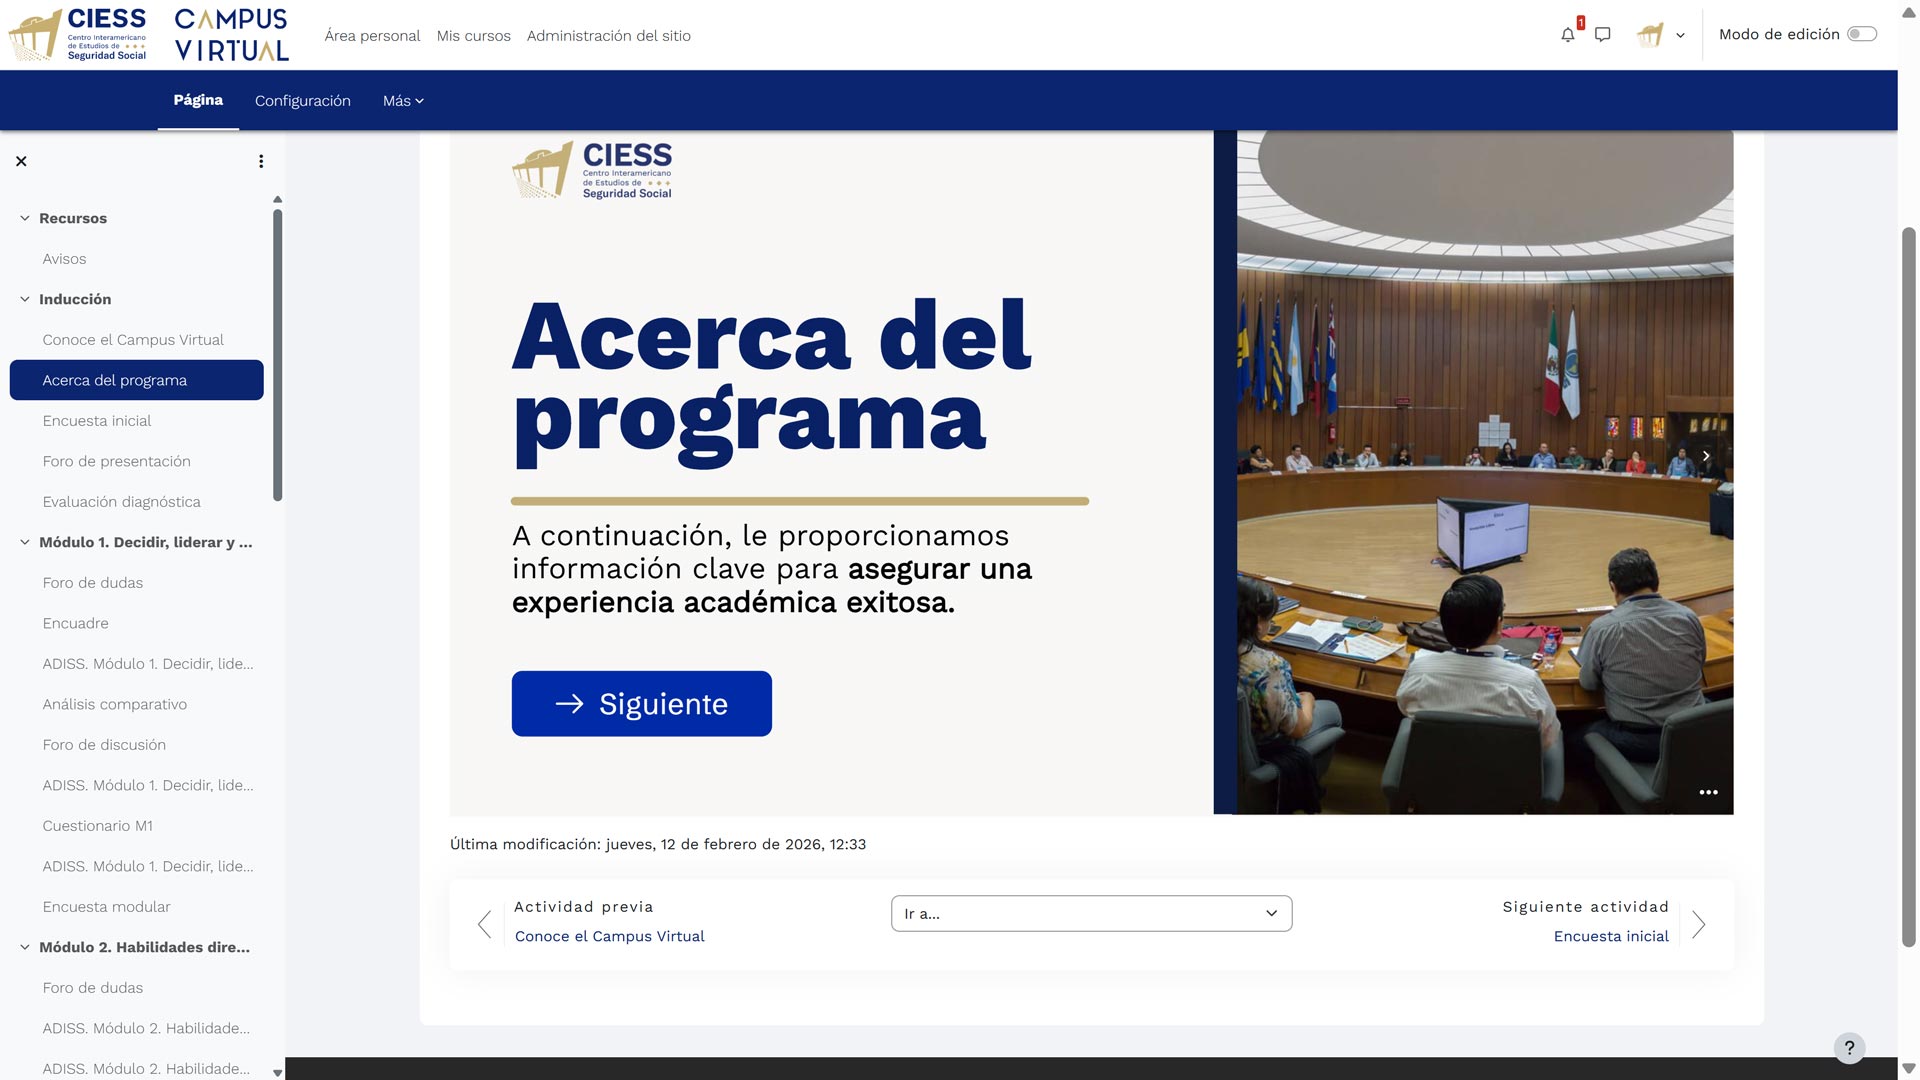
Continue with the "About the program" section. Here you will find key information about the objectives, methodology, duration, teacher profiles, and evaluation criteria of the academic activity. This presentation will give you a complete vision of what you can expect from the program and what is expected of you as a participant.
- Use the blue "Next" button located at the bottom to advance through the informative presentation.
- Read each slide carefully, as it contains details about accreditation, live sessions, and required submissions.
- Upon concluding the presentation, the system will register the activity as completed.
Academic Regulations
The "Academic Regulations" section contains the normative document that governs coexistence and academic processes within the platform. It is essential that you read it before starting your activities, as it details your rights, responsibilities, and CIESS institutional procedures. The document is presented in an integrated PDF viewer that allows you to consult it directly without downloading it:
- Page navigation: Use the left/right arrows in the viewer's top toolbar to move forward or backward page by page. You can also see the current page number and total (e.g., "1 / 8").
- Zoom: Adjust the zoom level with the "+" and "-" buttons to read comfortably. The current percentage is shown in the bar (e.g., "67%").
- Rotate: If the document appears in the wrong orientation, use the circular arrow icon to rotate it.
- Search: Use the magnifying glass icon to search for specific text within the document.
- Download: Press the down arrow icon to save a copy of the regulations on your device.
- Print: Use the printer icon if you want a physical copy of the document.
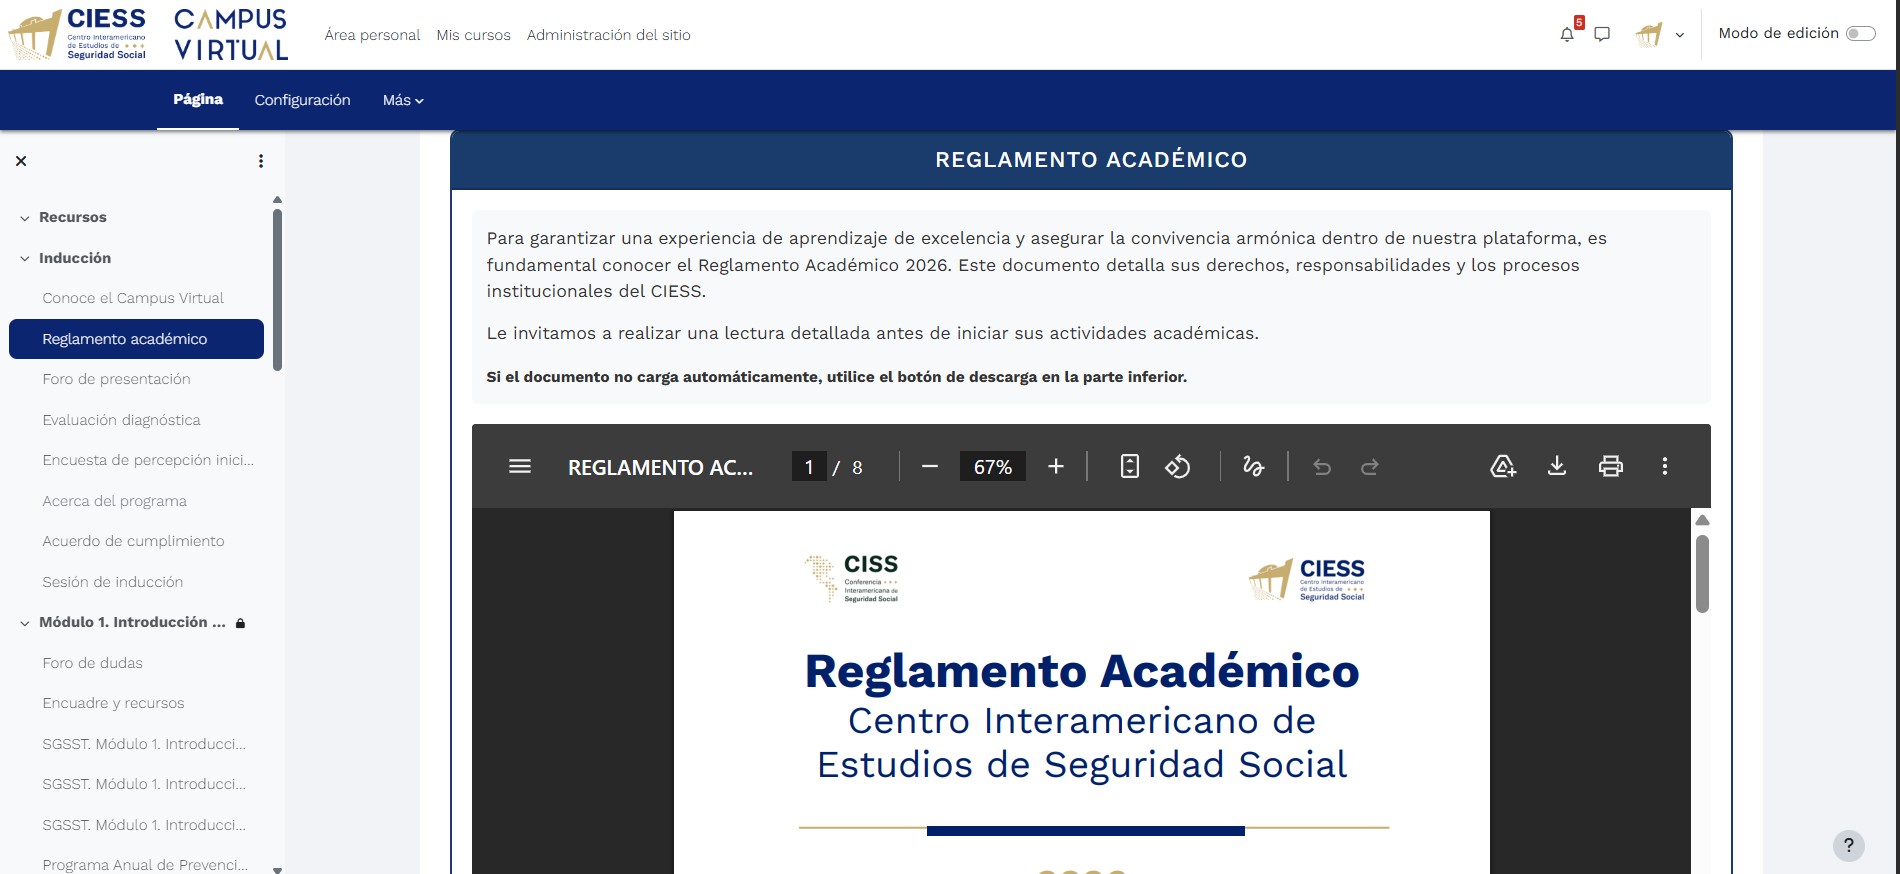
Tip: If the document does not load automatically in the viewer, use the download button in the toolbar to save the PDF and open it directly in your document reader. You can also scroll down the page to find an alternative download link.
Introduction Forum
The "Introduction forum" is the first space for interaction with your classmates and teachers. Your participation is essential to build community and start the collaborative experience. Upon entering the forum, you will see a header with the title "INTRODUCTION FORUM" and a list of questions designed for you to introduce yourself:
- State your full name, academic background, and occupation.
- What are your expectations for the course/diploma.
- What are the biggest challenges you have experienced when studying online and how you have faced them.
- What are the main reasons that motivated you to enroll.
- What additional resources or support you consider would be favorable to improve your learning experience.
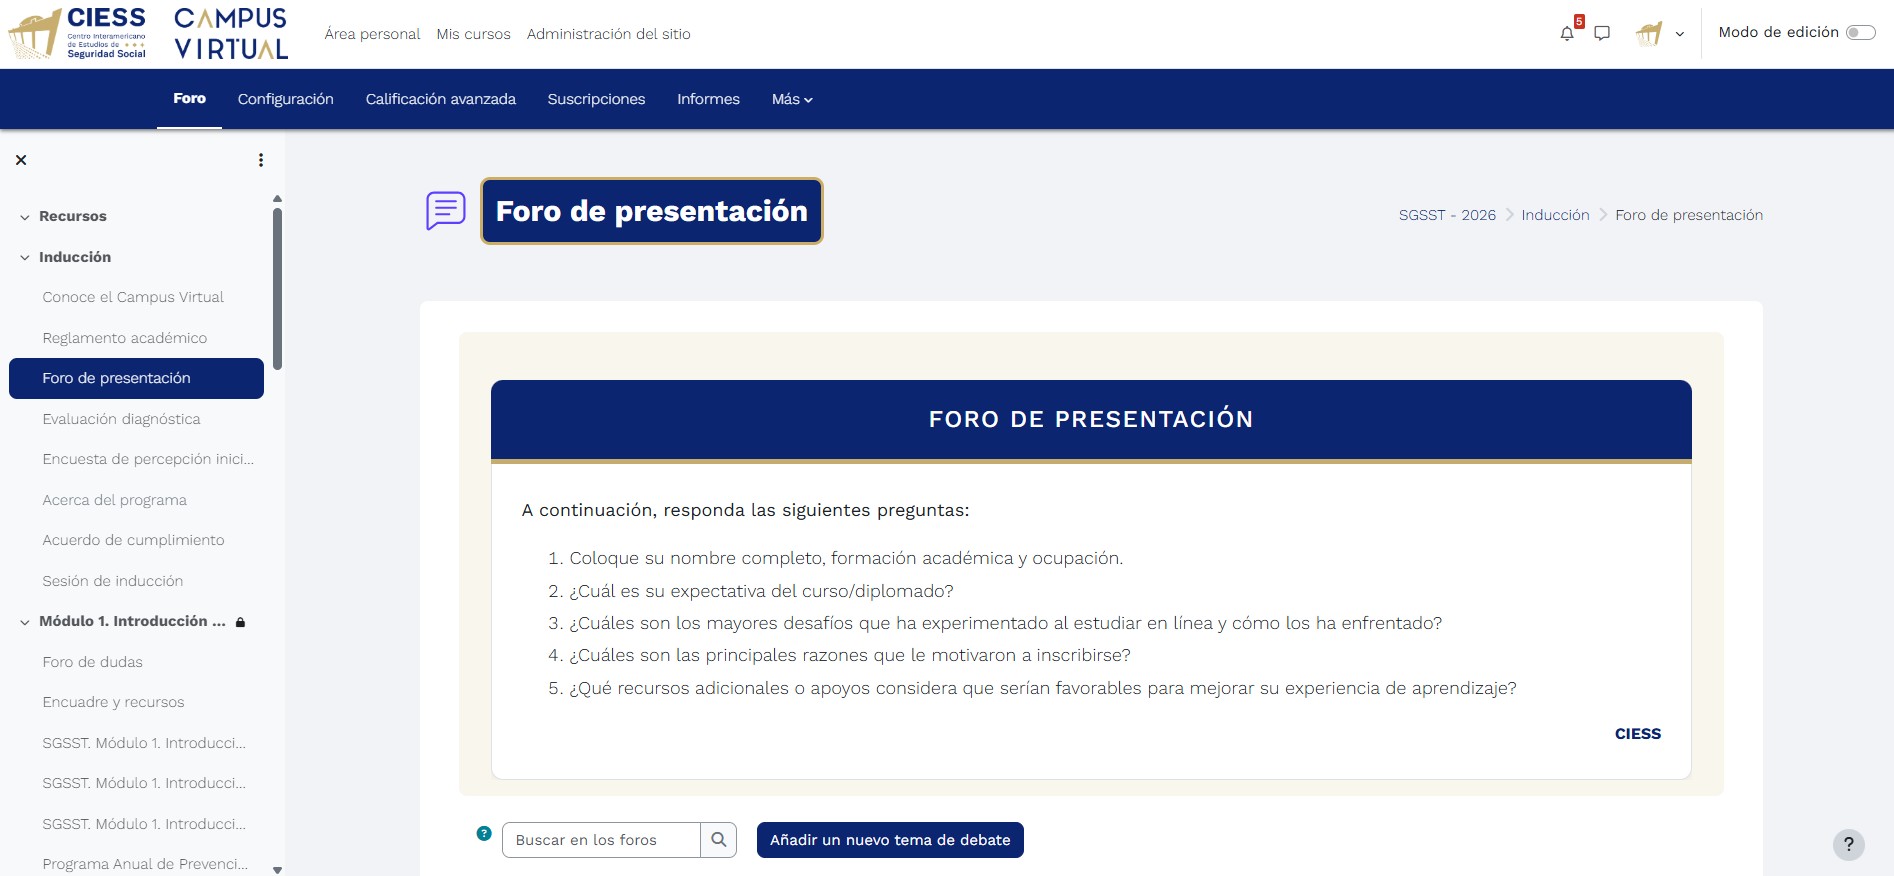
To participate in the forum, click the "Add a new discussion topic" button. A form will open with two mandatory fields you must complete:
- Subject: Write a descriptive title for your presentation (for example, "Presentation - [Your name]"). This field is mandatory and is indicated with a red warning icon if empty.
- Message: Use the rich text editor to answer the forum questions. The editor includes formatting tools: bold, italics, image insertion, links, lists, text alignment, and more. A word counter at the bottom will help you verify the length of your message.
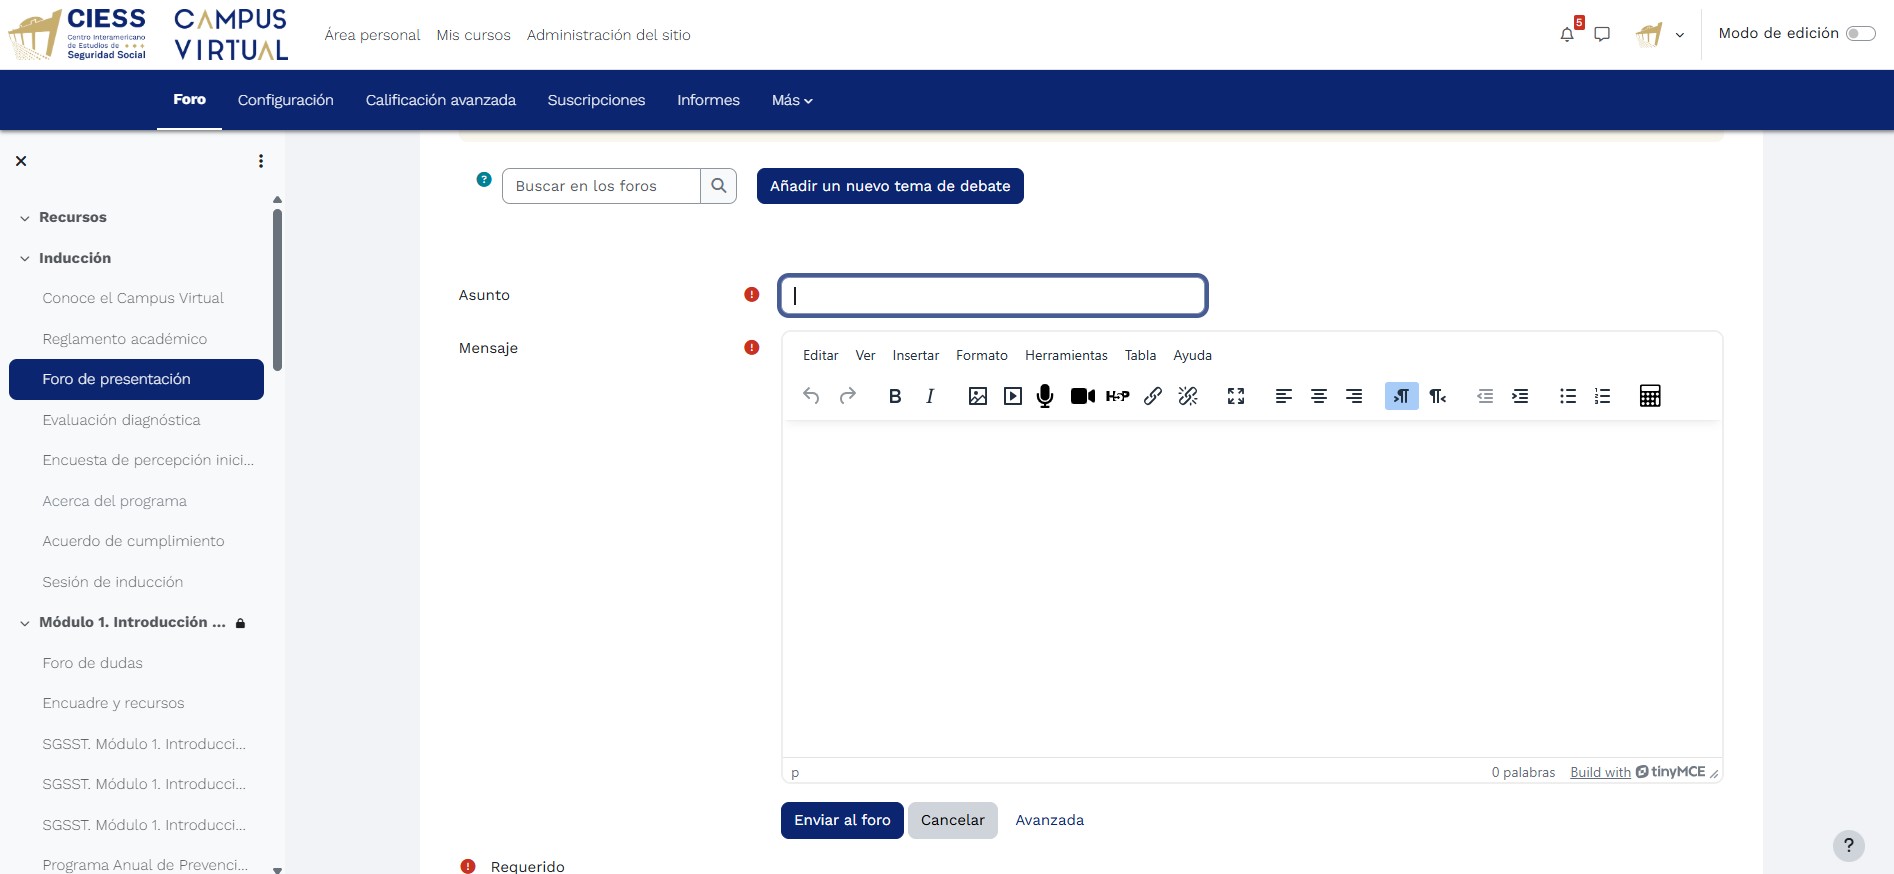
Once you have drafted your message, review the content and then press the "Post to forum" button to publish your participation. If you want to discard what you wrote, you can use the "Cancel" button. The "Advanced" button gives you access to additional options such as attaching files or scheduling the post.
- After publishing, you can also reply to your classmates' presentations by clicking the "Reply" link below each message.
- Use the "Search forums" field to locate specific topics or participants.
Important: Your participation in the Introduction forum is part of the induction activities and may be considered within the accreditation criteria. Make sure to answer all questions completely and respectfully.
Diagnostic Assessment and Surveys
The "Diagnostic assessment" is an instrument that identifies your prior knowledge level on the program topics. Its results do not affect your final grade; they are used exclusively for teachers to adjust teaching strategies according to the group's needs. Check the status of the assessment and, if you have been selected to answer it, follow the on-screen instructions.
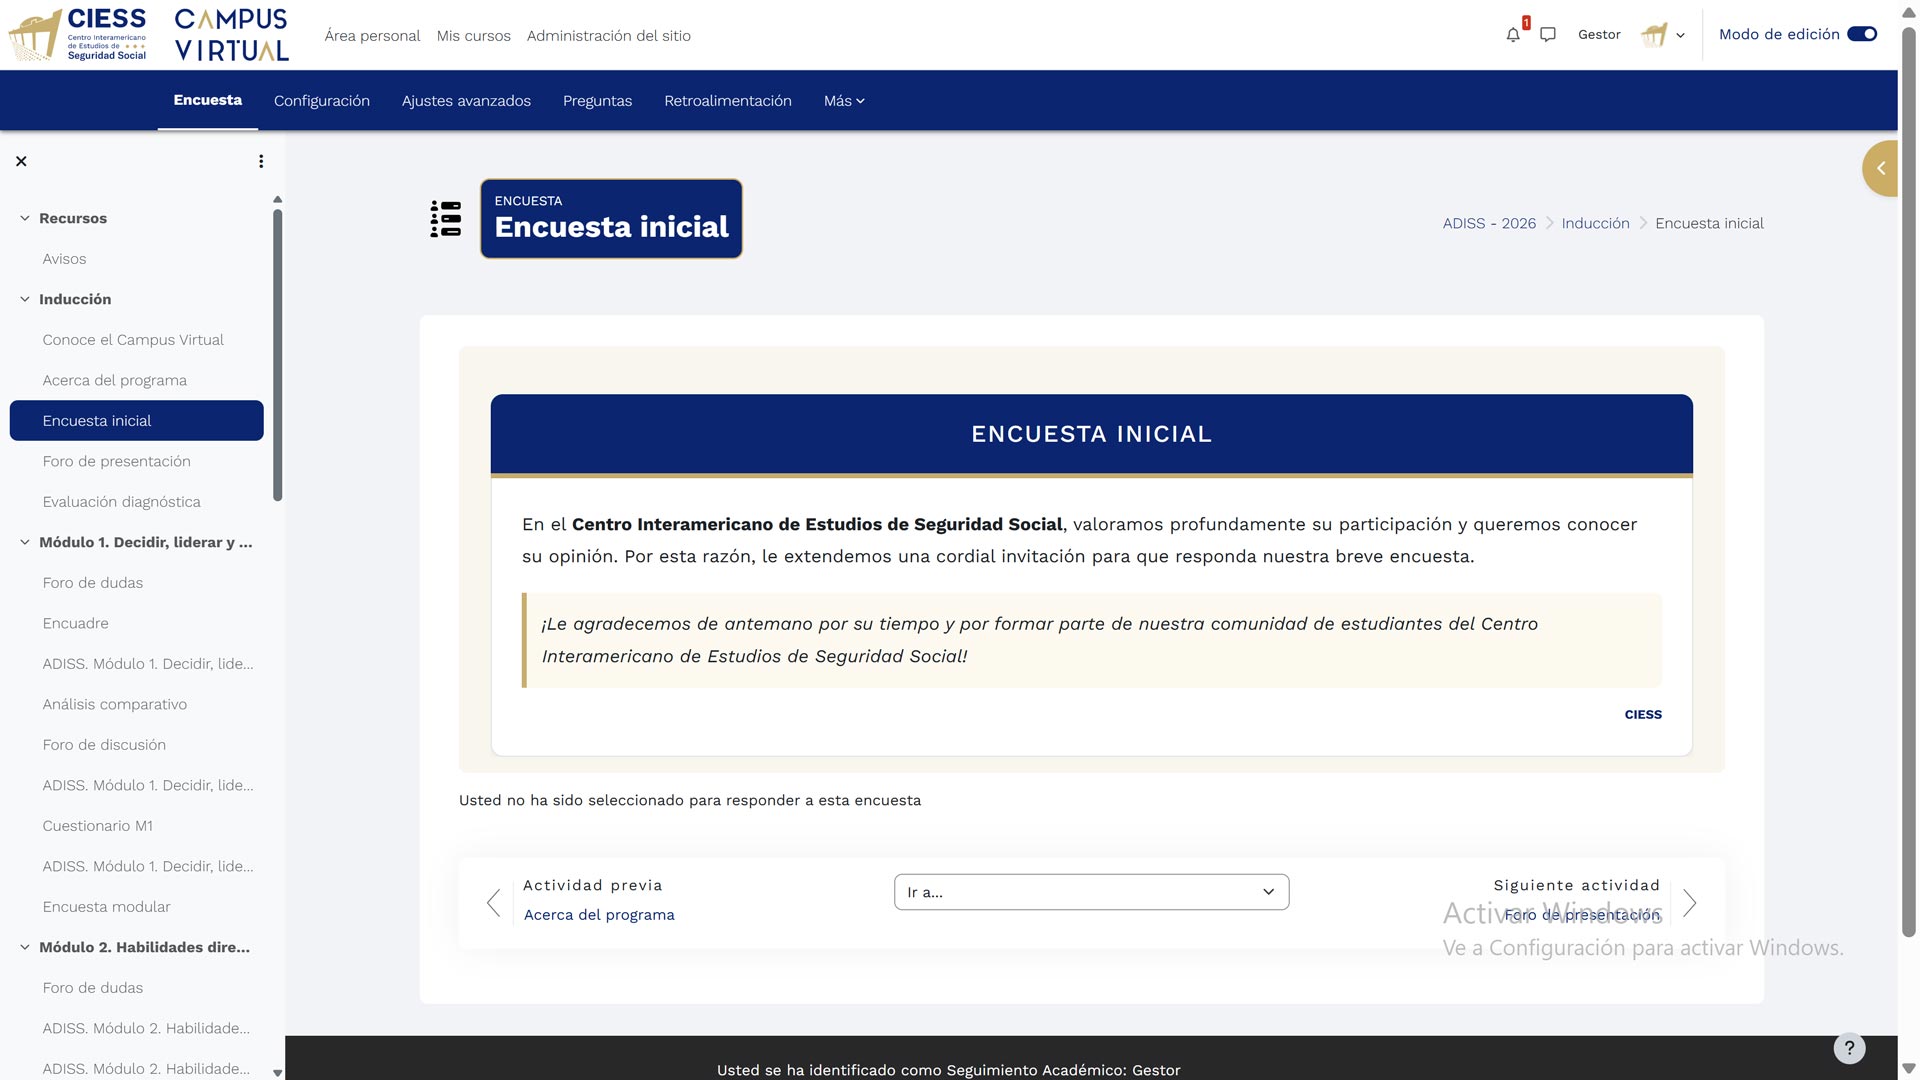
The "Initial perception survey" collects information about your expectations, previous online education experience, and support needs. Like the diagnostic assessment, your answers are confidential and help the academic team improve the learning experience. It is important that you check the survey status, as in some cases a message will appear indicating if you have been selected to answer it.
It is necessary to complete the perception surveys (initial and final) to advance to the next module or receive your accreditation certificate. Do not skip these activities.
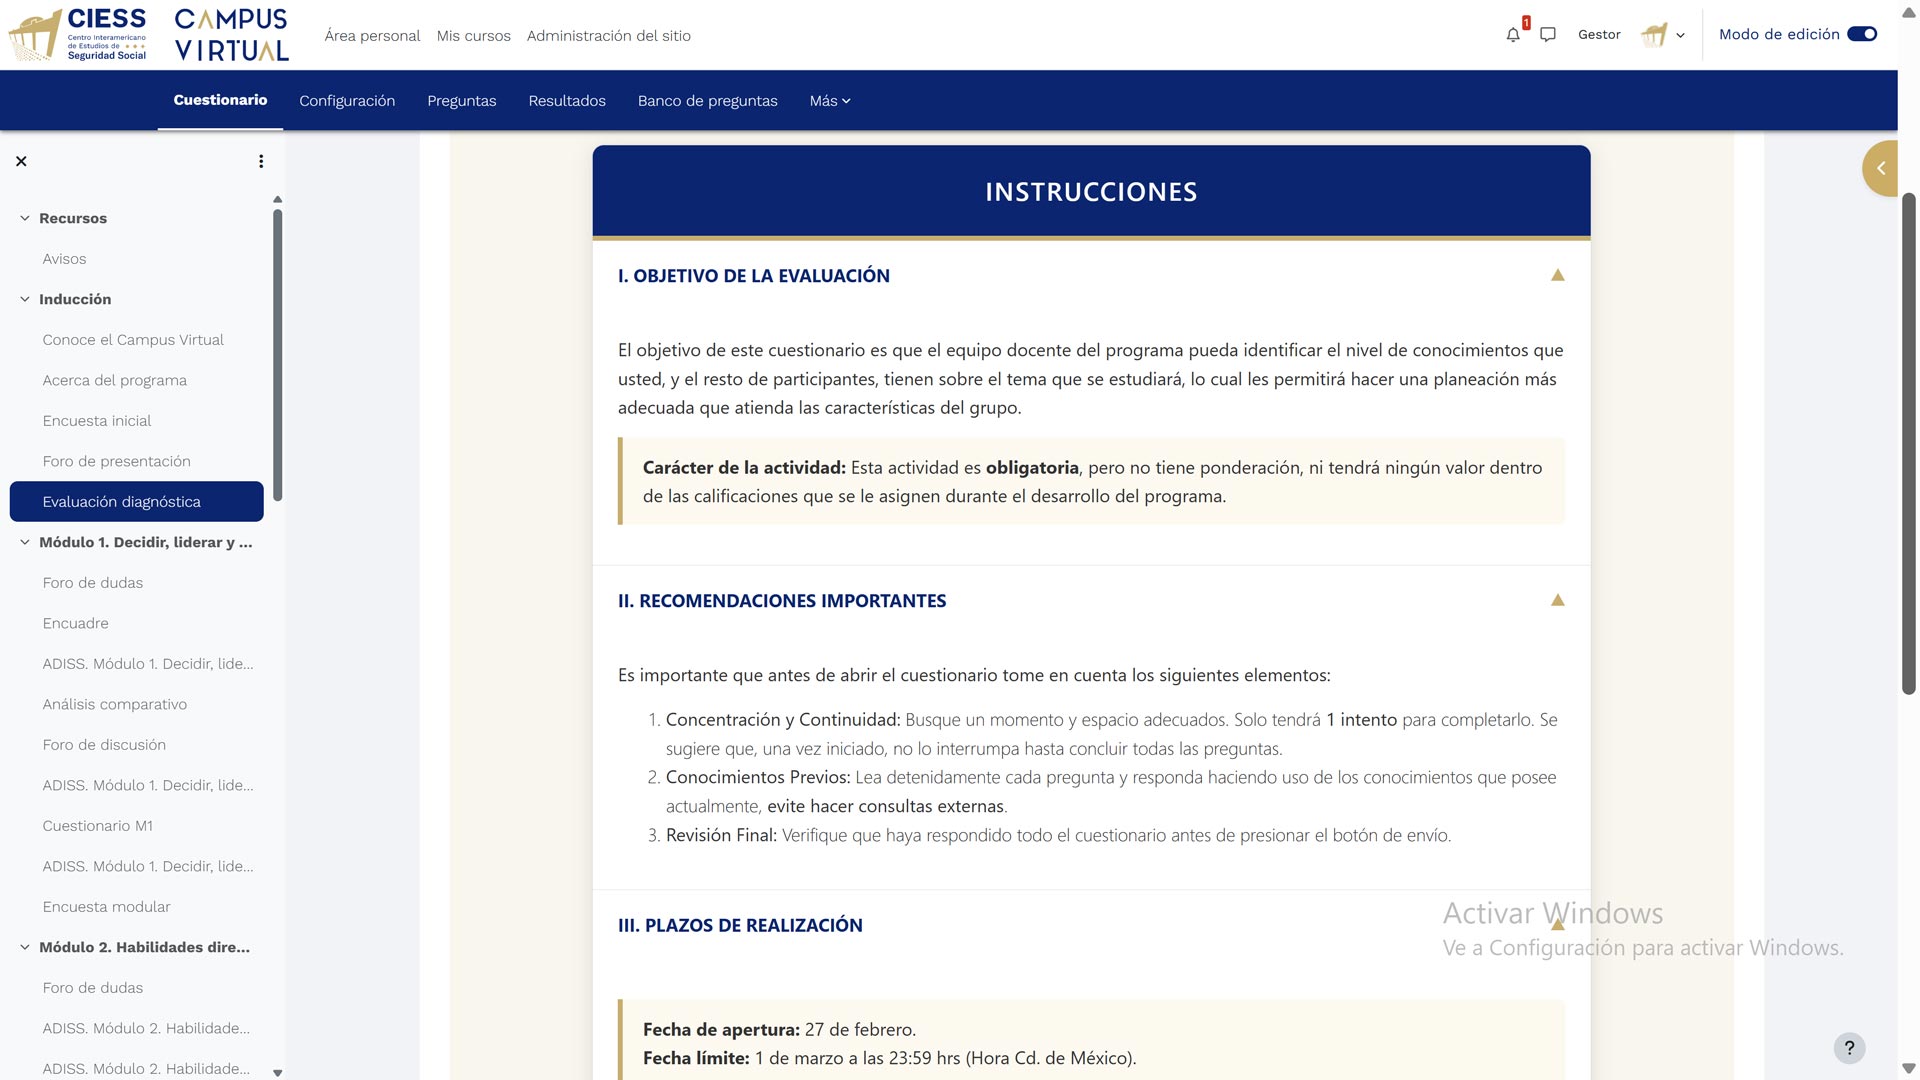
Before taking any assessment, carefully read the "Instructions" page. Here, the assessment objective, important recommendations (such as maintaining concentration and using prior knowledge), and the deadlines (opening and closing dates) are detailed. Respecting these deadlines is essential for your assessment to be registered correctly.