
How to join teacher sessions
Log in to the Virtual Campus and navigate to your course. Locate the module corresponding to your session. It is important that you review and study the contents of each module before the session date.
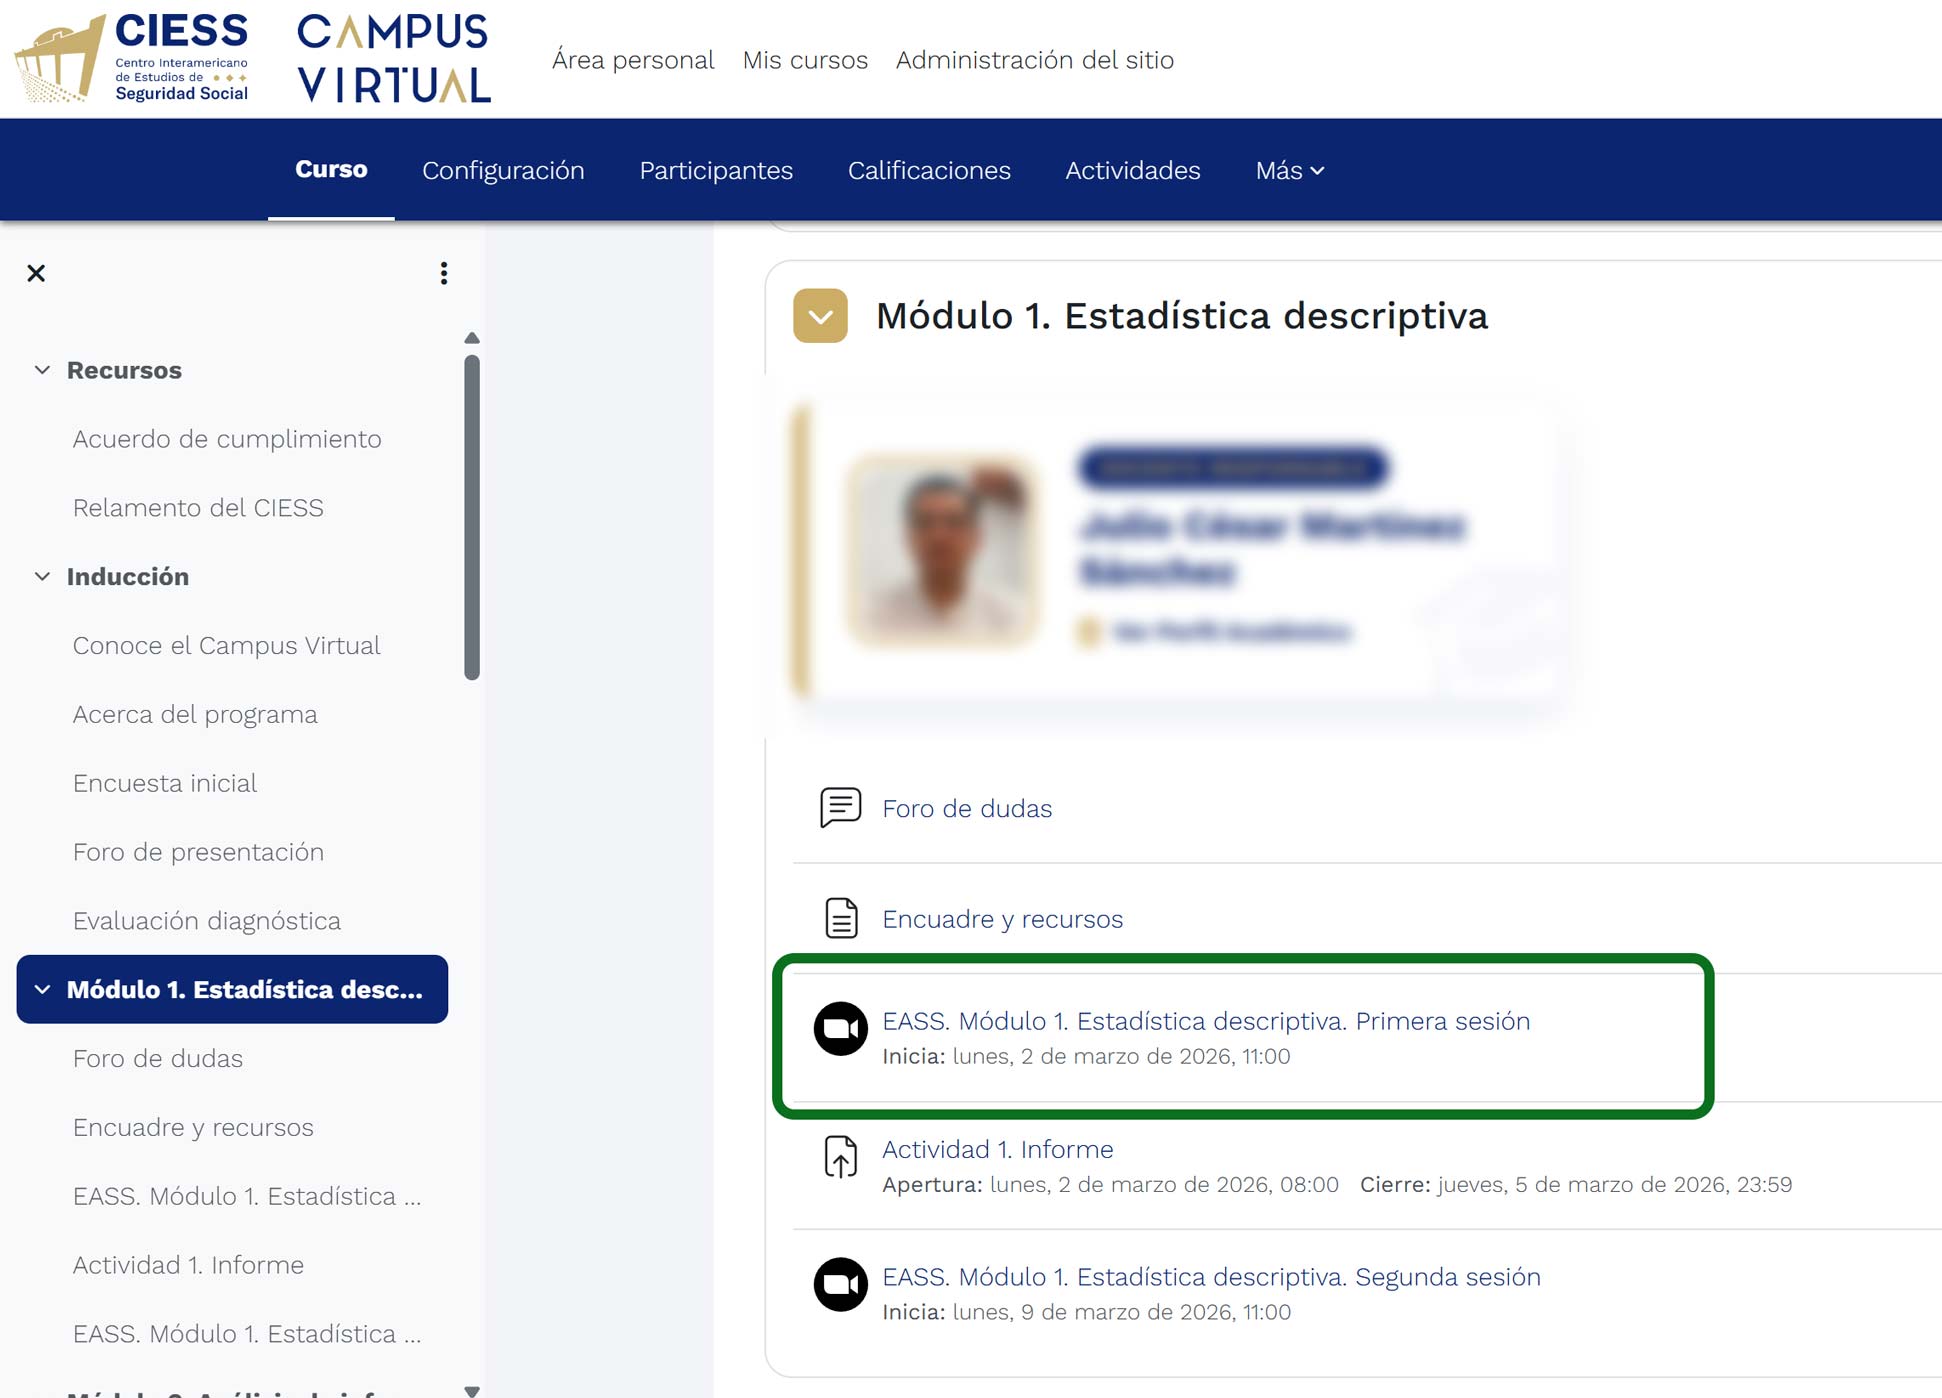
Course panel displaying modules and Zoom sessions
Please note: Due to teacher schedules, dates and times may vary. Any changes will be officially notified through the Virtual Campus. Please keep an eye out for updates.
Inside the module, look for the scheduled Zoom activity. Verify that it is the correct date and time. Click on the session name to access the details.
Once inside the session page, if the time has arrived, you will see the "Join" button in dark blue. Click this button to start the connection process.
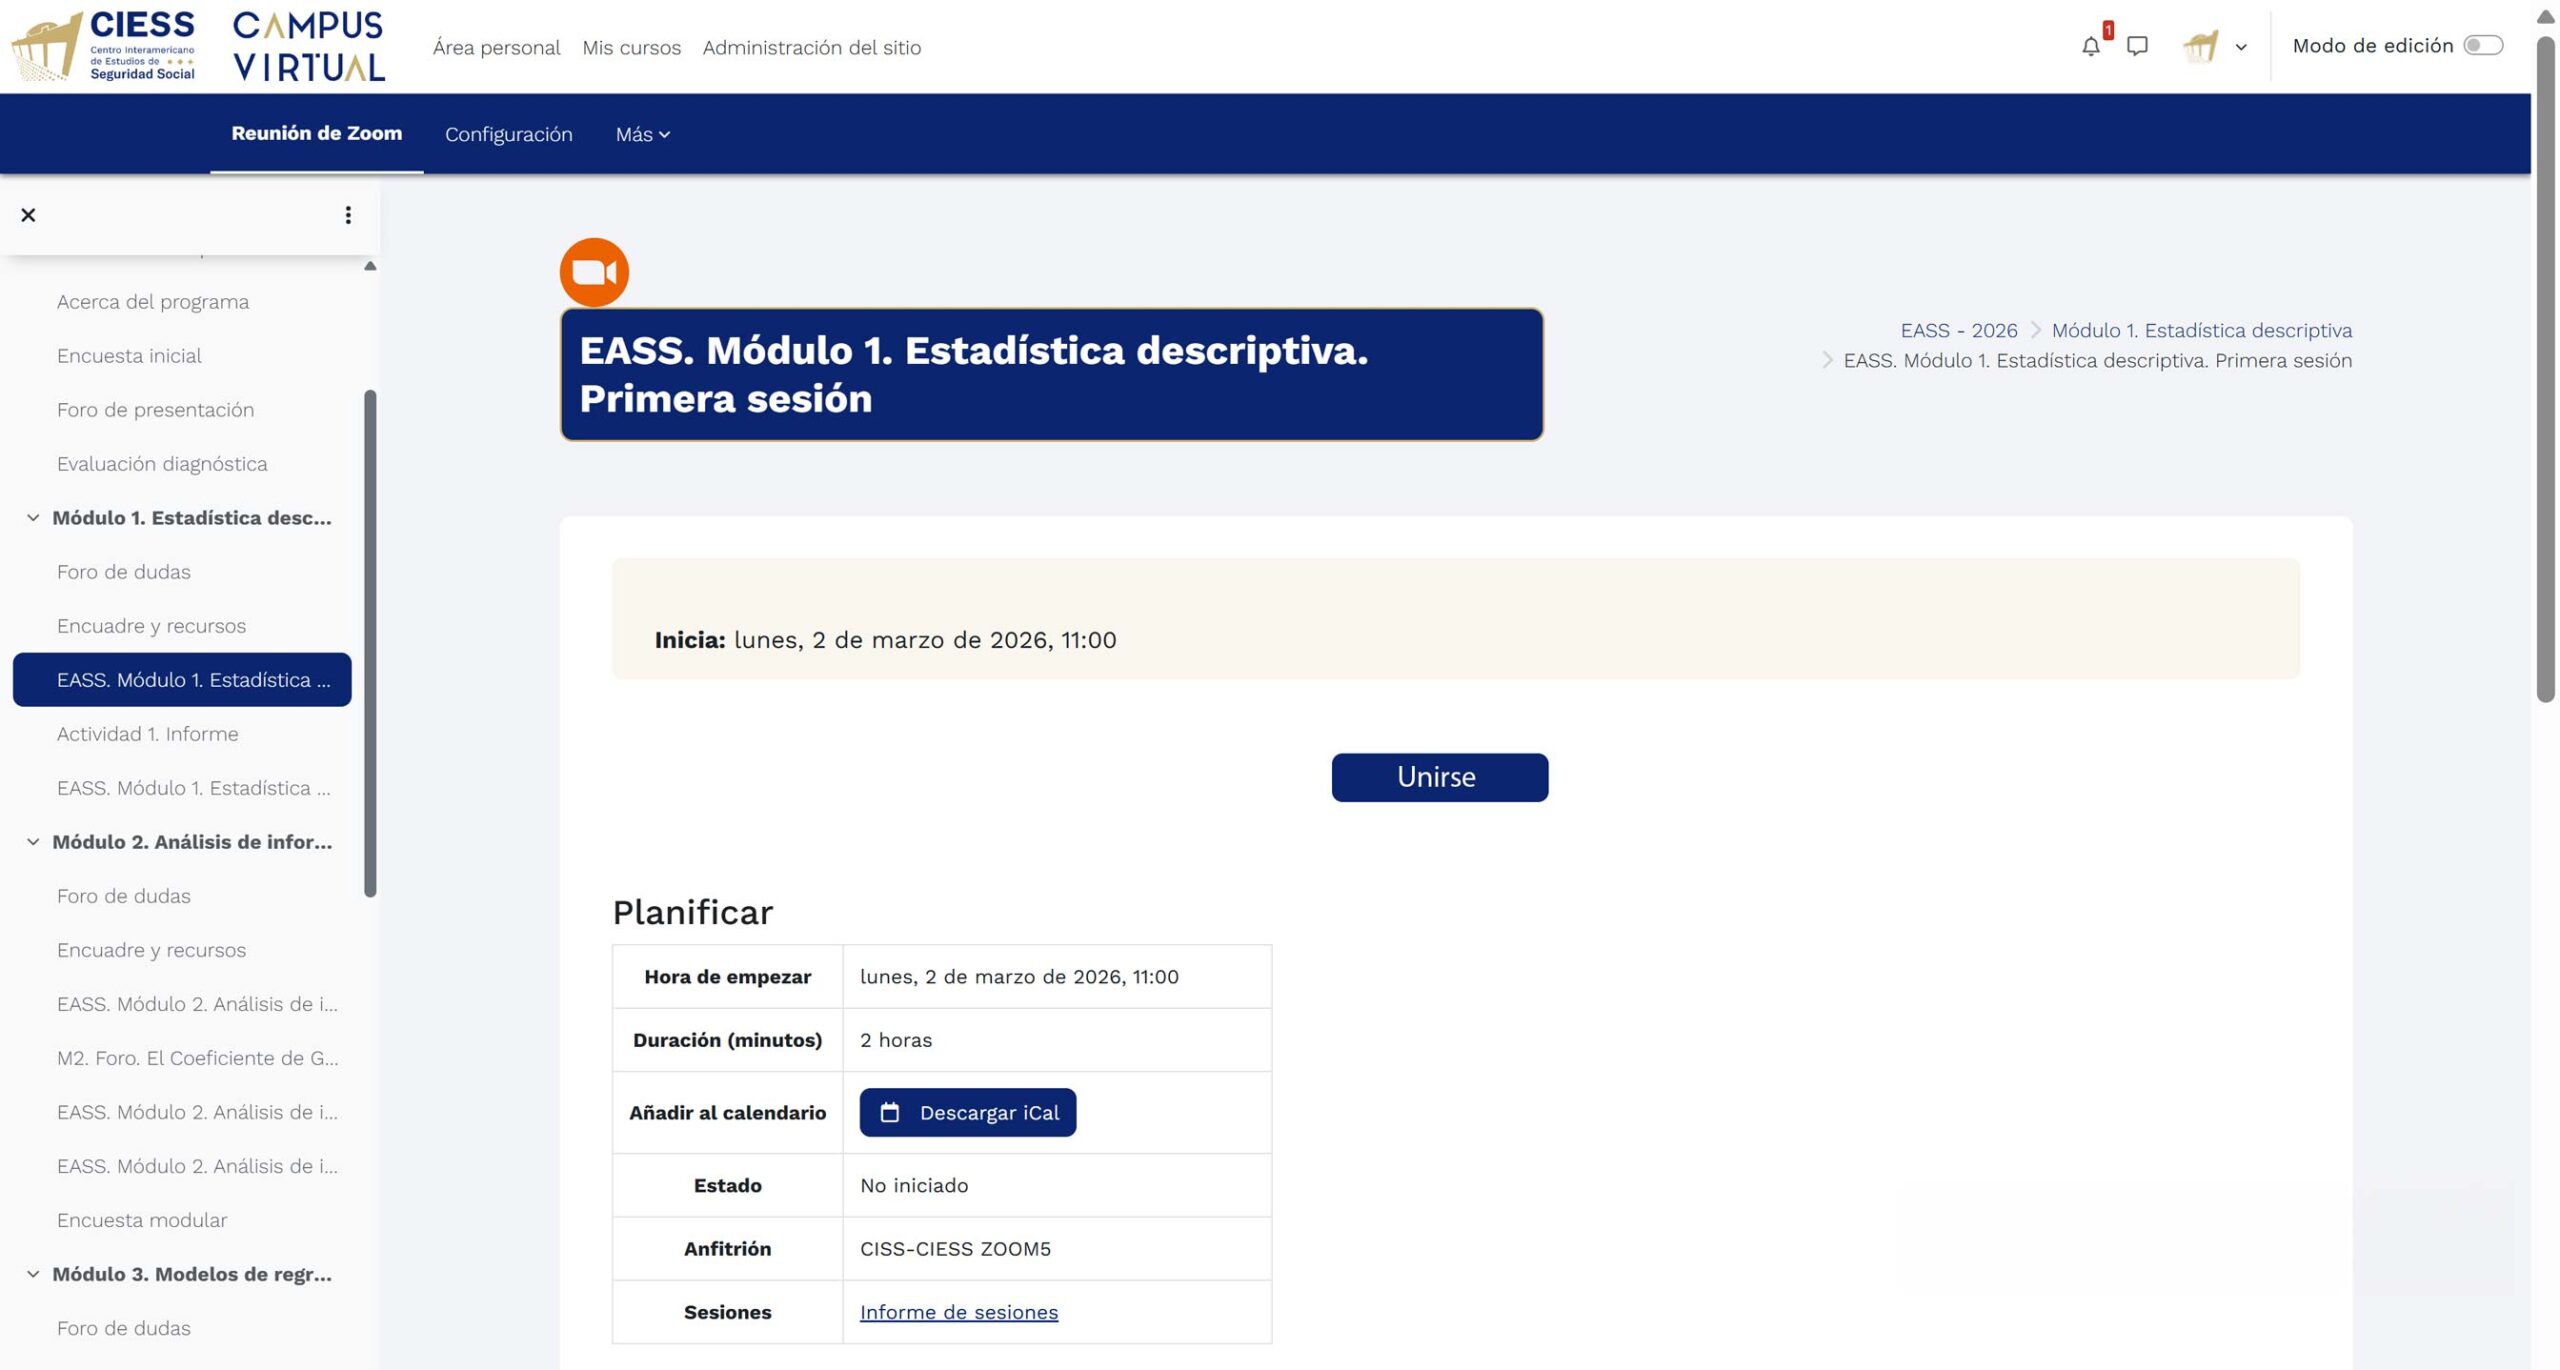
Session page with the "Join" button available
When you click "Join", the Zoom application will open automatically, and you will be directed to the session's waiting room. The teacher or host will admit you to the meeting. While you wait, you can check that your camera and microphone are working properly.
Tip: We recommend joining the session 5 to 10 minutes early to solve any technical issues and ensure everything is working properly before class starts.
If you try to join before the scheduled time, instead of the "Join" button you will see the message: "You cannot join at this time. The meeting has not started yet." Please wait until the designated time to access.
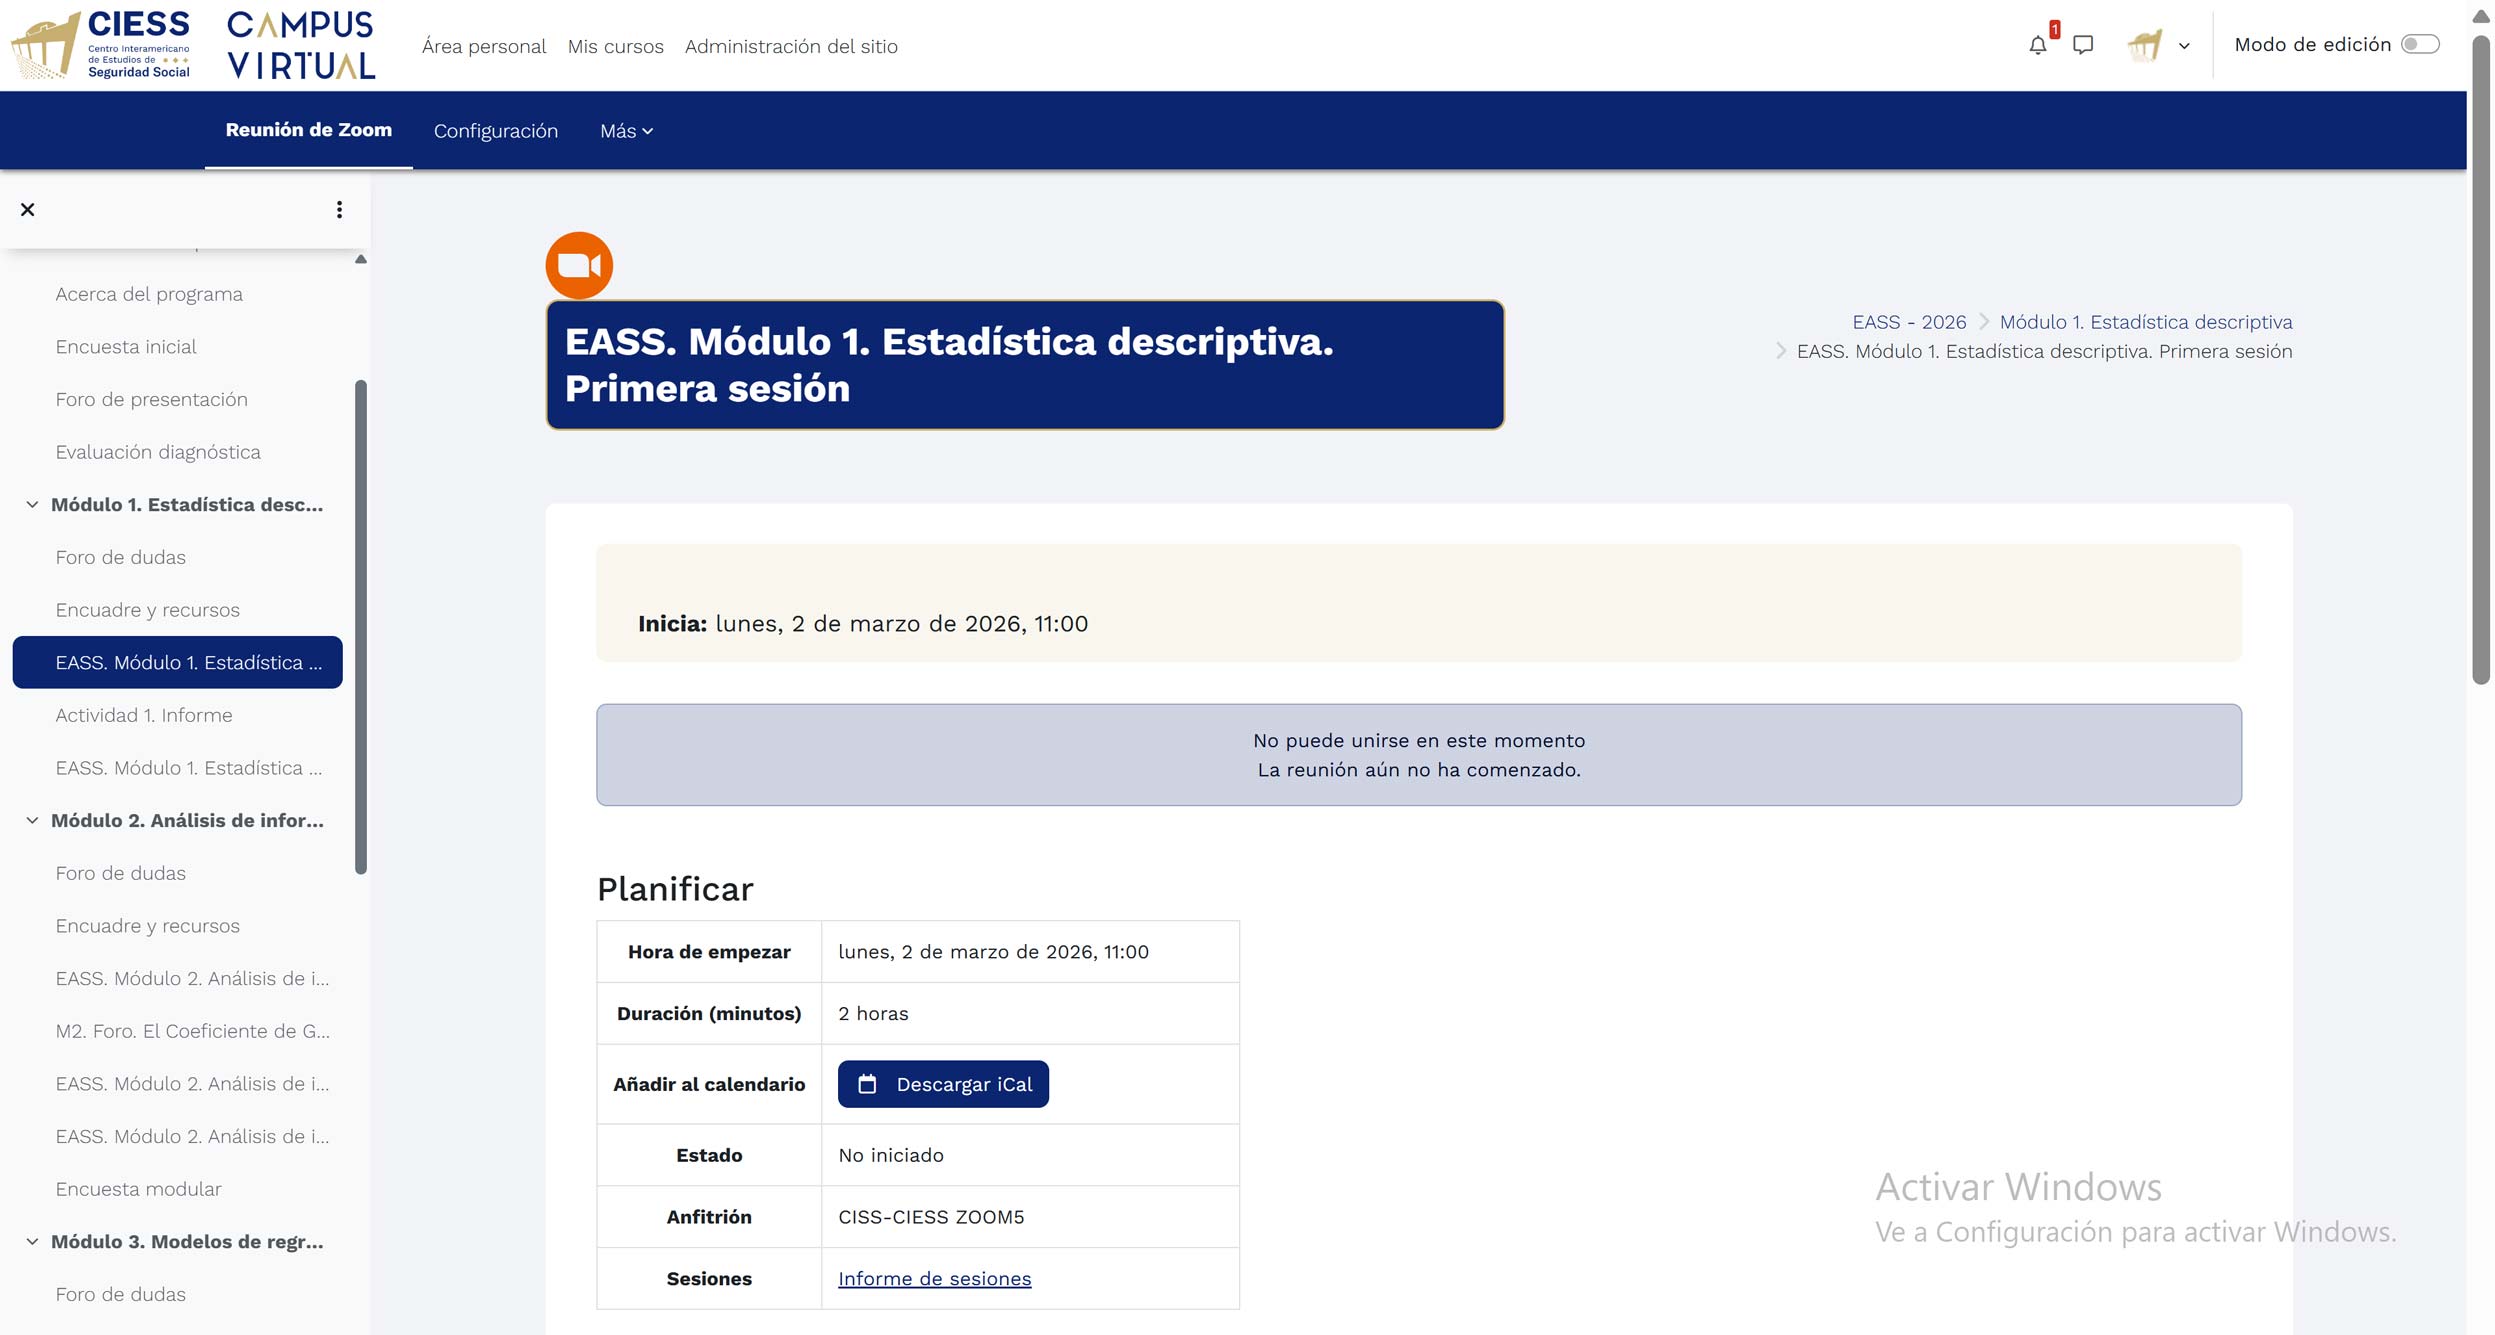
Message that appears when the meeting has not started yet
Technical Requirement: Make sure you have the Zoom application installed on your device before attempting to join the session.
Renaming Yourself in Zoom
In your Zoom meeting, click on Participants in the bottom toolbar.
Hover your cursor over your name in the participant list.
Click on More and then select Rename.
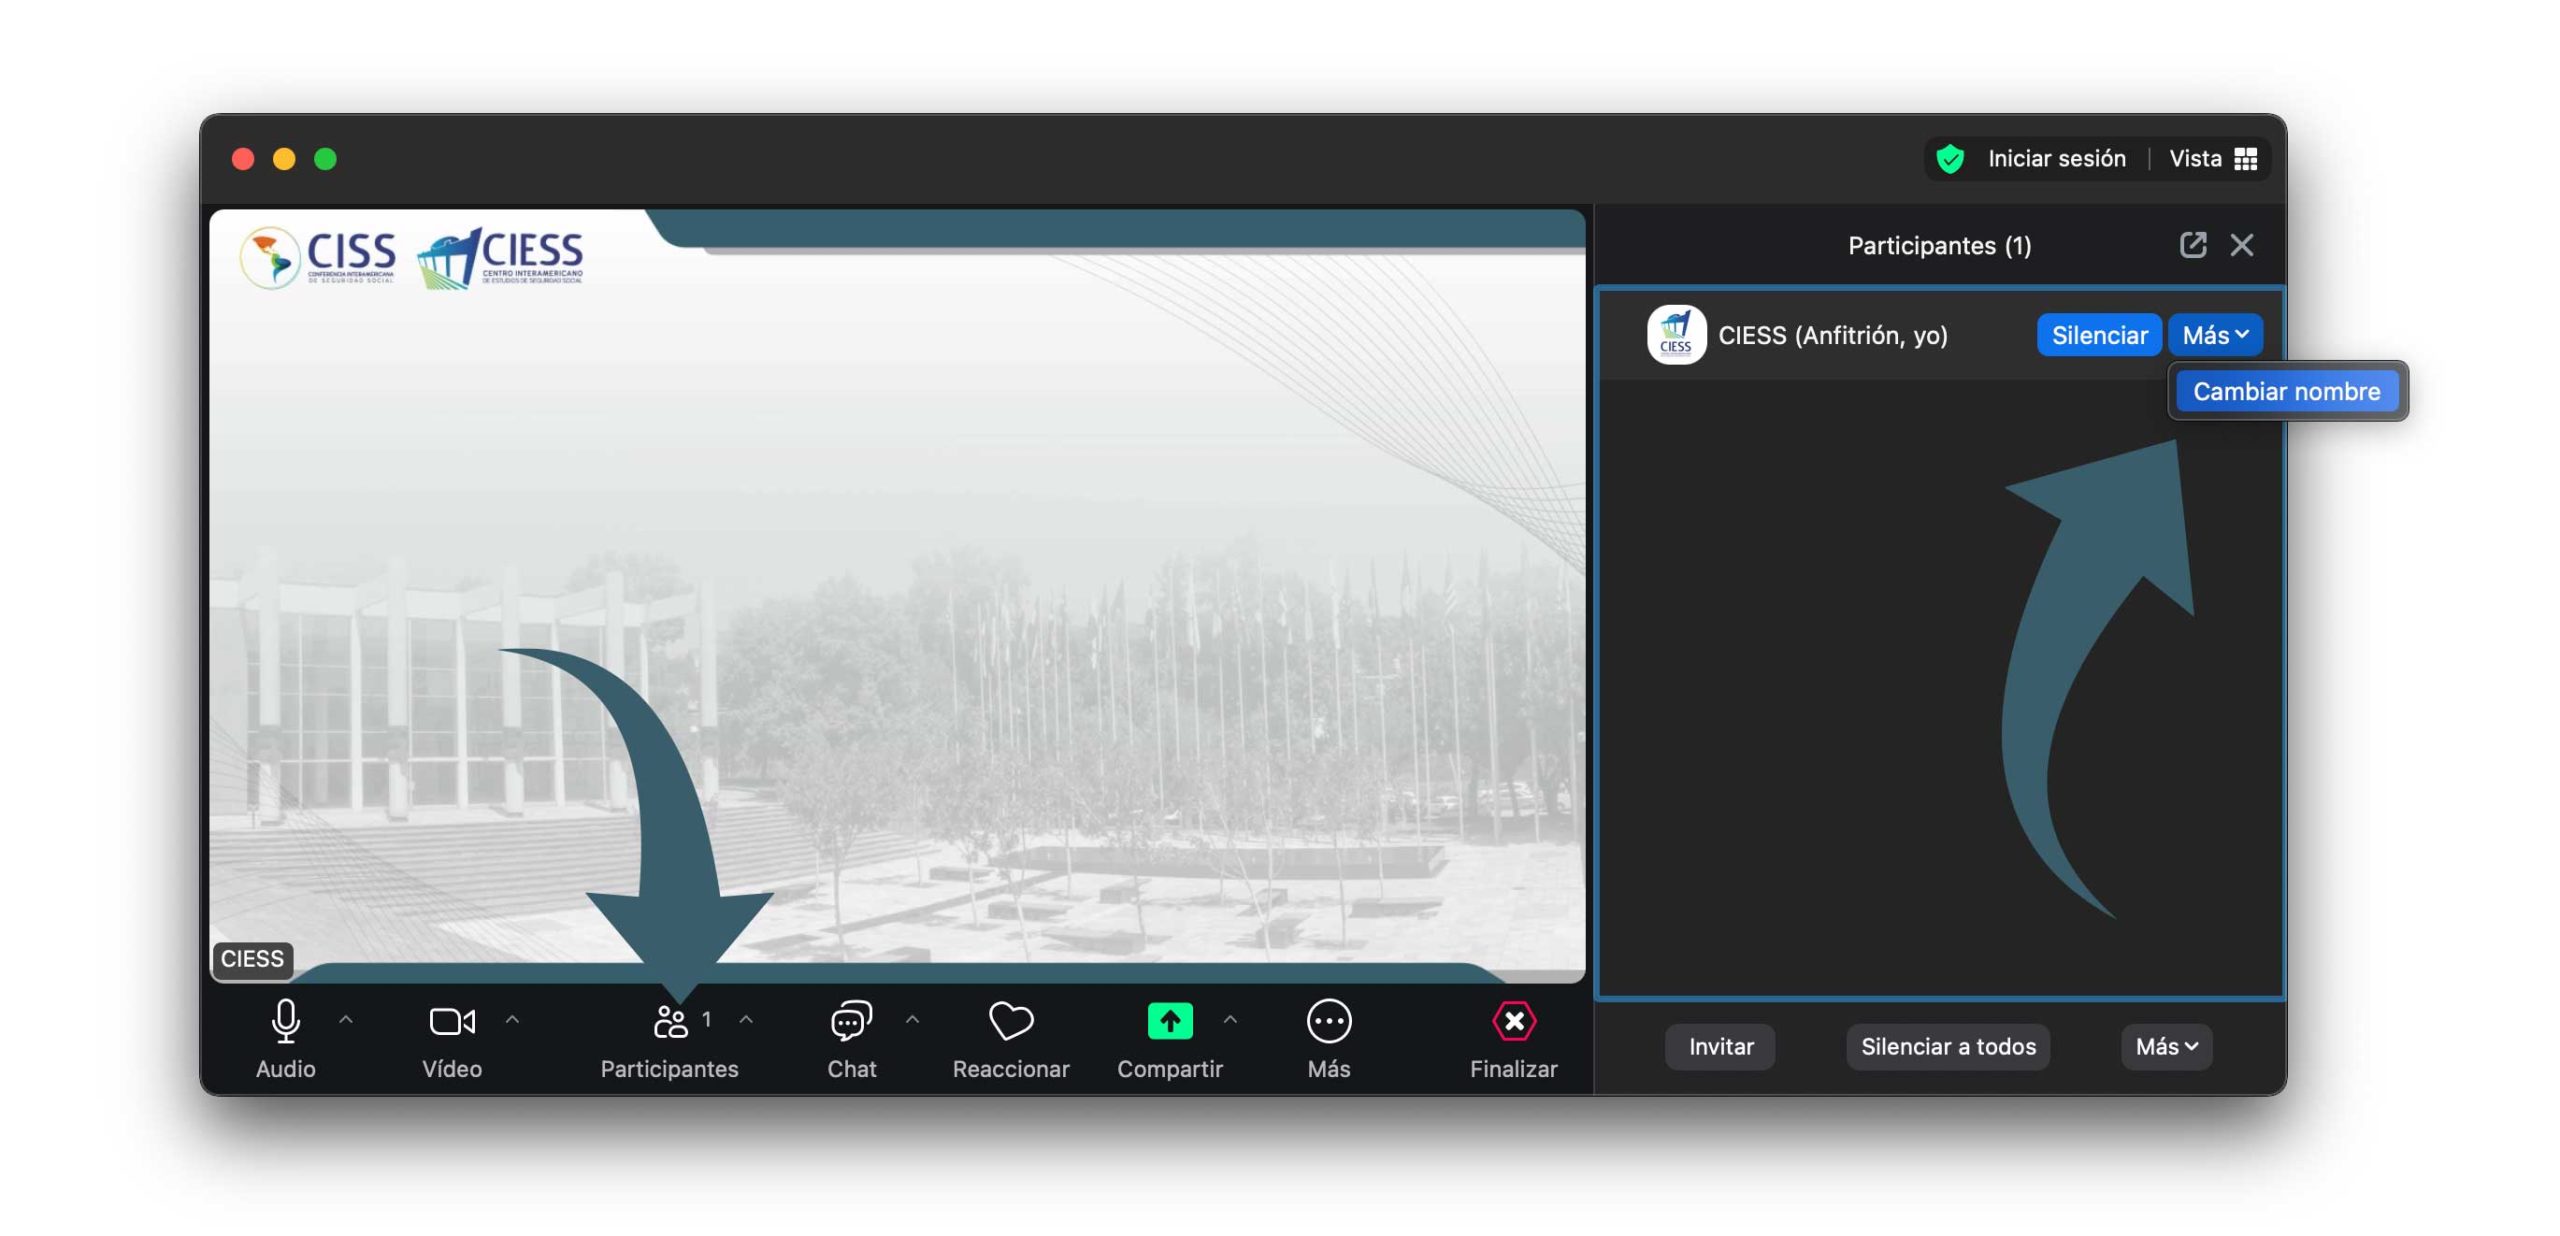
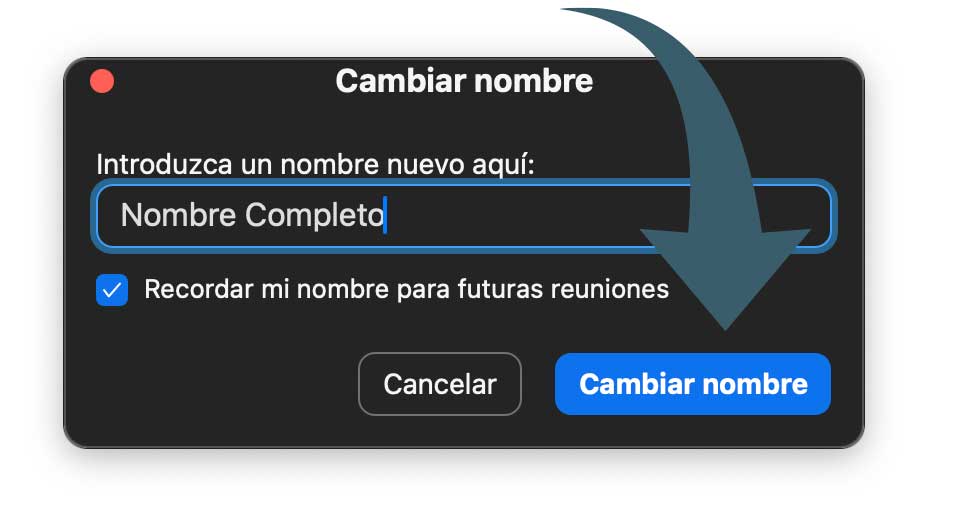
Type the display name you want and click Rename.
Tip: Check the option "Remember my name for future meetings" so Zoom automatically saves your name.
Change Interpretation Channel
During the meeting, click on Interpretation in the bottom toolbar.
In the pop-up menu, select the language you wish to switch to.
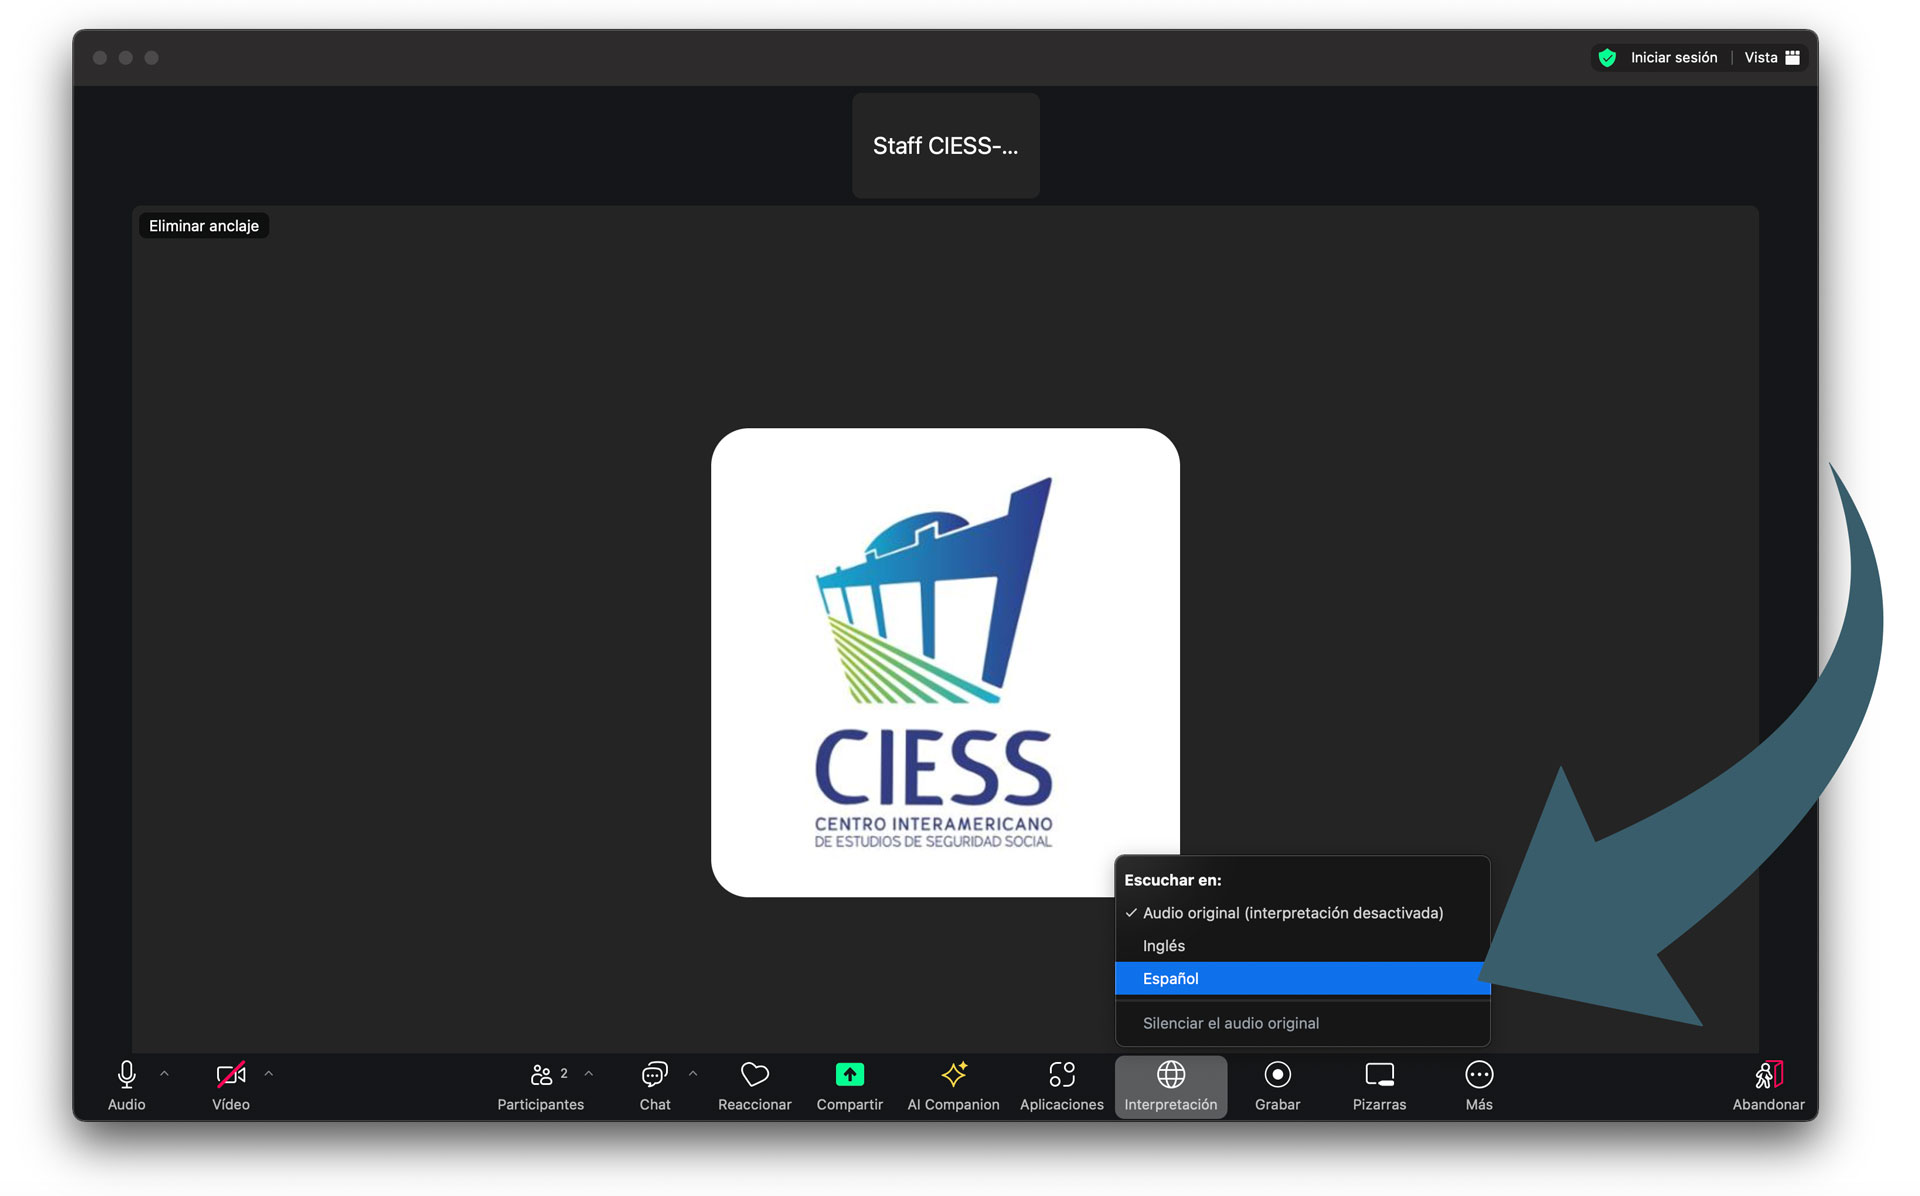
To listen only to the interpretation, check "Mute Original Audio".
Share Your Screen
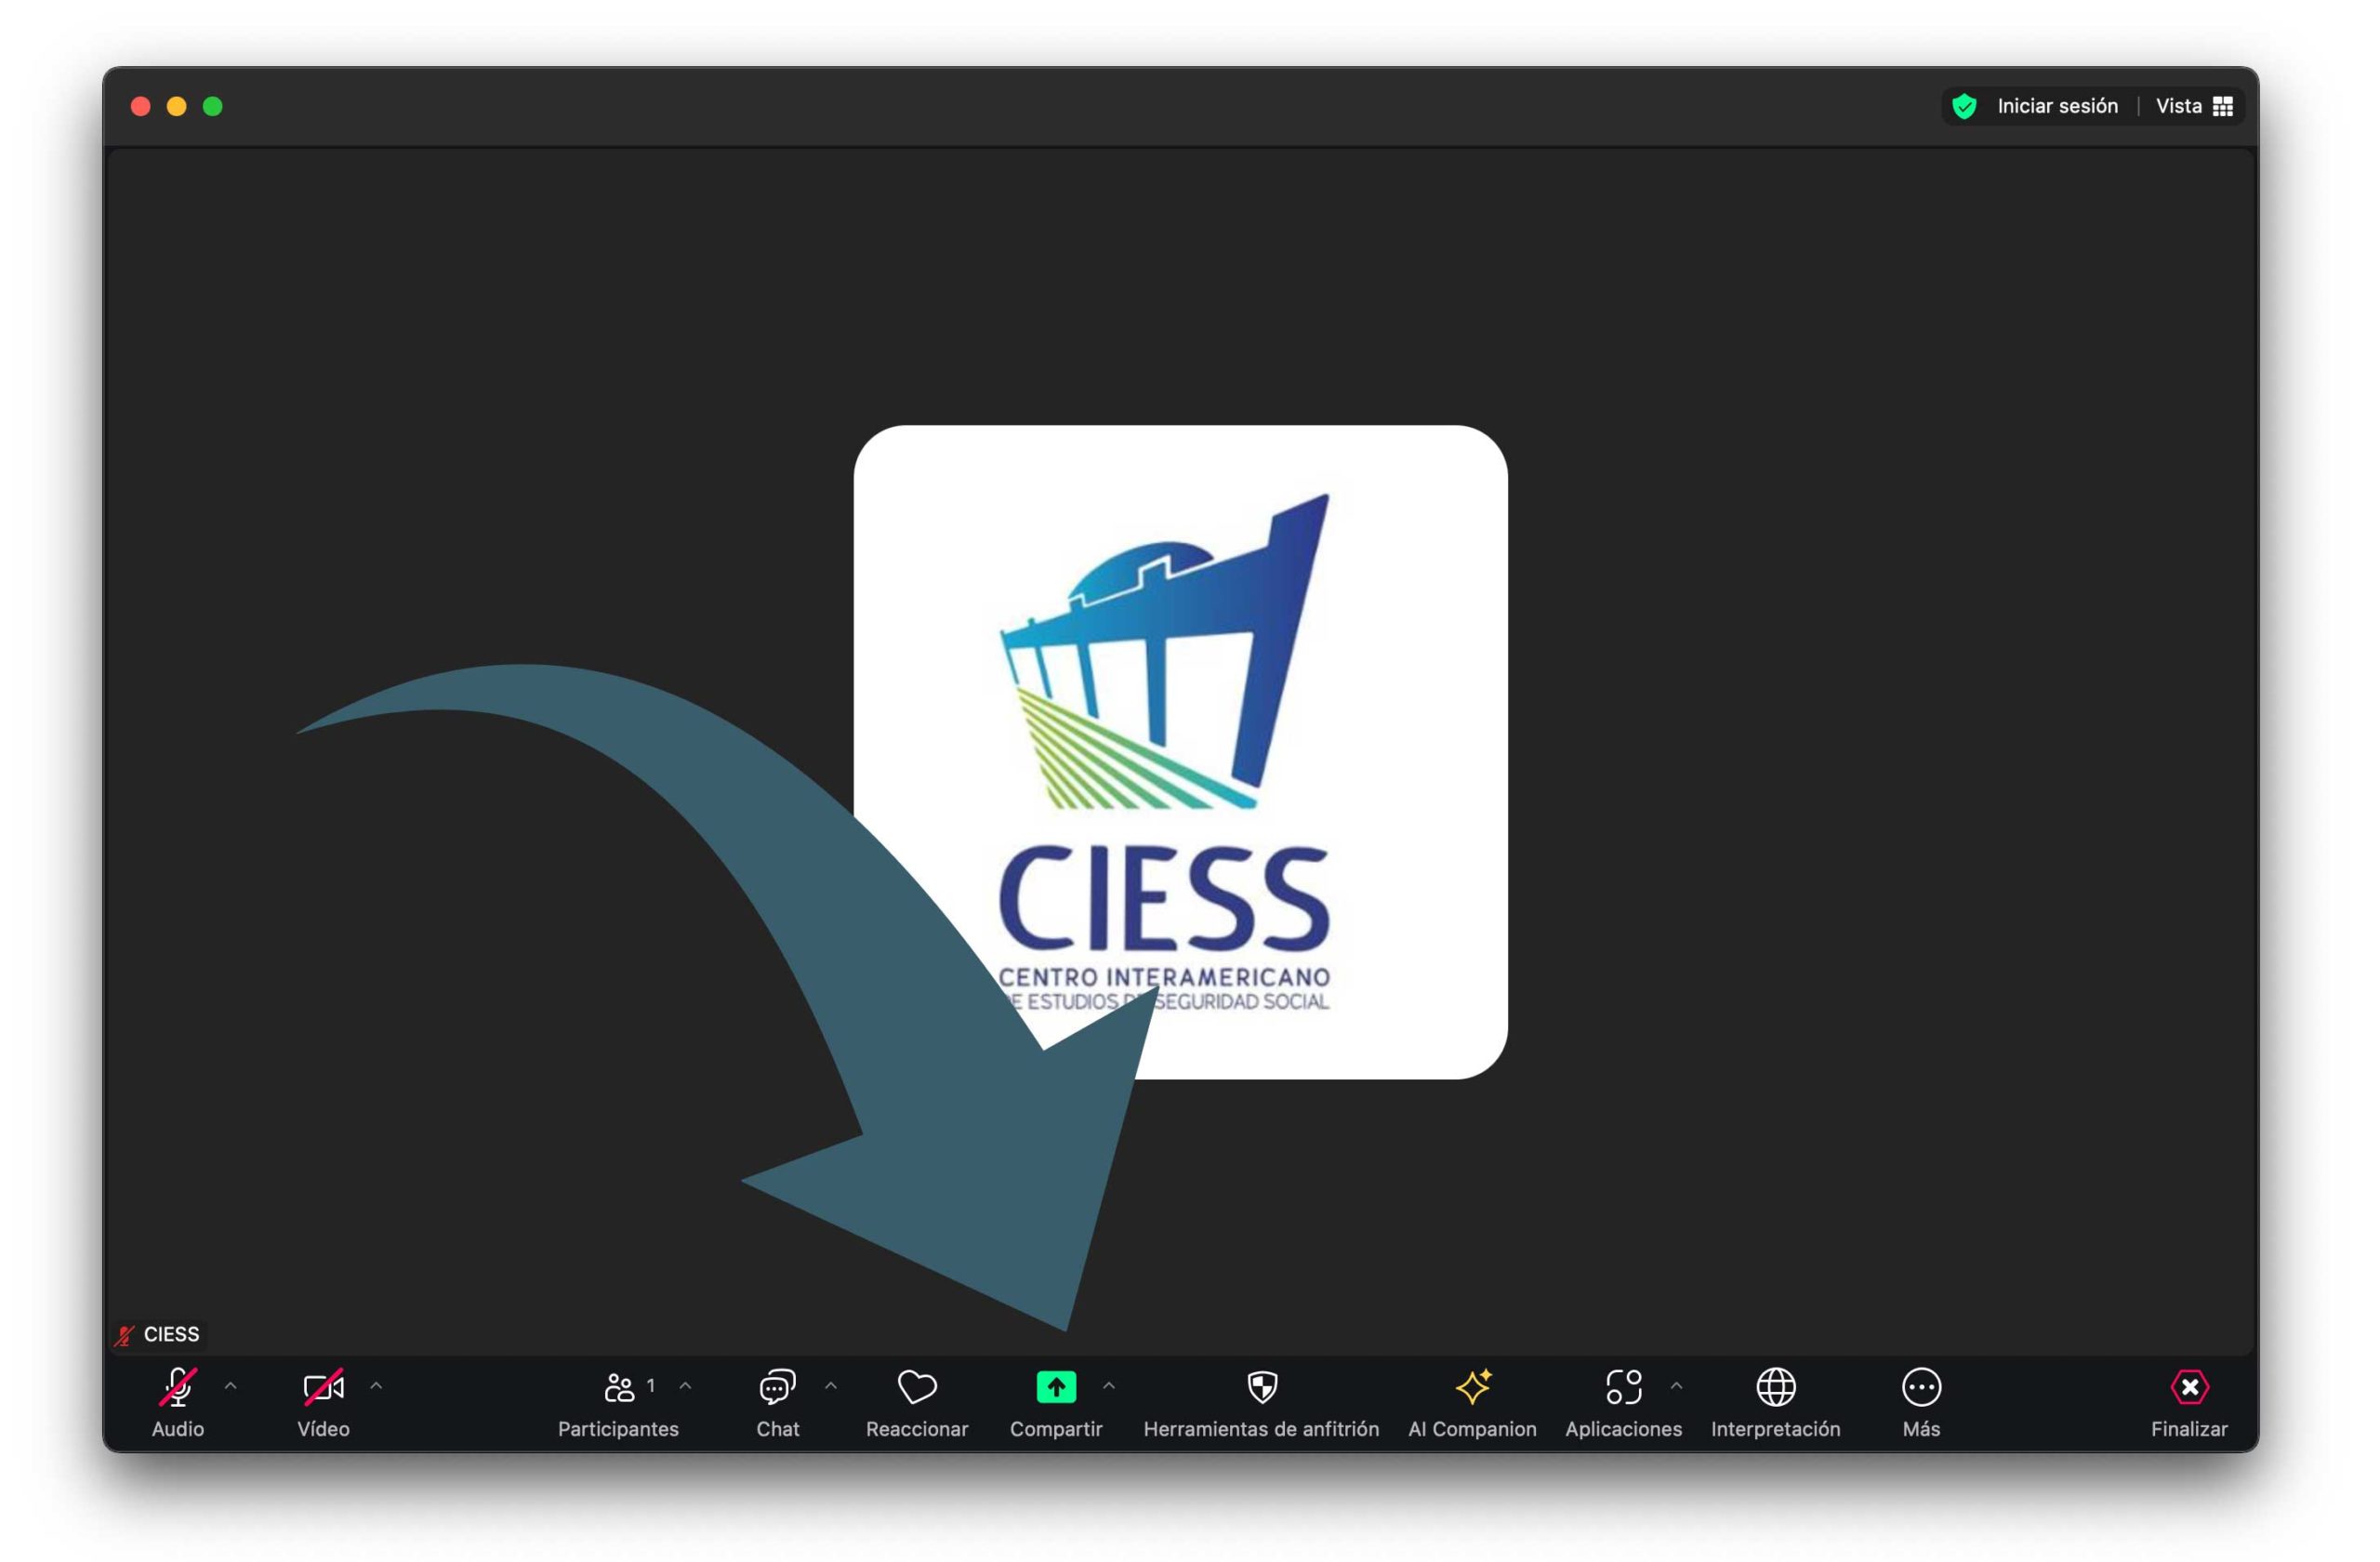
Click on Share Screen in the toolbar.
Choose the window or screen. Check Share sound if needed.
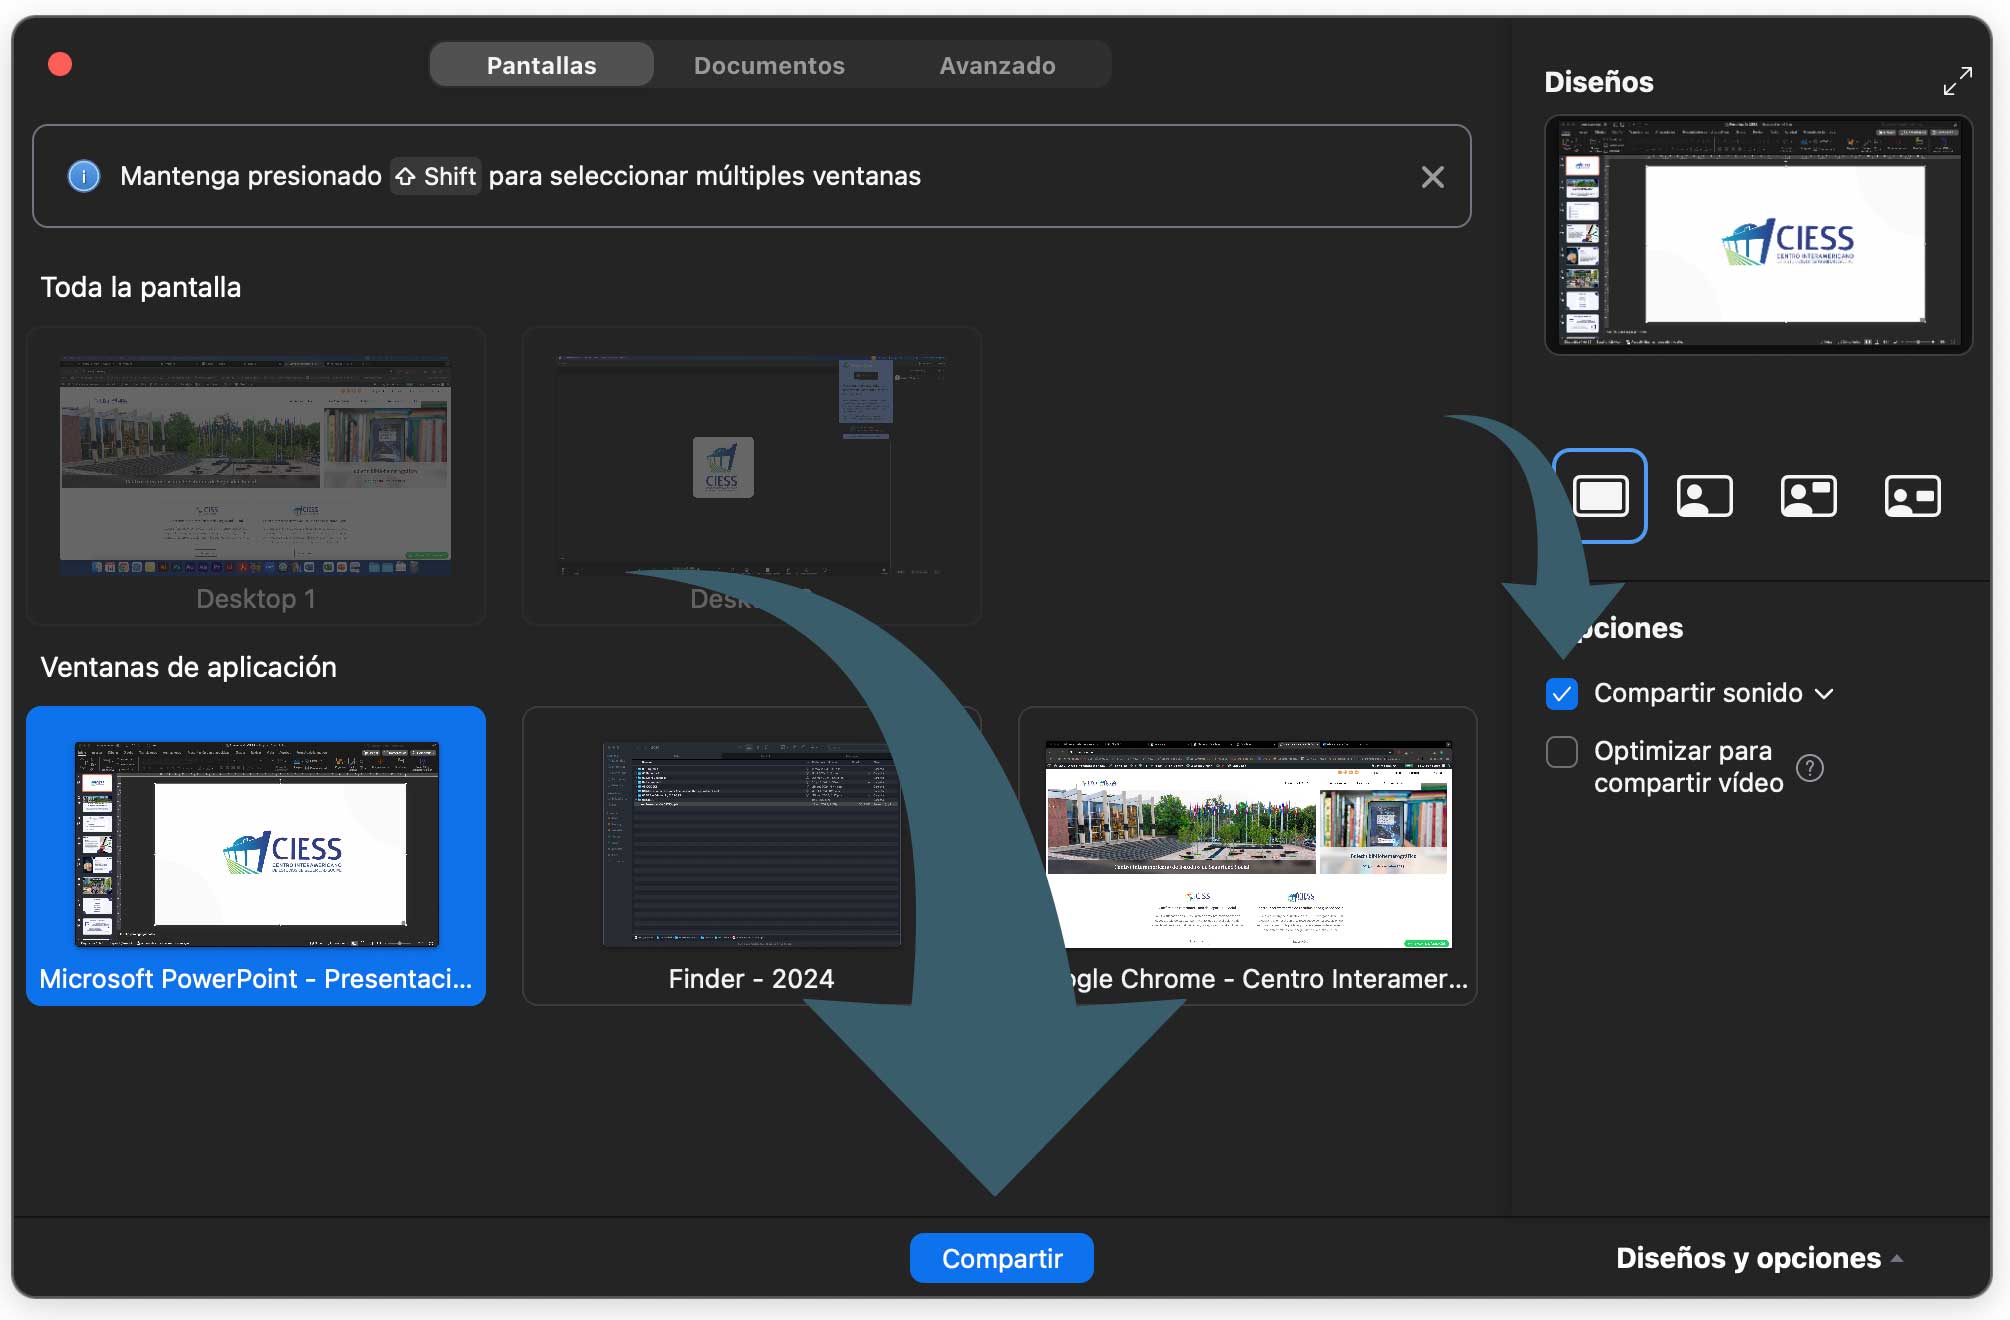
Click Share. To finish, use the red Stop Share button.

Set Up Virtual Background
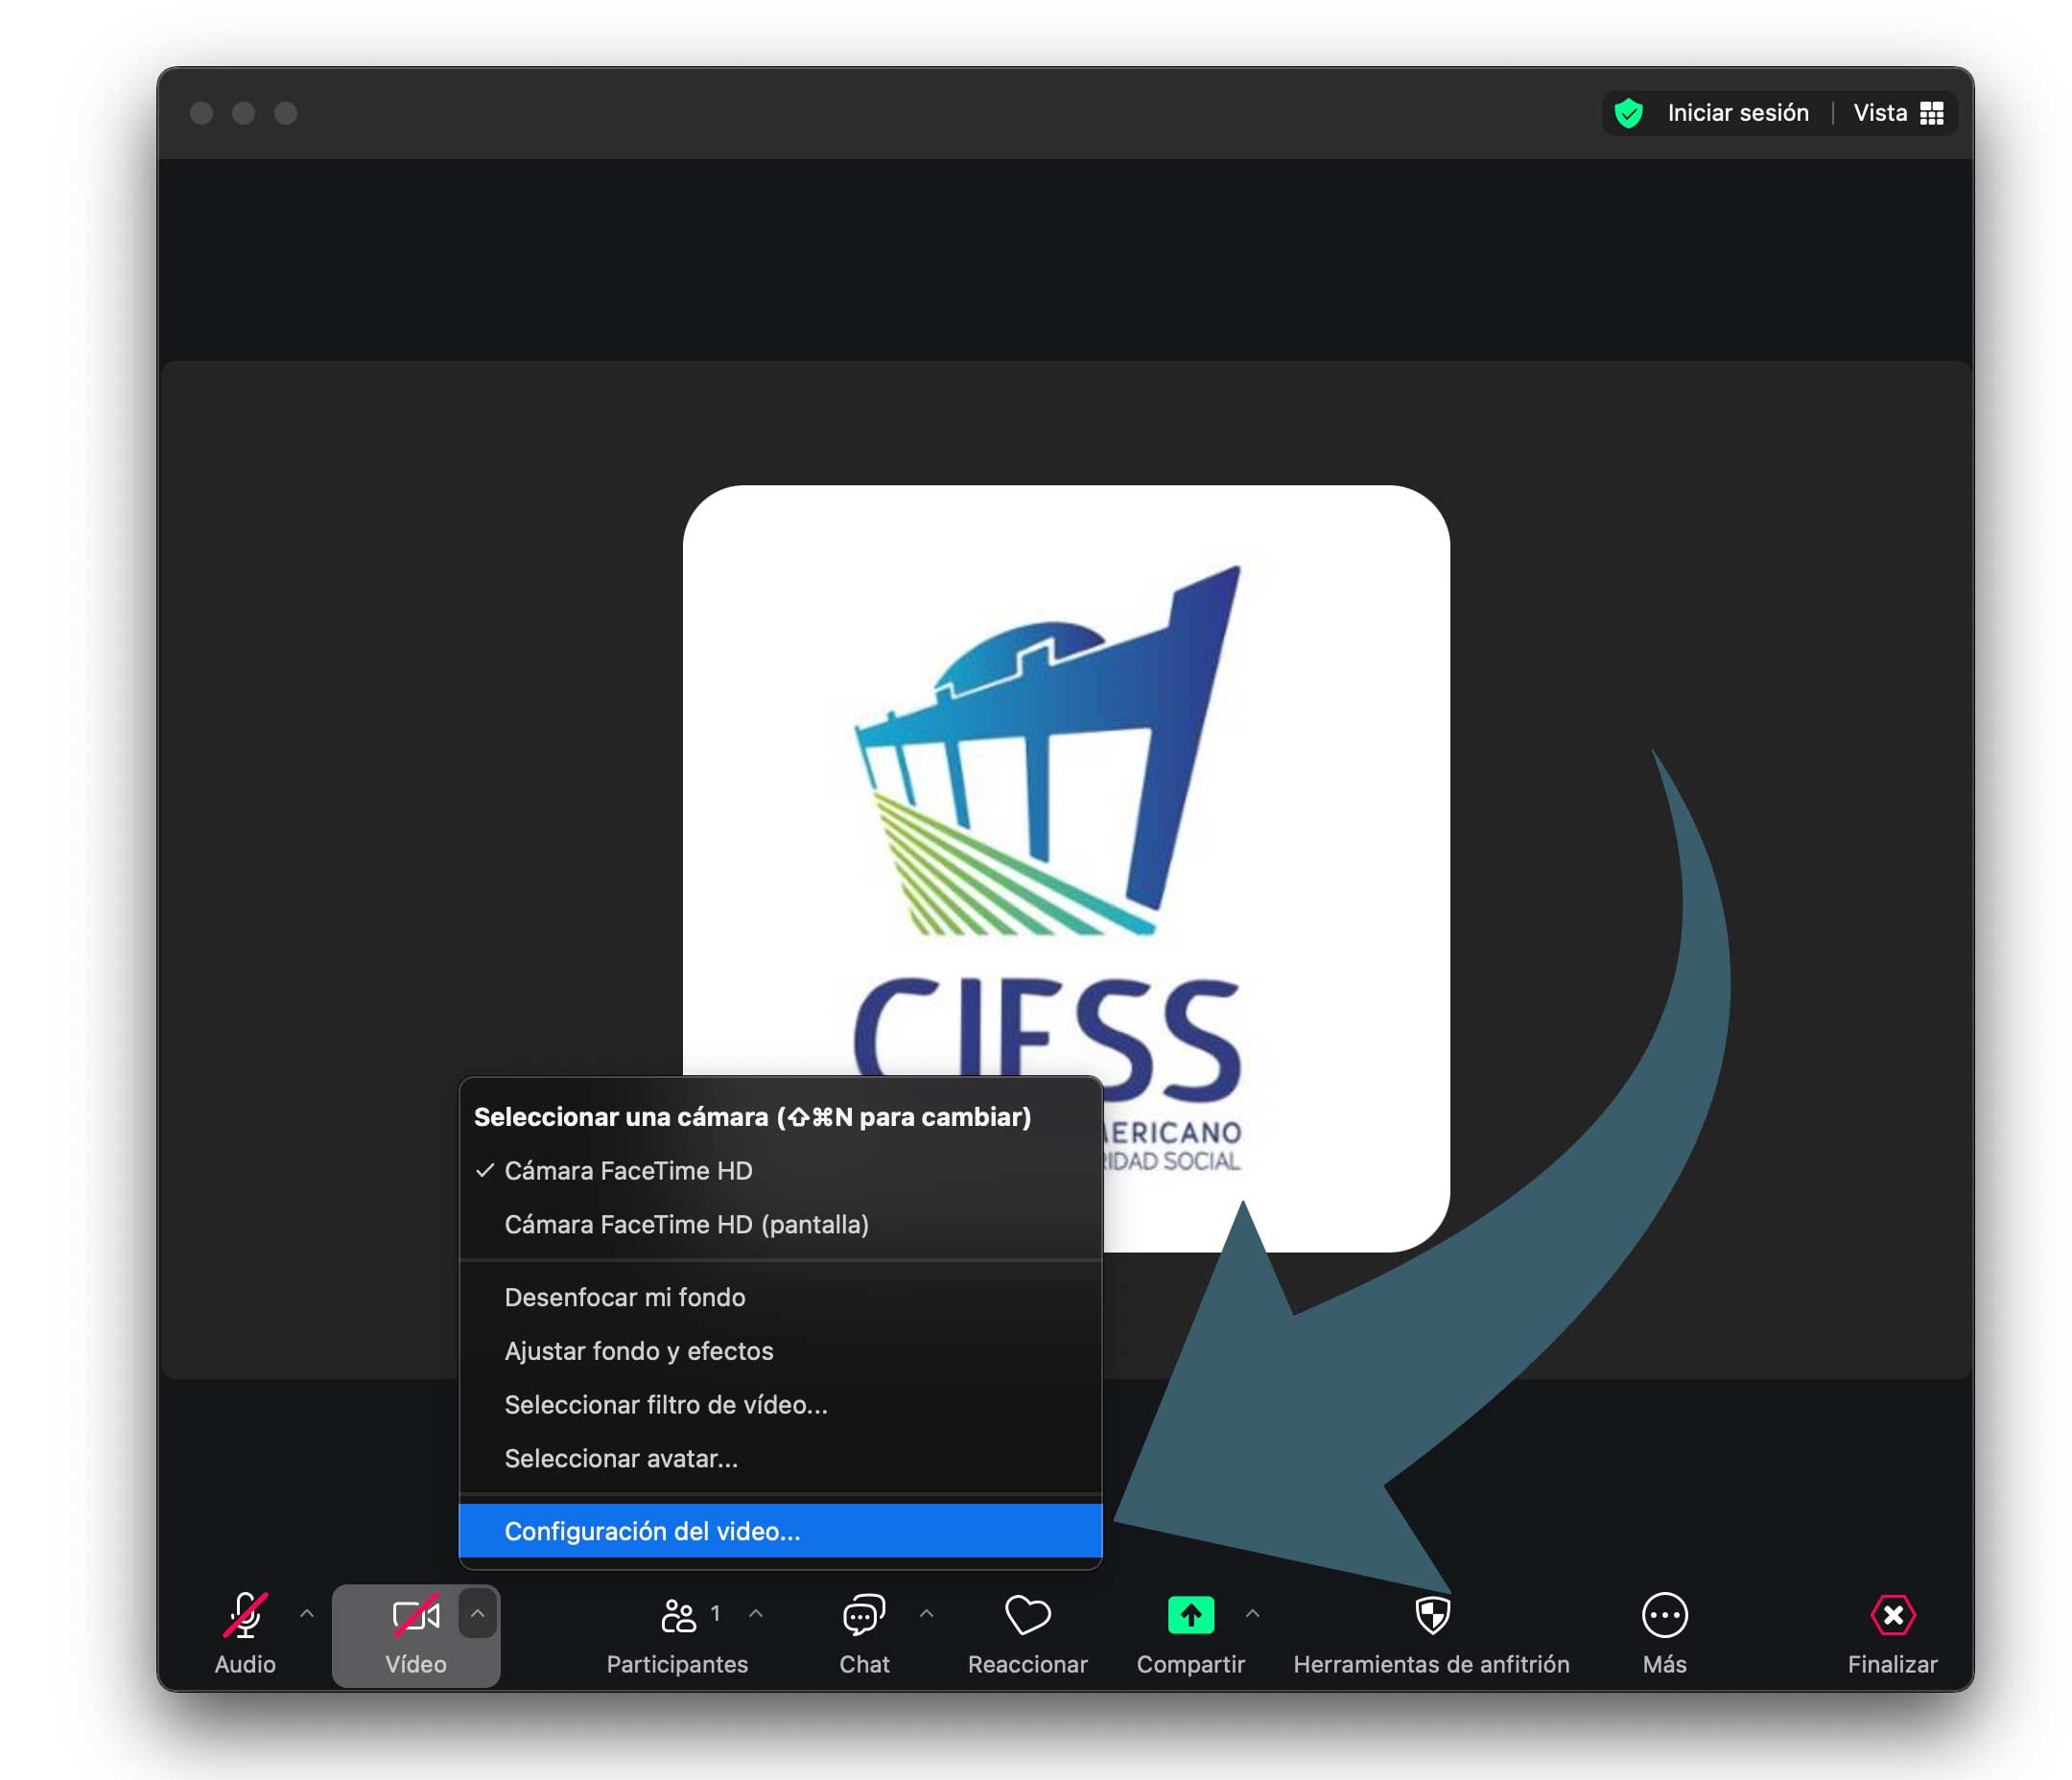
Click the arrow (^) next to the video icon and choose Video Settings.
Go to Background & Effects. Select a background or add one with the + button.
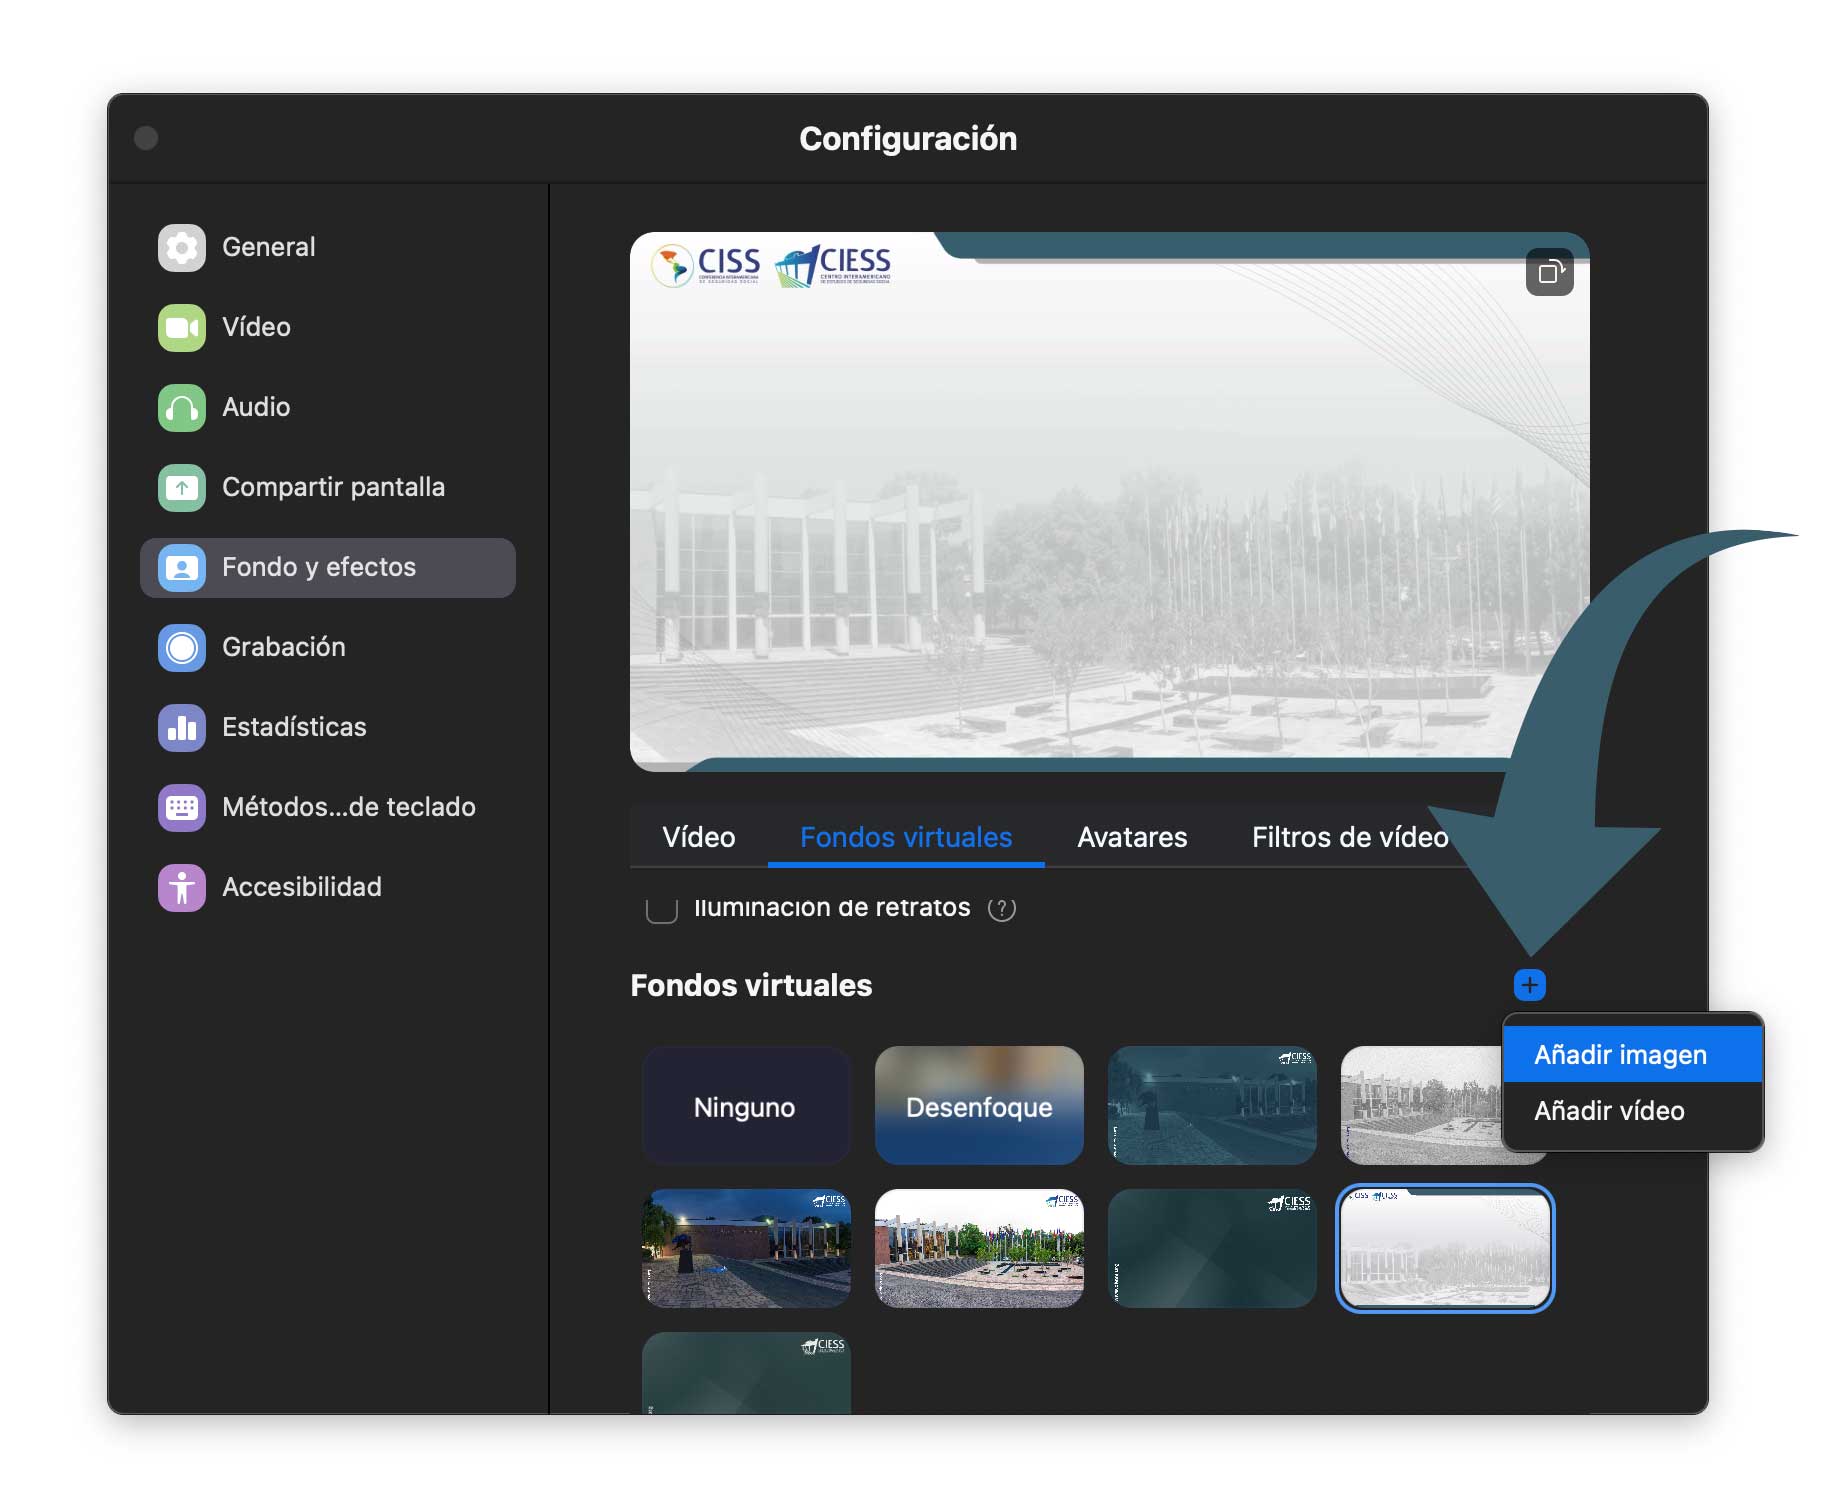
Use even lighting for a better effect.
Use Collaborative Whiteboard
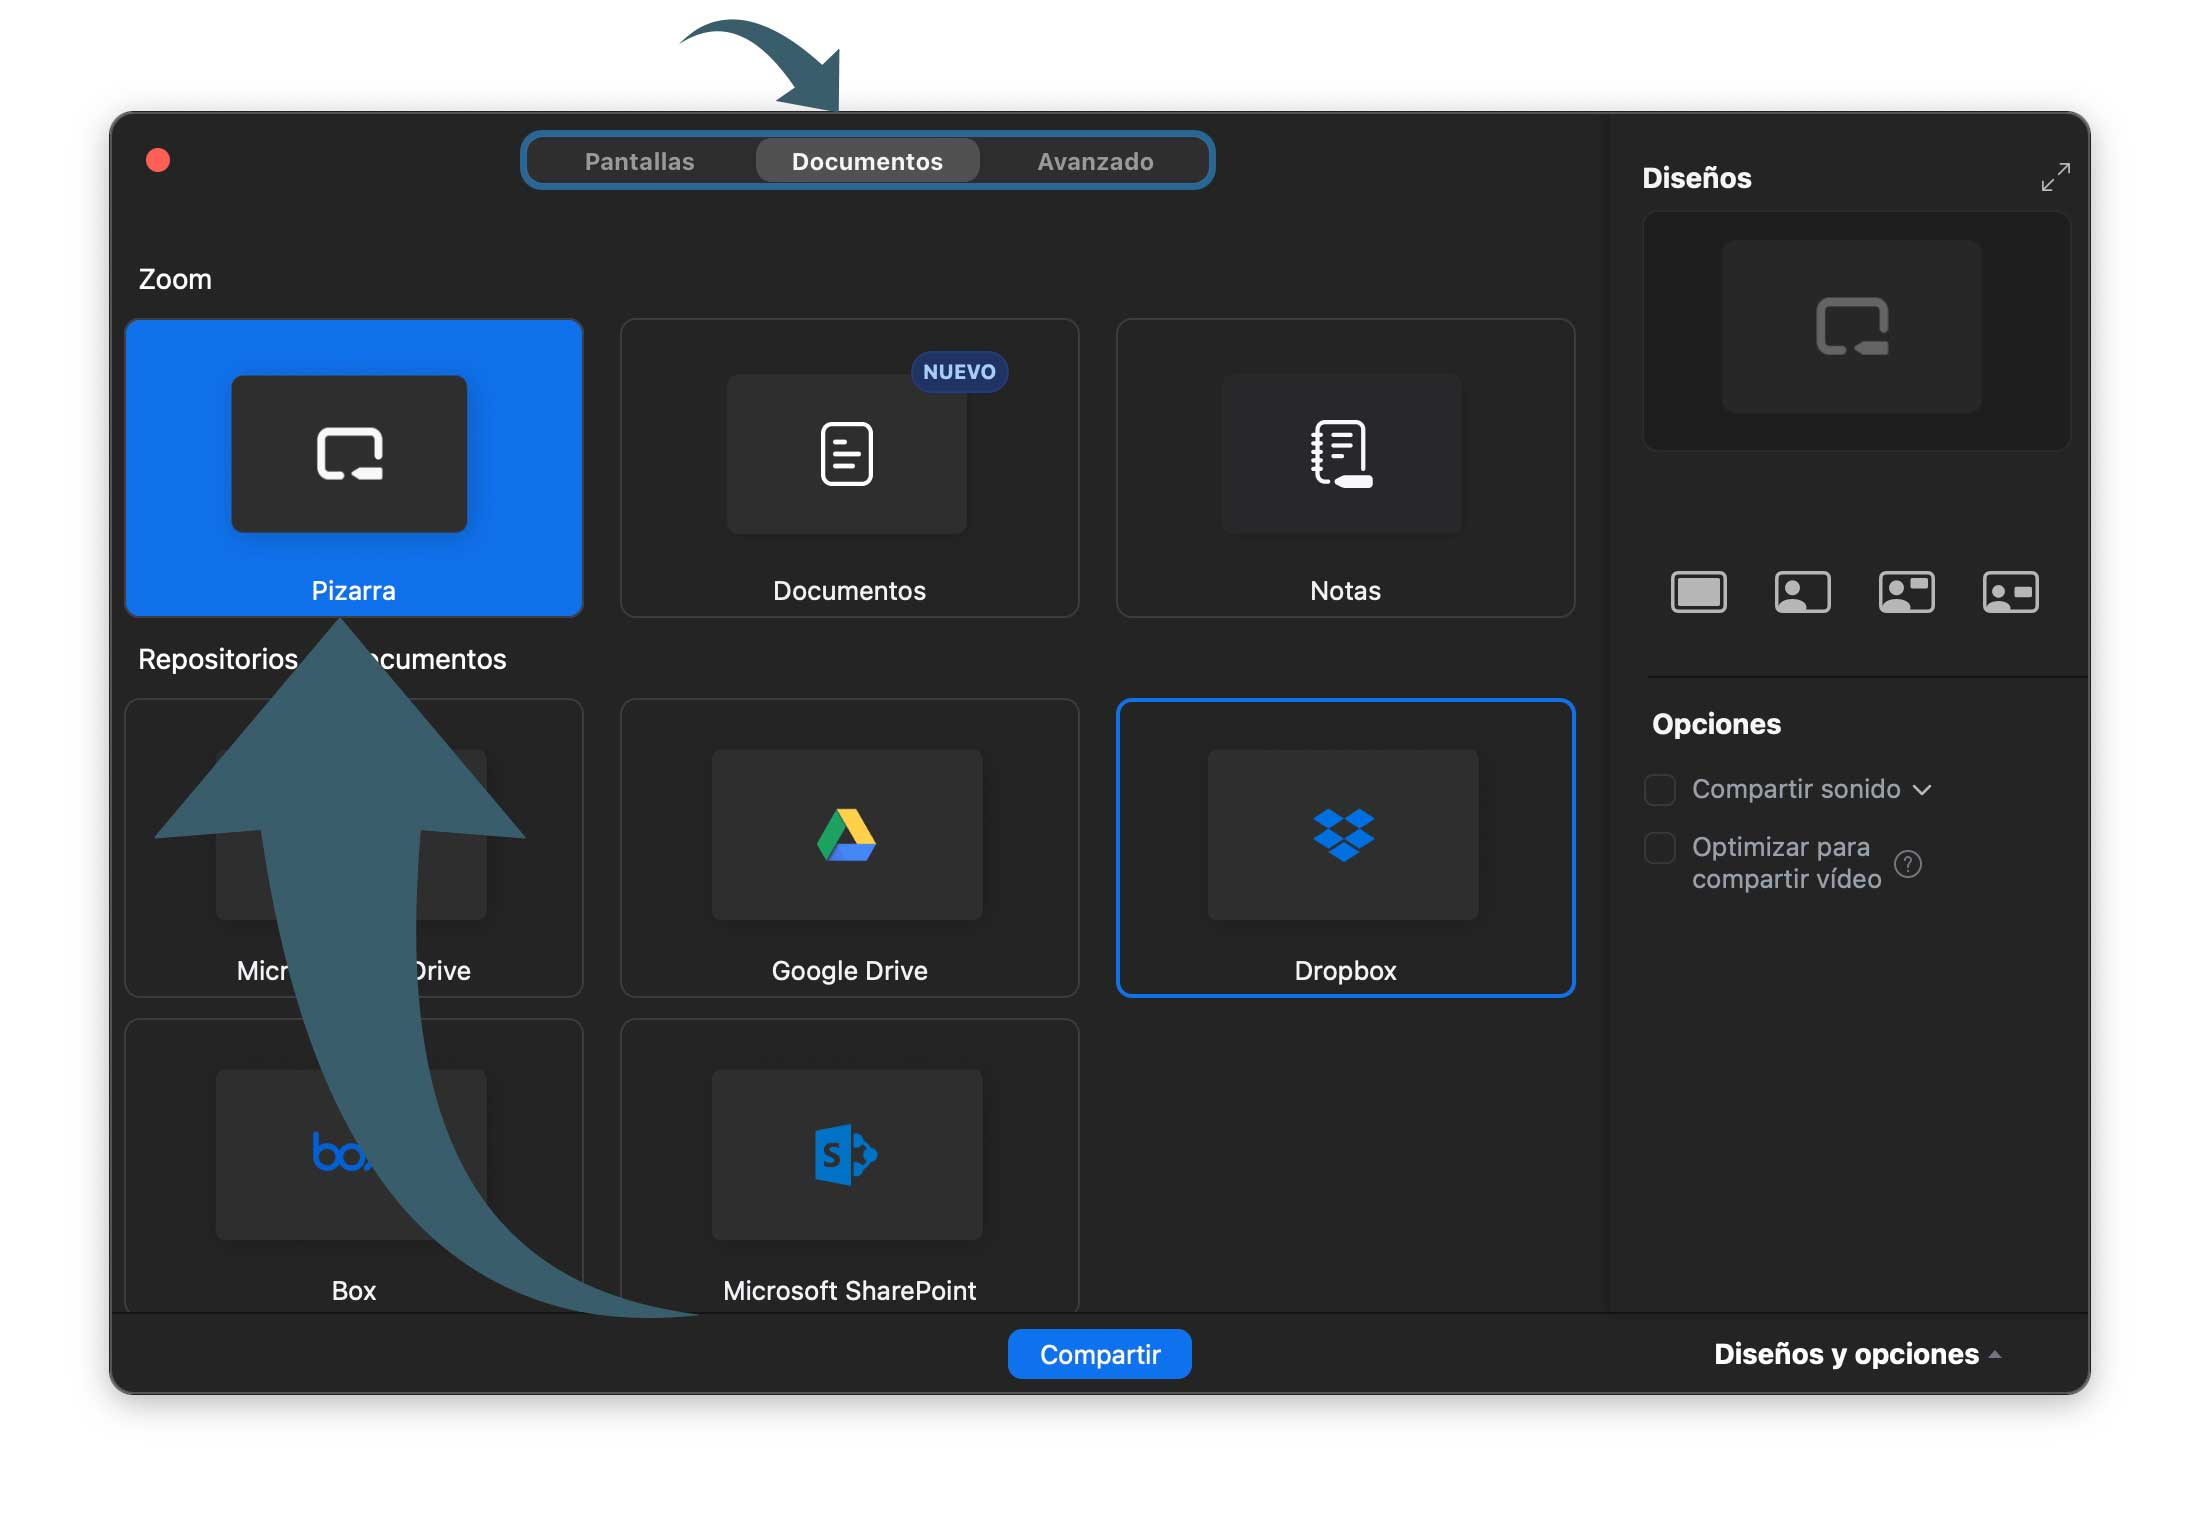
Click on Share Screen and select Whiteboard.
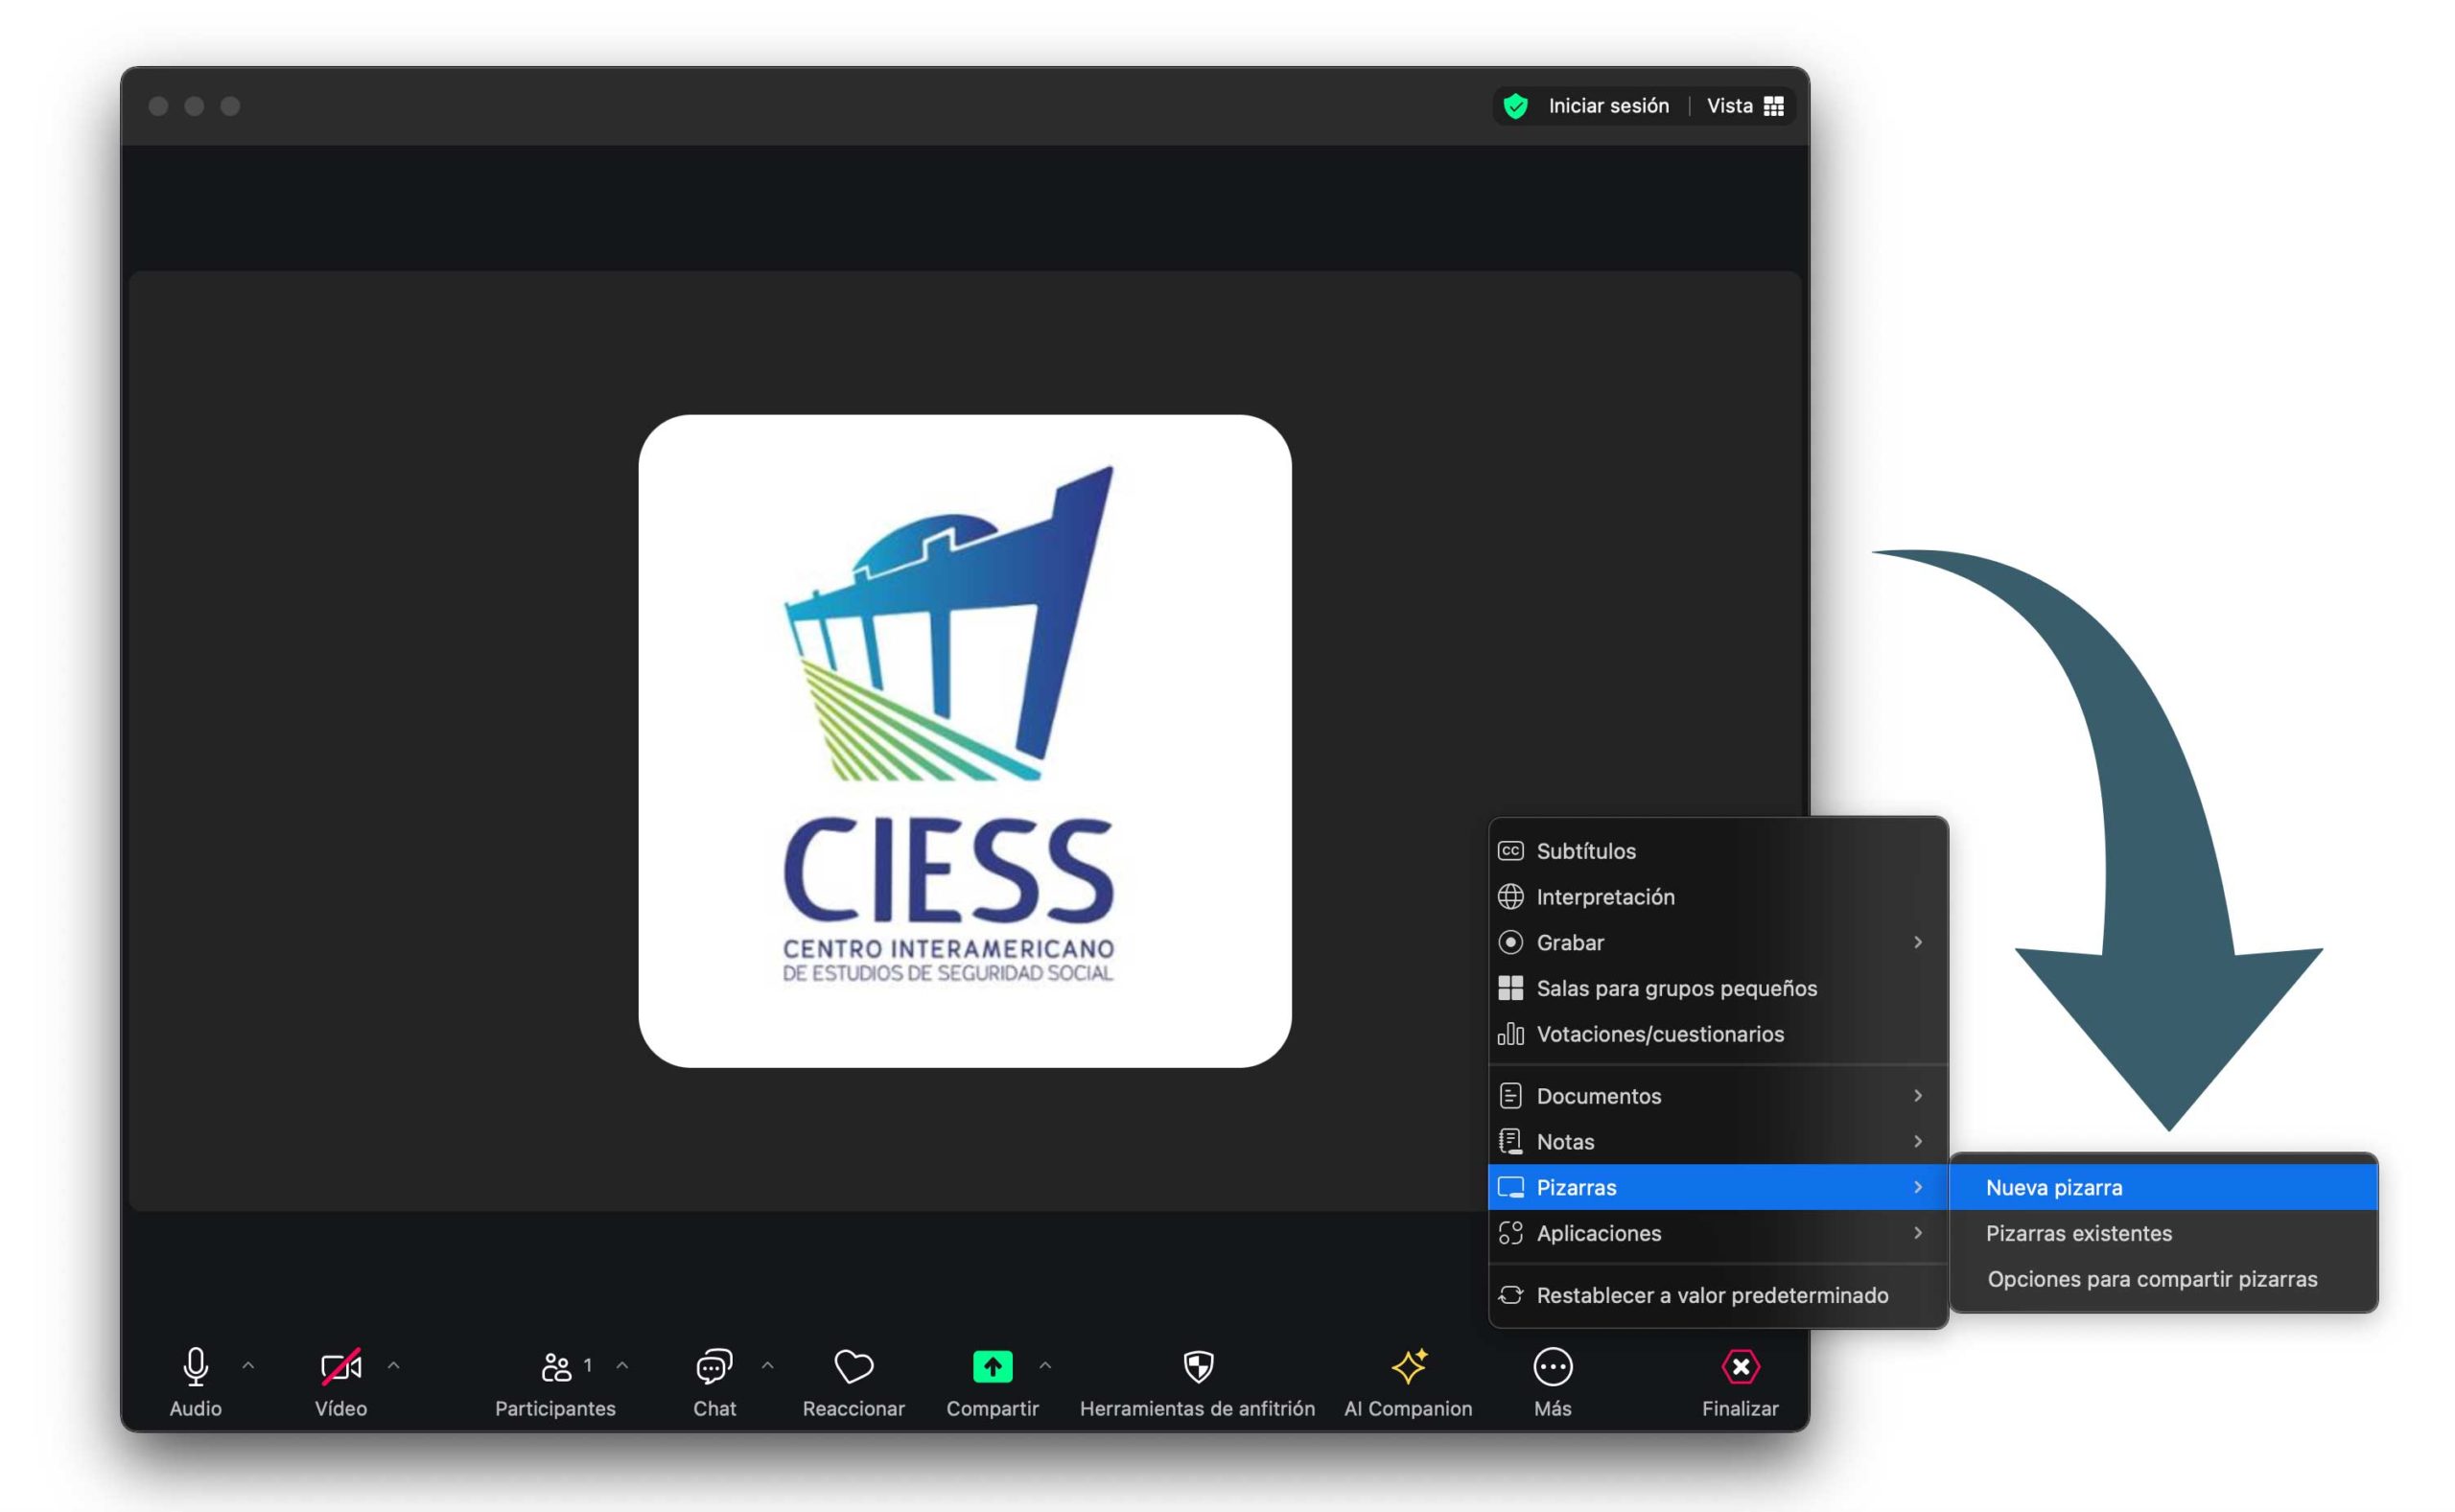
You can also access it from More > Whiteboards > New Whiteboard.
Set Up Audio and Video
When joining, it will ask if you want to join with audio. Select Join with Computer Audio.
In the lower left corner, you will find the Mute/Unmute and Start/Stop Video buttons.
Mute your microphone when you are not speaking to avoid background noise that interrupts class.
Raise Your Hand
Click on the Participants button in the bottom toolbar.
At the bottom of the window that appears, look for and click the Raise Hand icon.
The teacher will see a hand next to your name and know that you want to participate.
Use the Chat
Click on the Chat button in the toolbar.
Type your message in the text box and press Enter to send it.
You can choose to send the message to Everyone or to a specific person if the teacher allows it.
Change Your Name
Click on the Participants button.
Hover your cursor over your name and click Rename.
Type your full real name so the teacher can accurately mark attendance.
Use Reactions
Click on the Reactions button in the toolbar.
Select an emoji (such as a thumbs up or applause) to react without interrupting the class.
Leave the Meeting
When class ends, click the red Leave button in the bottom right corner.
If you get disconnected by accident, click the original link again to rejoin.